Loading and Removing the Ink Ribbon Cassette
You must load an ink ribbon cassette into the printer in order to print.
Important!
•Note that you will not be able to open the disc tray and load the ink ribbon cassette unless the power cord/AC adaptor and USB cable are both connected to the printer. See “Connecting to a Power Source and a PC” on page 21 for more information.
•The carriage is secured in place by packing material to protect it against damage. Before using the printer for the first time, use the procedure on page 24 of this manual to remove the packing material.
•When the ink ribbon cassette requires replacement, purchase a TR- 18 ink ribbon cassette.
To load the Ink ribbon cassette into the printer
1.Remove the stopper from the ink ribbon cassette.
Stopper ![]()
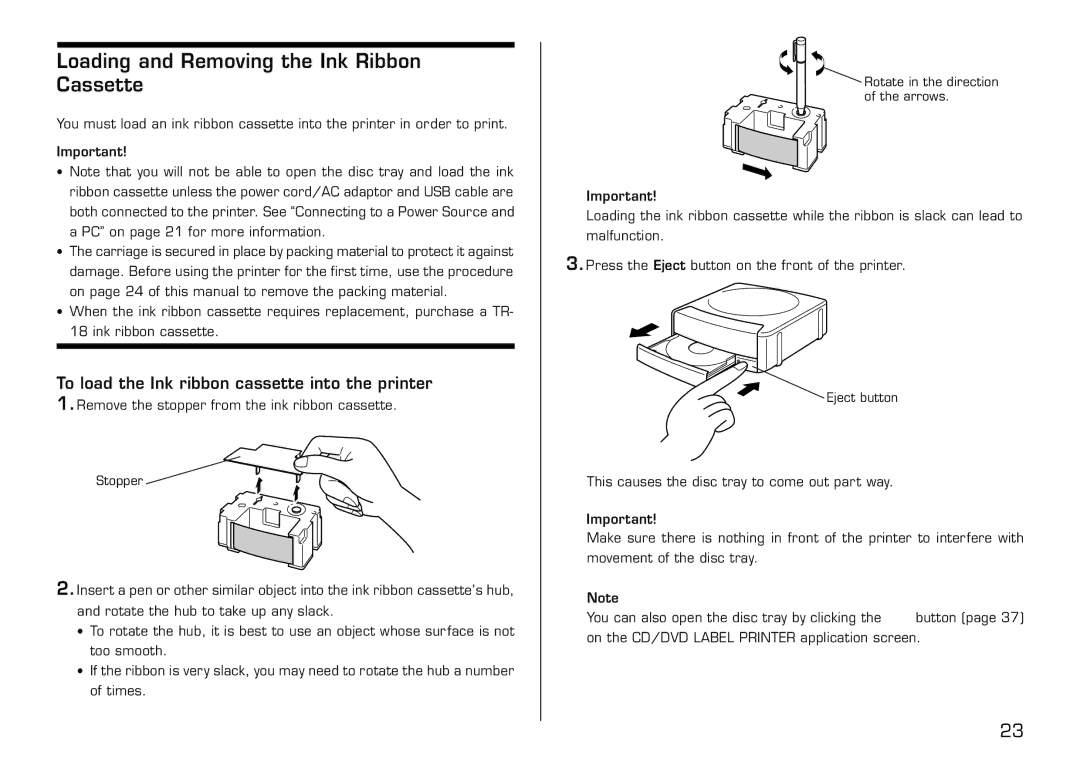
2.Insert a pen or other similar object into the ink ribbon cassette’s hub, and rotate the hub to take up any slack.
•To rotate the hub, it is best to use an object whose surface is not too smooth.
•If the ribbon is very slack, you may need to rotate the hub a number of times.
![]() Rotate in the direction of the arrows.
Rotate in the direction of the arrows.
Important!
Loading the ink ribbon cassette while the ribbon is slack can lead to malfunction.
3.Press the Eject button on the front of the printer.
![]() Eject button
Eject button
This causes the disc tray to come out part way.
Important!
Make sure there is nothing in front of the printer to interfere with movement of the disc tray.
Note
You can also open the disc tray by clicking the ![]() button (page 37) on the CD/DVD LABEL PRINTER application screen.
button (page 37) on the CD/DVD LABEL PRINTER application screen.
23