Connecting to a Power Source and a PC
Use the power cord and AC adaptor that come bundled with the printer to connect to a power source. Use the bundled USB cable to connect to a PC.
Important!
Perform the following procedures only after you have installed the CD/ DVD LABEL PRINTER application on your computer (See page 18) .
To connect to a power source and a PC
1.Connect the power cord to the AC adaptor.
2.Connect the USB cable to the USB port of the PC.
Important!
Be sure you connect directly to the USB port of the PC. Connecting through a hub or chaining through another USB device may cause misoperation.
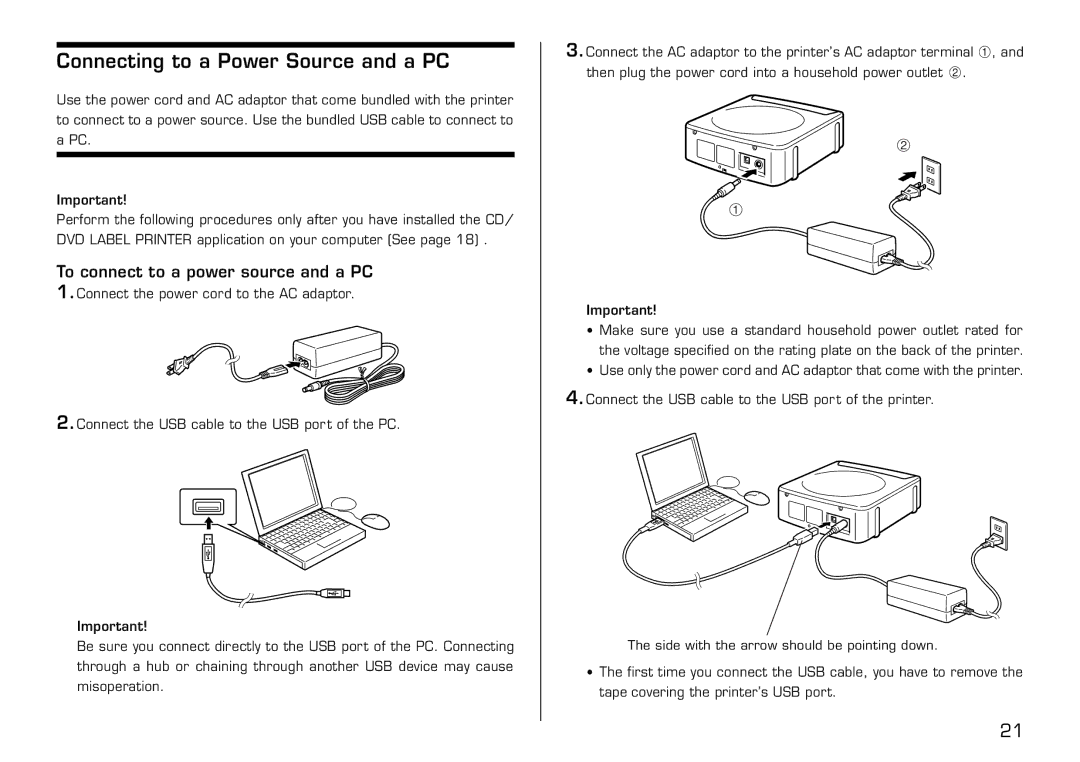
3.Connect the AC adaptor to the printer’s AC adaptor terminal 1, and then plug the power cord into a household power outlet 2.
2
1
Important!
•Make sure you use a standard household power outlet rated for the voltage specified on the rating plate on the back of the printer.
•Use only the power cord and AC adaptor that come with the printer.
4.Connect the USB cable to the USB port of the printer.
The side with the arrow should be pointing down.
•The first time you connect the USB cable, you have to remove the tape covering the printer’s USB port.
21