To print a label
Important!
•See the separate “Quick Start Guide” sheet for important information about printing conditions.
•This printer supports printing on 12cm diameter discs only. Attempting to print on a
•We recommend that you use this product for printing on blank, unrecorded media. Printing on media that already had data recorded on it may cause the data to become corrupted.
1.Click ![]() .
.
•Carefully pull out the disc tray to the position shown in the illustration.
Important!
Make sure there is nothing in front of the printer to interfere with movement of the disc tray.
•This displays a dialog box for printing.
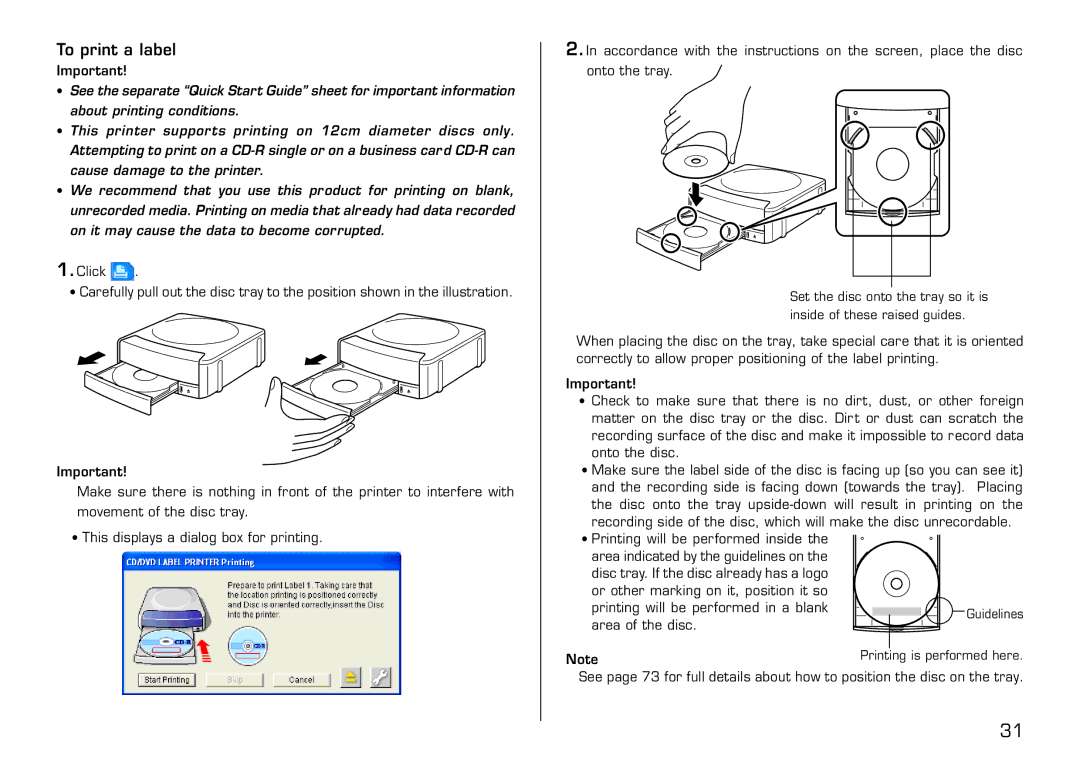
2.In accordance with the instructions on the screen, place the disc onto the tray.
Set the disc onto the tray so it is inside of these raised guides.
When placing the disc on the tray, take special care that it is oriented correctly to allow proper positioning of the label printing.
Important!
•Check to make sure that there is no dirt, dust, or other foreign matter on the disc tray or the disc. Dirt or dust can scratch the recording surface of the disc and make it impossible to record data onto the disc.
•Make sure the label side of the disc is facing up (so you can see it) and the recording side is facing down (towards the tray). Placing the disc onto the tray
•Printing will be performed inside the
area indicated by the guidelines on the disc tray. If the disc already has a logo or other marking on it, position it so printing will be performed in a blank area of the disc.
Note
See page 73 for full details about how to position the disc on the tray.
31