CN 2110 Temperature Controller
Configuration
continued
4.Press the ![]() or
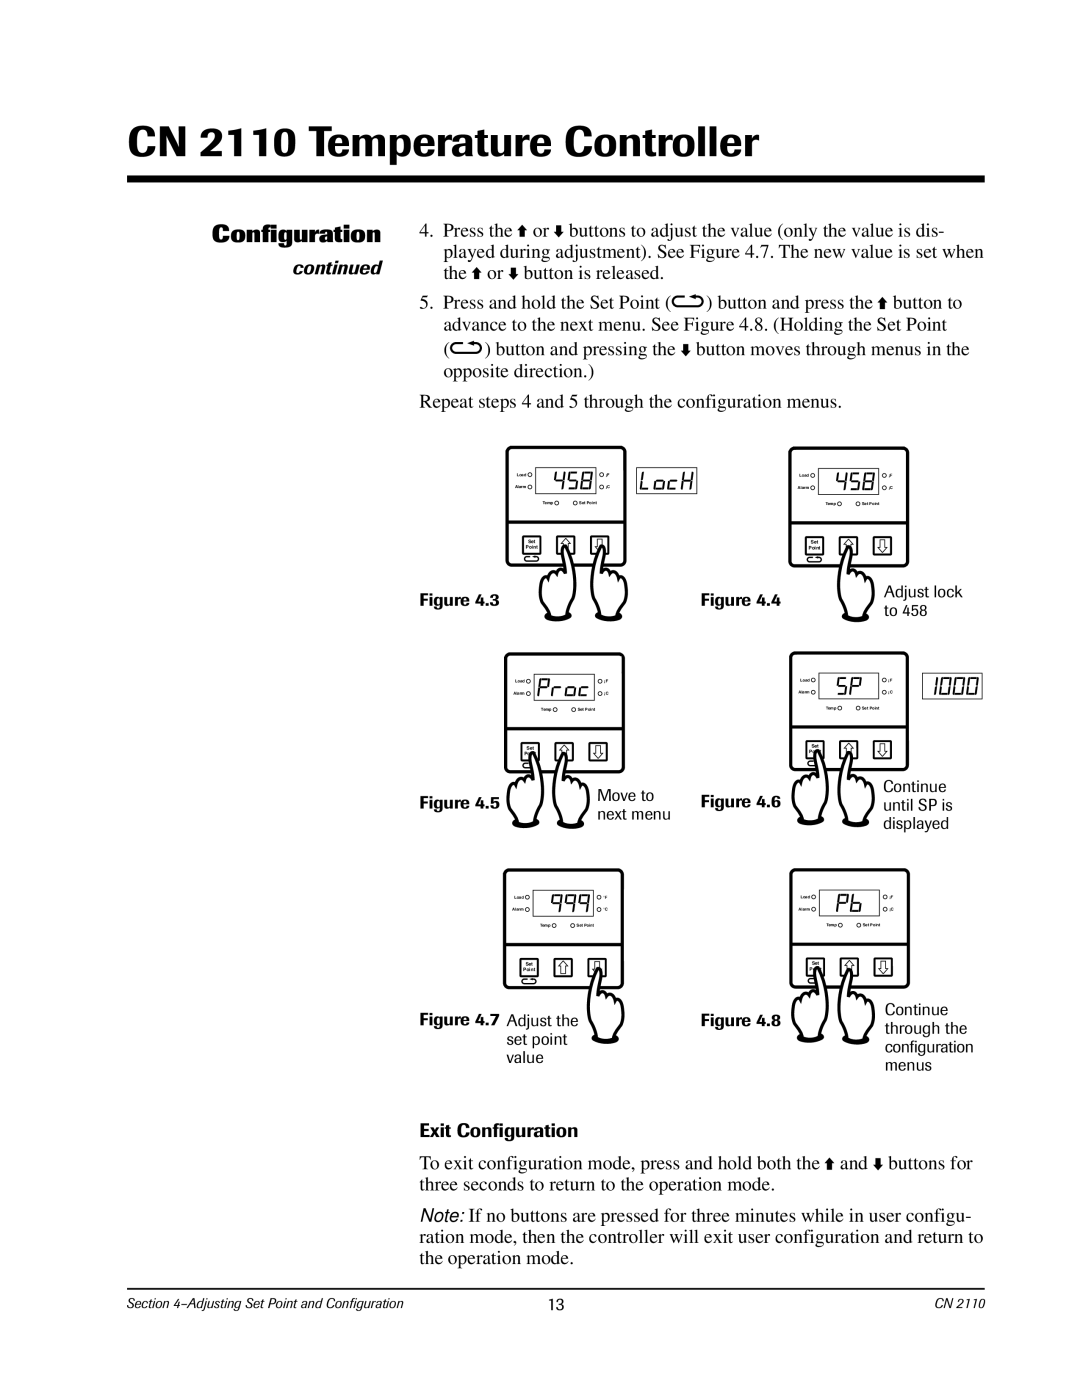
or ![]() buttons to adjust the value (only the value is dis- played during adjustment). See Figure 4.7. The new value is set when the
buttons to adjust the value (only the value is dis- played during adjustment). See Figure 4.7. The new value is set when the ![]() or
or ![]() button is released.
button is released.
5.Press and hold the Set Point (![]() ) button and press the
) button and press the![]() button to advance to the next menu. See Figure 4.8. (Holding the Set Point
button to advance to the next menu. See Figure 4.8. (Holding the Set Point
(![]() ) button and pressing the
) button and pressing the ![]() button moves through menus in the opposite direction.)
button moves through menus in the opposite direction.)
Repeat steps 4 and 5 through the configuration menus.
Load | ¡F | Load | ¡F |
Alarm | ¡C | Alarm | ¡C |
Temp | Set Point | Temp | Set Point |
Set | Set |
Point | Point |
Figure 4.3 |
| Figure 4.4 | Adjust lock |
| to 458 | ||
|
|
| |
Load | ¡F | Load | ¡F |
Alarm | ¡C | Alarm | ¡C |
Temp | Set Point | Temp | Set Point |
Set |
| Set |
|
Point |
| Point |
|
|
|
|
Continue
Figure 4.5Move to Figure 4.6until SP is next menu
displayed
Load | °F | Load | ¡F |
Alarm | °C | Alarm | ¡C |
Temp | Set Point | Temp | Set Point |
Set | Set |
Point | Point |
Figure 4.7 Adjust the | Figure 4.8 | Continue | |
through the | |||
set point |
| ||
| configuration | ||
value |
| ||
| menus | ||
|
|
Exit Configuration
To exit configuration mode, press and hold both the![]() and
and ![]() buttons for three seconds to return to the operation mode.
buttons for three seconds to return to the operation mode.
Note: If no buttons are pressed for three minutes while in user configu- ration mode, then the controller will exit user configuration and return to the operation mode.
Section | 13 | CN 2110 |
