To use the controller’s startup wizard, you will need an
Note The default IP address and DHCP server are only available when the controller is configured with factory default values.
Follow these steps to start the wizard:
Step 1 Connect the Ethernet cable to the Ethernet port on your PC.
Step 2 Connect the other end of the Ethernet cable to data port 1 on the WLC526.
Step 3 Plug the supplied,
Step 4 Plug plug the other end of the AC power cord into a grounded
Step 5 Power up the WLC526. The controller begins its boot process, which takes approximately 3 minutes.
Step 6 Open your web browser and browse to IP address 192.168.1.1. A network password screen appears.
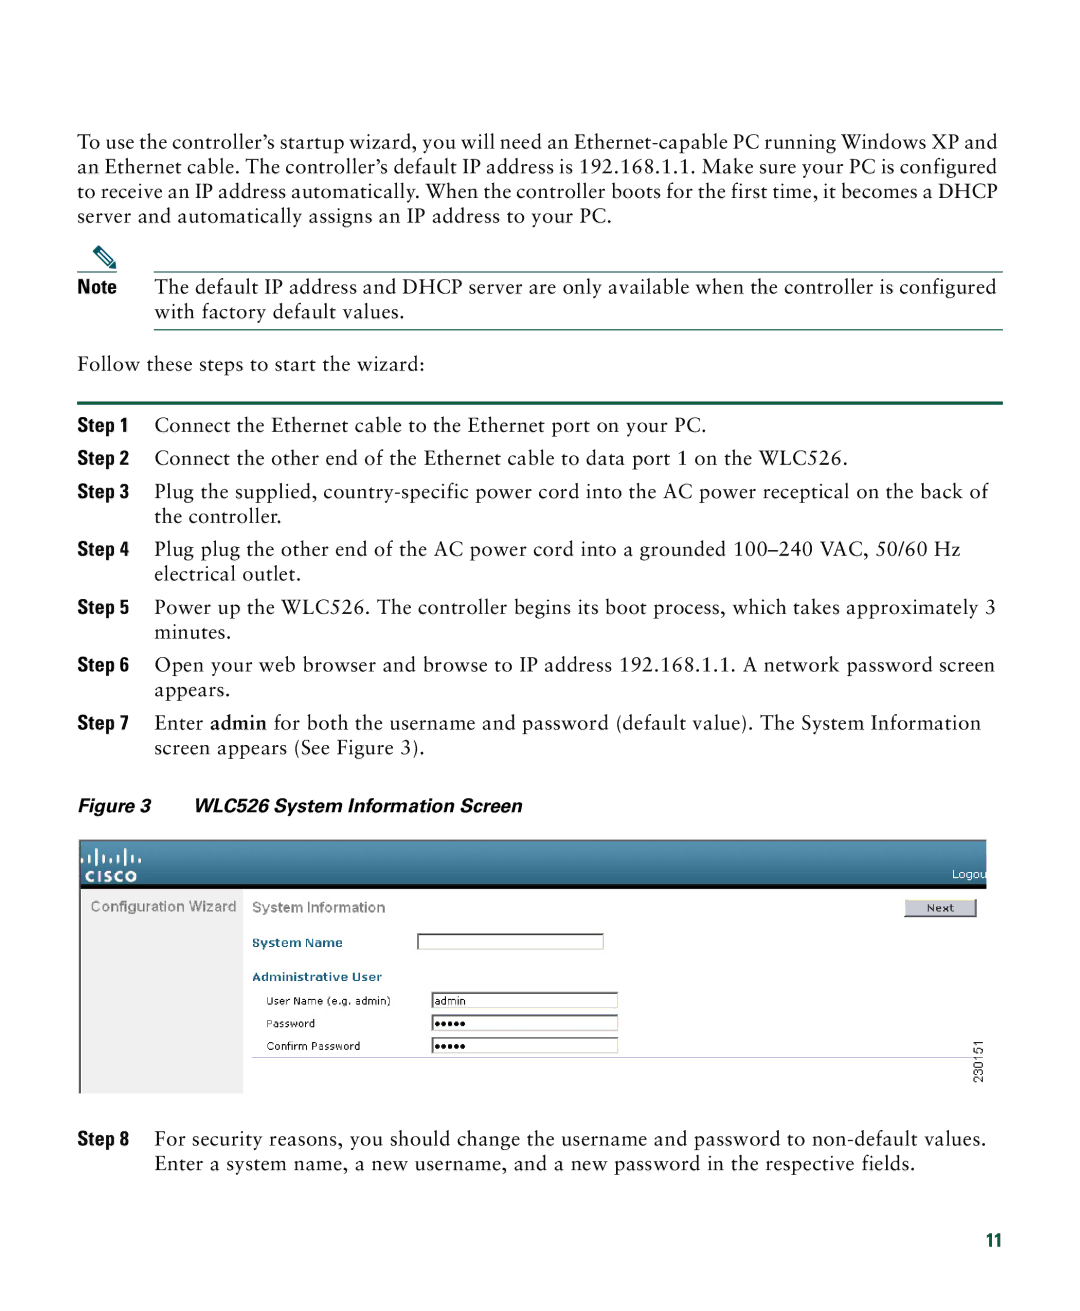
Step 7 Enter admin for both the username and password (default value). The System Information screen appears (See Figure 3).
Figure 3 WLC526 System Information Screen
Step 8 For security reasons, you should change the username and password to
11