F80 Installation.qxp:QXP-1058720374.qxp 12/29/06 10:03 AM Page 35
Operating Your Radio
External Devices and Connections
NOTE
Satellite acquisition time is dependent on the GPS device.
CobraMarine Chartplotter MC 600C Series
Your CobraMarine VHF radio is set up to connect directly to your chartplotter with a custom accessory cable that eases the installation.
The chartplotter uses a
Wiring the chartplotter to the transceiver is made easy with a
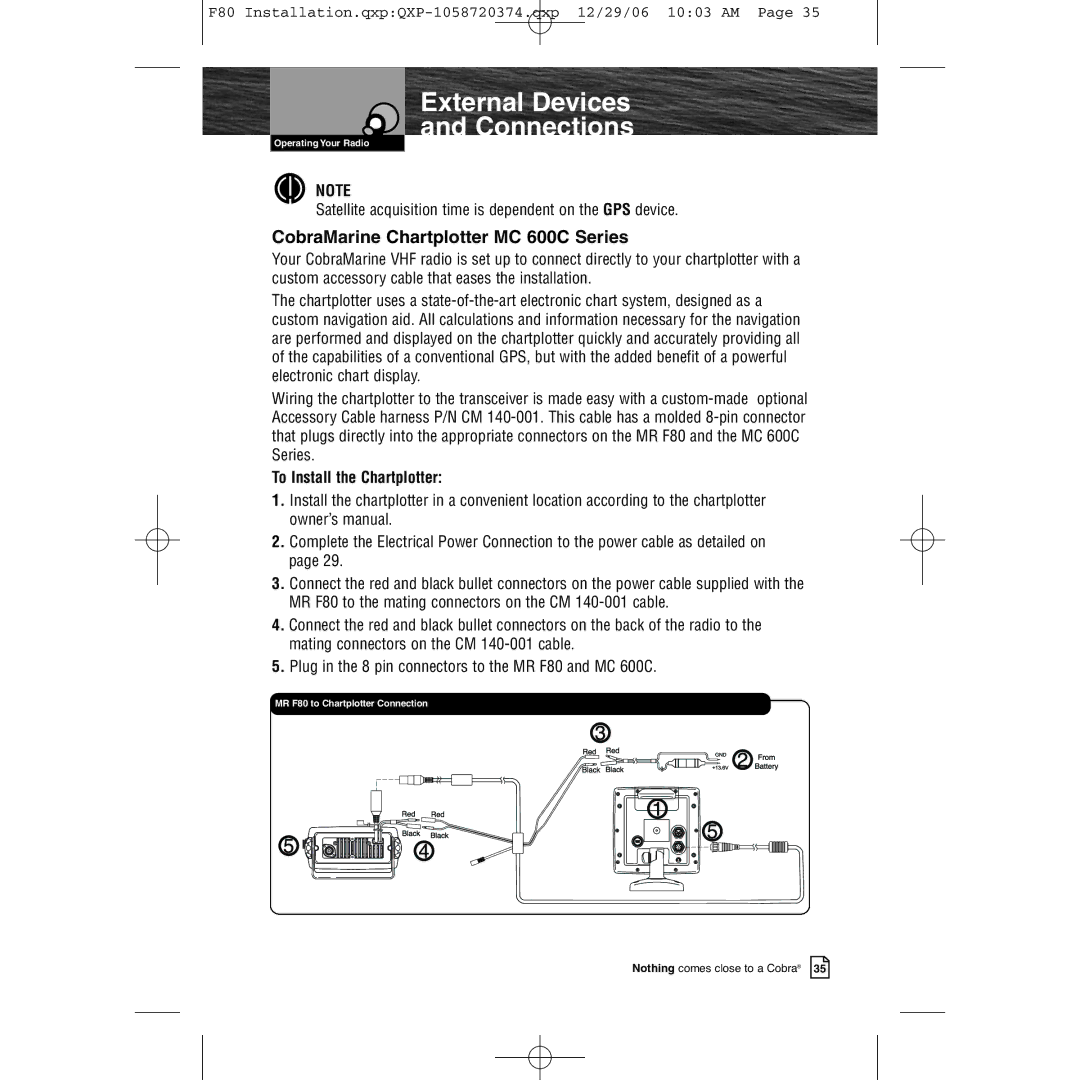
To Install the Chartplotter:
1.Install the chartplotter in a convenient location according to the chartplotter owner’s manual.
2.Complete the Electrical Power Connection to the power cable as detailed on page 29.
3.Connect the red and black bullet connectors on the power cable supplied with the MR F80 to the mating connectors on the CM
4.Connect the red and black bullet connectors on the back of the radio to the mating connectors on the CM
5.Plug in the 8 pin connectors to the MR F80 and MC 600C.
MR F80 to Chartplotter Connection
Nothing comes close to a Cobra® 35