1.12 - Attaching Handles
H1 - Handle
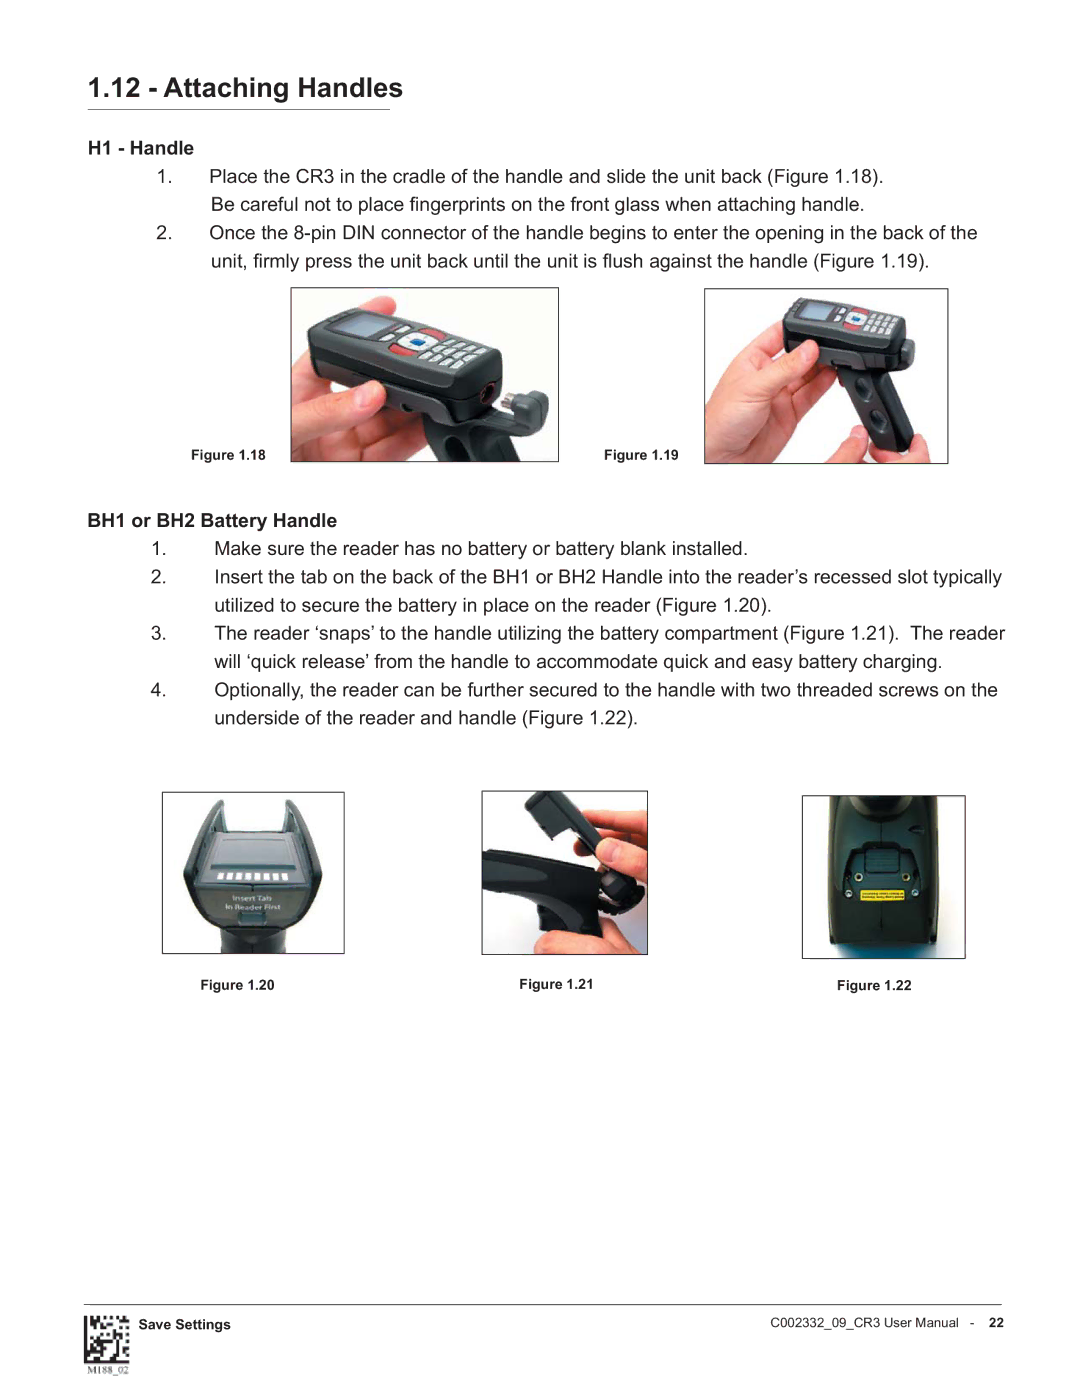
1.Place the CR3 in the cradle of the handle and slide the unit back (Figure 1.18). Be careful not to place fi ngerprints on the front glass when attaching handle.
2.Once the
Figure 1.18
Figure 1.19
BH1 or BH2 Battery Handle
1.Make sure the reader has no battery or battery blank installed.
2.Insert the tab on the back of the BH1 or BH2 Handle into the reader’s recessed slot typically utilized to secure the battery in place on the reader (Figure 1.20).
3.The reader ‘snaps’ to the handle utilizing the battery compartment (Figure 1.21). The reader will ‘quick release’ from the handle to accommodate quick and easy battery charging.
4.Optionally, the reader can be further secured to the handle with two threaded screws on the underside of the reader and handle (Figure 1.22).
Figure 1.20 | Figure 1.21 | Figure 1.22 |
Save Settings | C002332_09_CR3 User Manual - 22 |