Using the Configuration Utility (continued)
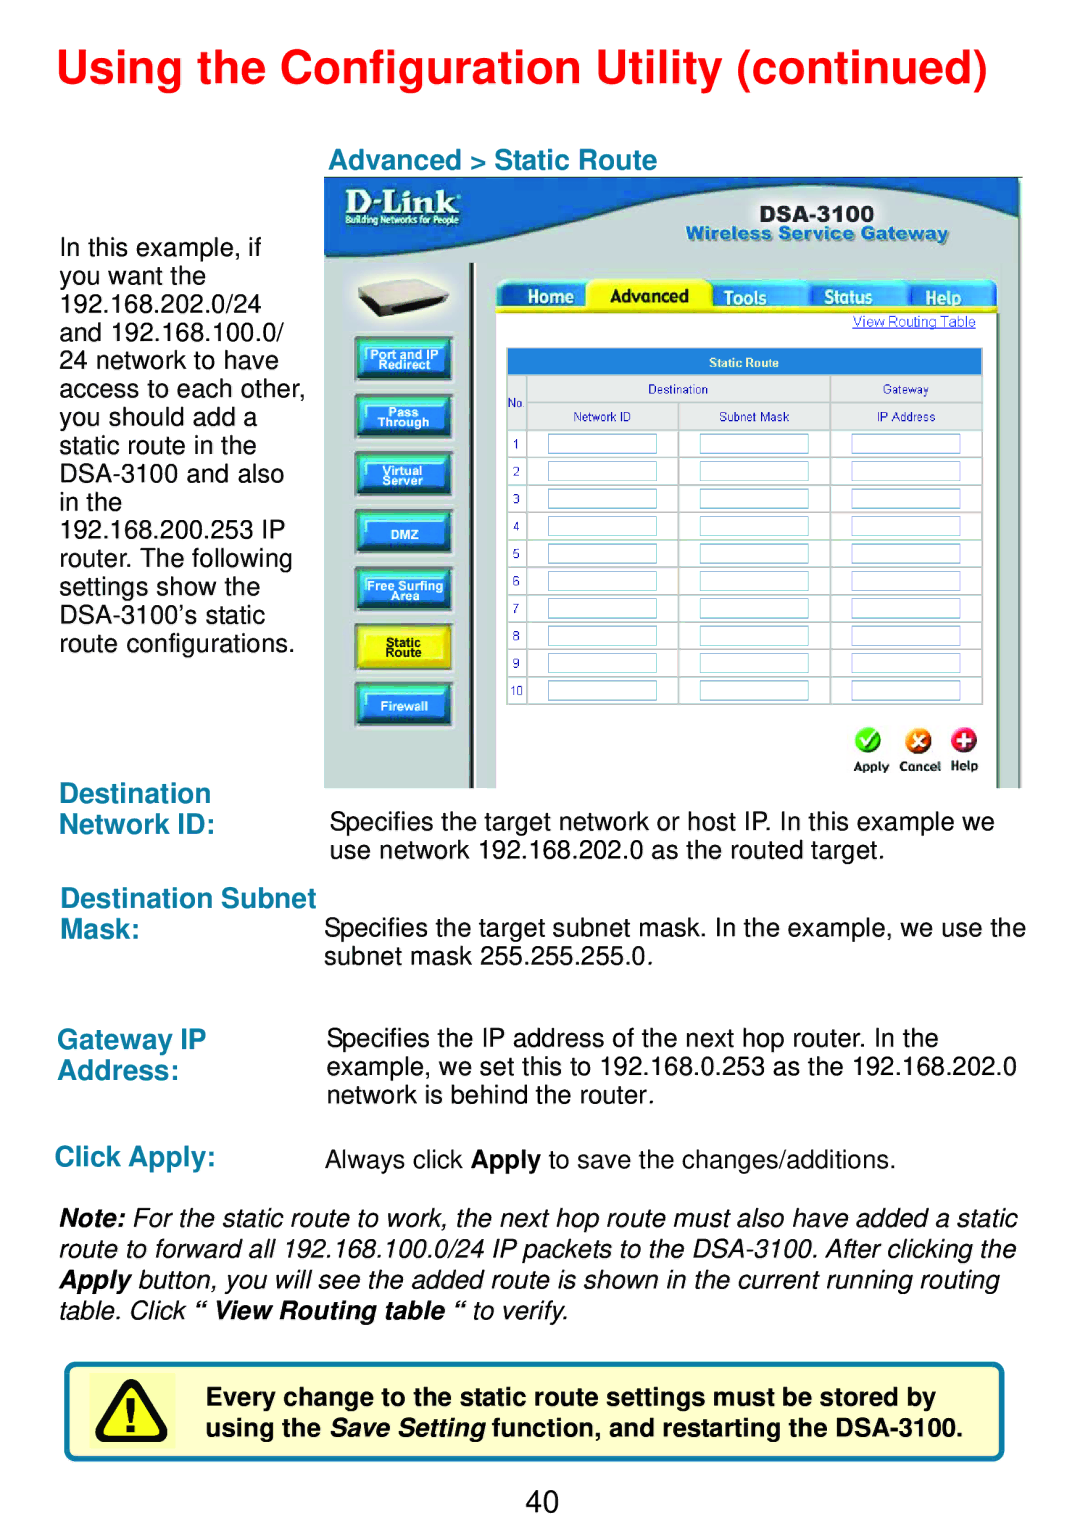
Advanced > Static Route
In this example, if you want the 192.168.202.0/24 and 192.168.100.0/ 24 network to have access to each other, you should add a static route in the
Destination
Network ID:
Destination Subnet Mask:
Gateway IP
Address:
Click Apply:
Specifies the target network or host IP. In this example we use network 192.168.202.0 as the routed target.
Specifies the target subnet mask. In the example, we use the subnet mask 255.255.255.0.
Specifies the IP address of the next hop router. In the example, we set this to 192.168.0.253 as the 192.168.202.0 network is behind the router.
Always click Apply to save the changes/additions.
Note: For the static route to work, the next hop route must also have added a static route to forward all 192.168.100.0/24 IP packets to the
Every change to the static route settings must be stored by using the Save Setting function, and restarting the
40