w w w . d e l l . c o m s u p p o r t . d e l l . c o m
3Connect the AC adapter to the connector on the APR, and connect the AC power cable to an electrical outlet.
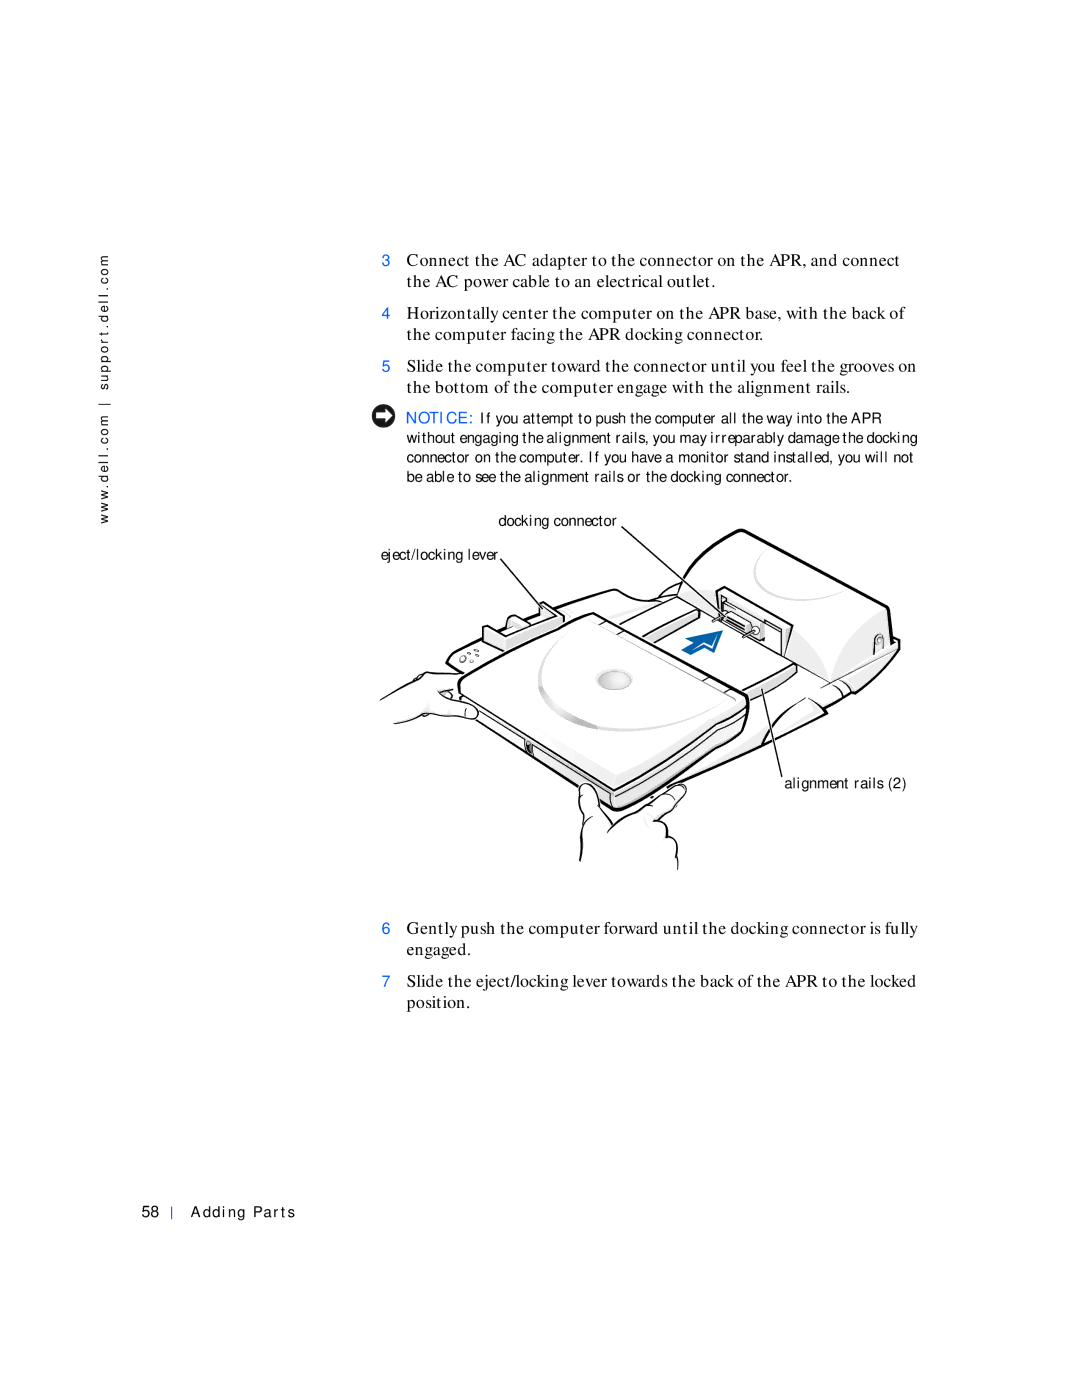
4Horizontally center the computer on the APR base, with the back of the computer facing the APR docking connector.
5Slide the computer toward the connector until you feel the grooves on the bottom of the computer engage with the alignment rails.
NOTICE: If you attempt to push the computer all the way into the APR without engaging the alignment rails, you may irreparably damage the docking connector on the computer. If you have a monitor stand installed, you will not be able to see the alignment rails or the docking connector.
docking connector
eject/locking lever
alignment rails (2)
6Gently push the computer forward until the docking connector is fully engaged.
7Slide the eject/locking lever towards the back of the APR to the locked position.
58
Adding Parts