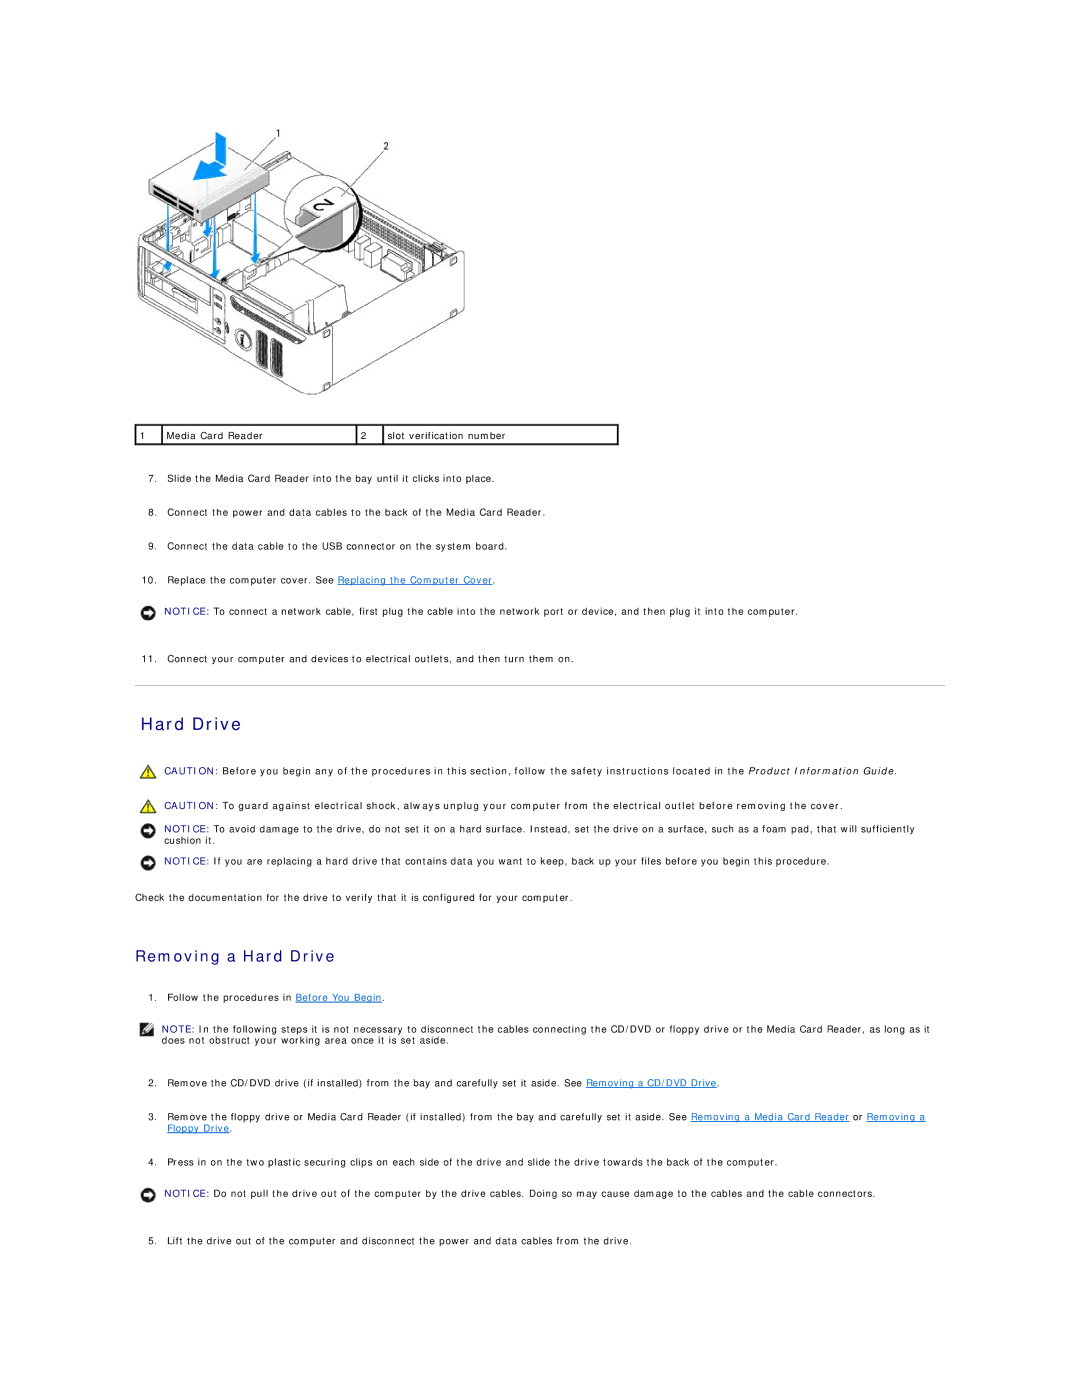
1 | Media Card Reader | 2 | slot verification number |
|
|
|
|
7.Slide the Media Card Reader into the bay until it clicks into place.
8.Connect the power and data cables to the back of the Media Card Reader.
9.Connect the data cable to the USB connector on the system board.
10.Replace the computer cover. See Replacing the Computer Cover.
NOTICE: To connect a network cable, first plug the cable into the network port or device, and then plug it into the computer.
11. Connect your computer and devices to electrical outlets, and then turn them on.
Hard Drive
CAUTION: Before you begin any of the procedures in this section, follow the safety instructions located in the Product Information Guide.
CAUTION: To guard against electrical shock, always unplug your computer from the electrical outlet before removing the cover.
NOTICE: To avoid damage to the drive, do not set it on a hard surface. Instead, set the drive on a surface, such as a foam pad, that will sufficiently cushion it.
NOTICE: If you are replacing a hard drive that contains data you want to keep, back up your files before you begin this procedure.
Check the documentation for the drive to verify that it is configured for your computer.
Removing a Hard Drive
1. Follow the procedures in Before You Begin.
NOTE: In the following steps it is not necessary to disconnect the cables connecting the CD/DVD or floppy drive or the Media Card Reader, as long as it does not obstruct your working area once it is set aside.
2.Remove the CD/DVD drive (if installed) from the bay and carefully set it aside. See Removing a CD/DVD Drive.
3.Remove the floppy drive or Media Card Reader (if installed) from the bay and carefully set it aside. See Removing a Media Card Reader or Removing a Floppy Drive.
4.Press in on the two plastic securing clips on each side of the drive and slide the drive towards the back of the computer.
NOTICE: Do not pull the drive out of the computer by the drive cables. Doing so may cause damage to the cables and the cable connectors.
5. Lift the drive out of the computer and disconnect the power and data cables from the drive.