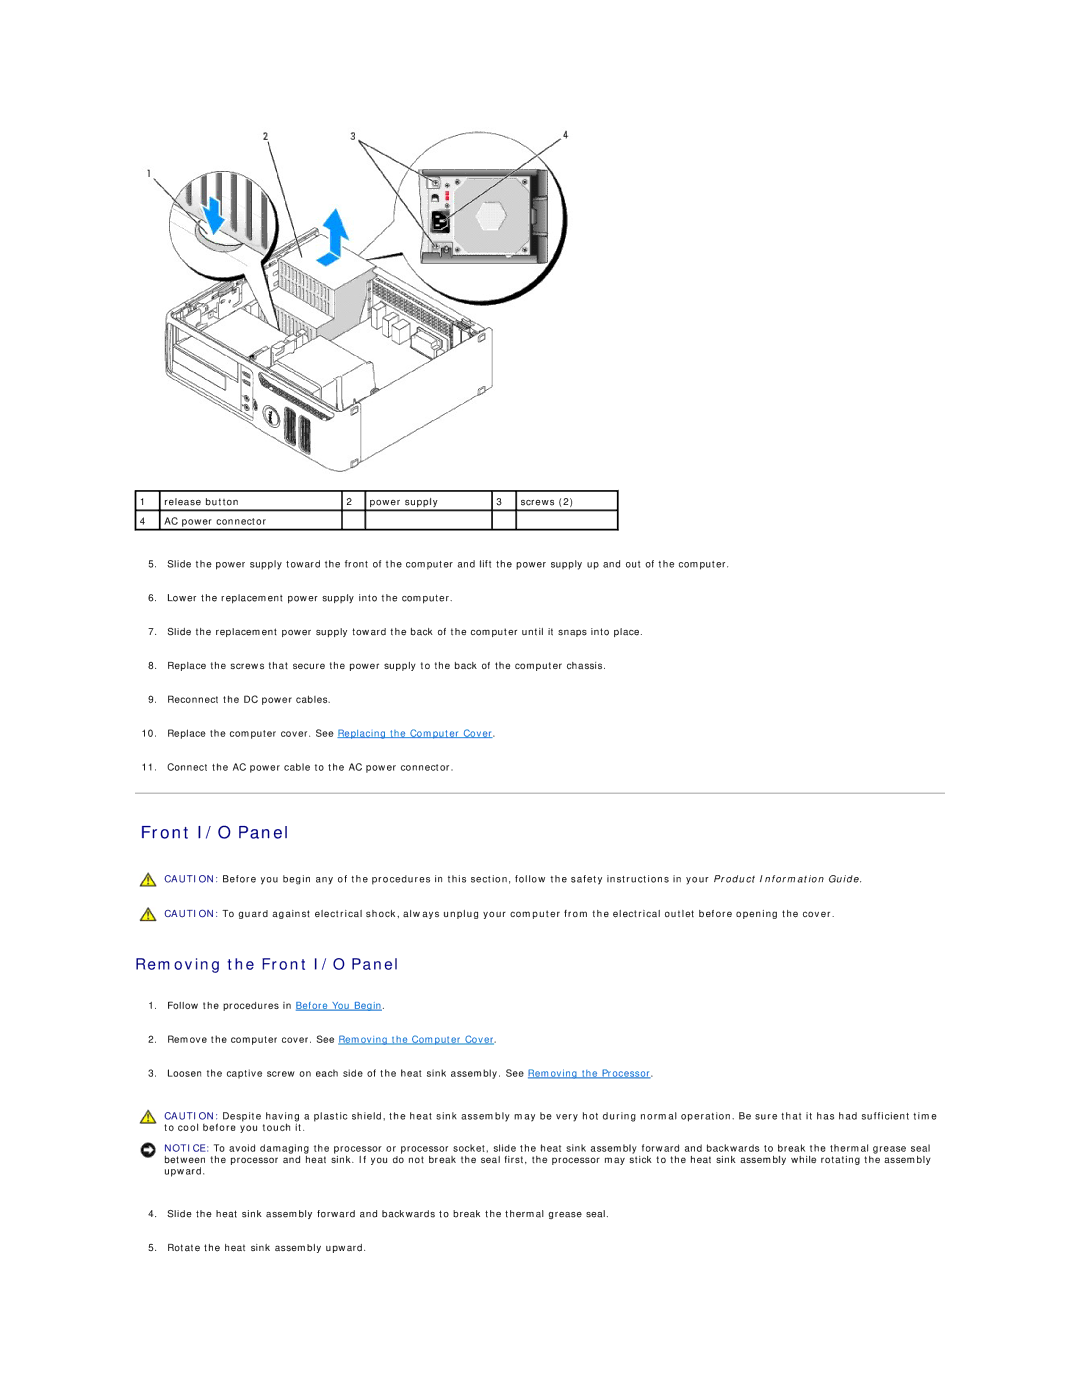
1 release button | 2 power supply | 3 screws (2) |
4AC power connector
5.Slide the power supply toward the front of the computer and lift the power supply up and out of the computer.
6.Lower the replacement power supply into the computer.
7.Slide the replacement power supply toward the back of the computer until it snaps into place.
8.Replace the screws that secure the power supply to the back of the computer chassis.
9.Reconnect the DC power cables.
10.Replace the computer cover. See Replacing the Computer Cover.
11.Connect the AC power cable to the AC power connector.
Front I/O Panel
CAUTION: Before you begin any of the procedures in this section, follow the safety instructions in your Product Information Guide.
CAUTION: To guard against electrical shock, always unplug your computer from the electrical outlet before opening the cover.
Removing the Front I/O Panel
1.Follow the procedures in Before You Begin.
2.Remove the computer cover. See Removing the Computer Cover.
3.Loosen the captive screw on each side of the heat sink assembly. See Removing the Processor.
CAUTION: Despite having a plastic shield, the heat sink assembly may be very hot during normal operation. Be sure that it has had sufficient time to cool before you touch it.
NOTICE: To avoid damaging the processor or processor socket, slide the heat sink assembly forward and backwards to break the thermal grease seal between the processor and heat sink. If you do not break the seal first, the processor may stick to the heat sink assembly while rotating the assembly upward.
4.Slide the heat sink assembly forward and backwards to break the thermal grease seal.
5.Rotate the heat sink assembly upward.