To replace the battery:
1.Record all of the settings in system setup (see System Setup Options) so that you can restore the correct settings in step 8.
2.Follow the procedures in Before You Begin.
3.Locate the battery socket.
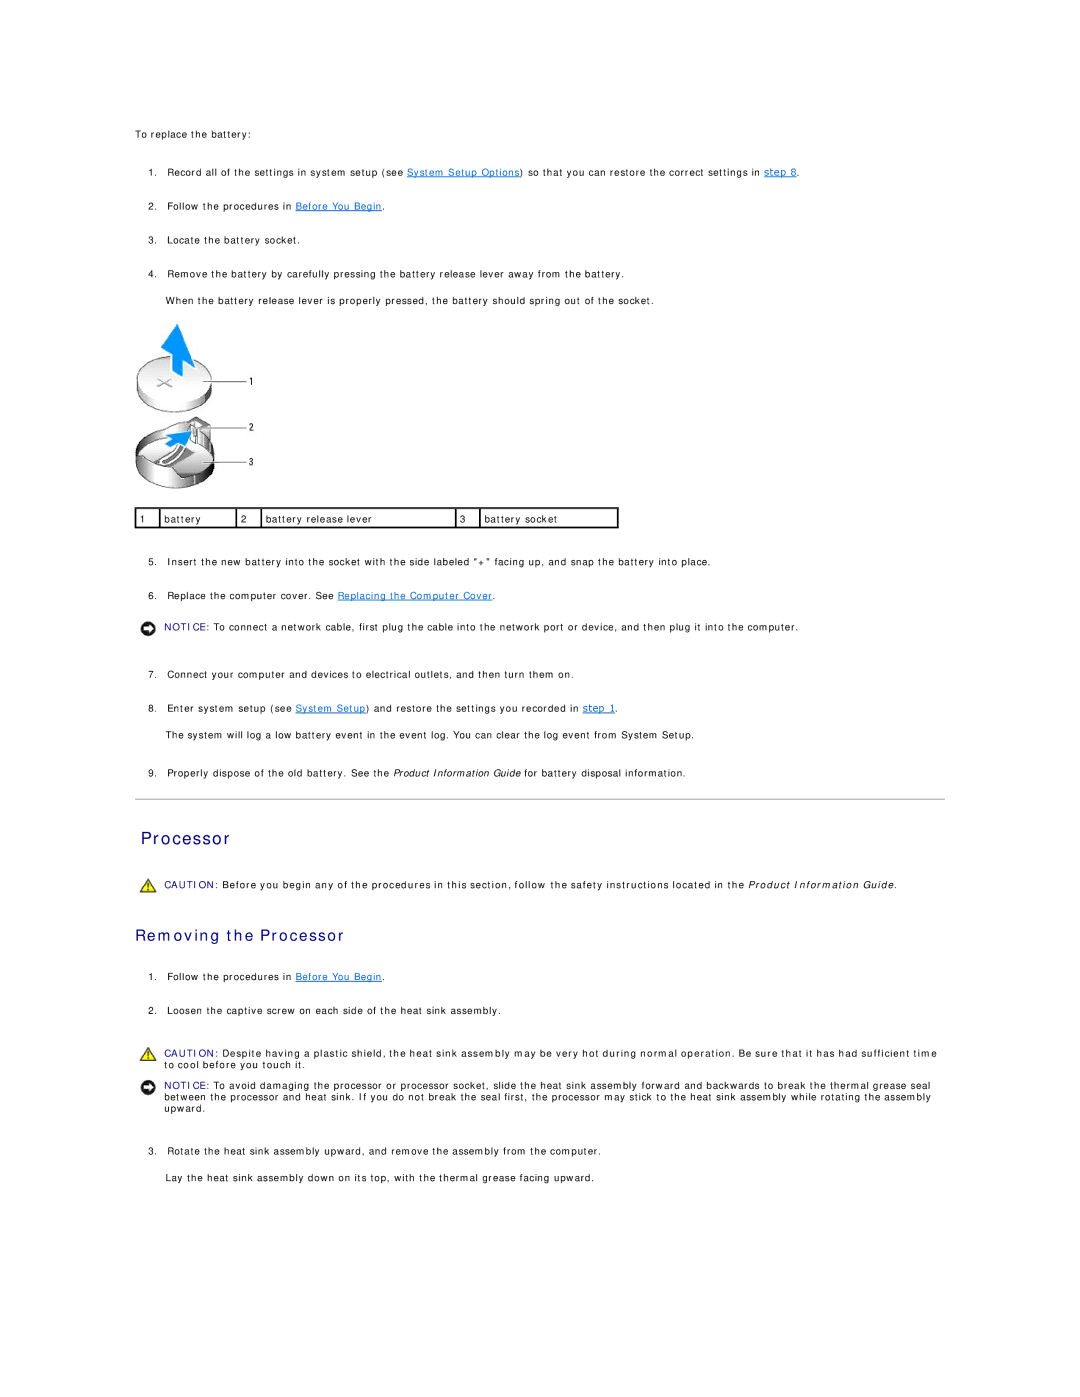
4.Remove the battery by carefully pressing the battery release lever away from the battery.
When the battery release lever is properly pressed, the battery should spring out of the socket.
1 | battery | 2 | battery release lever | 3 | battery socket |
|
|
|
|
|
|
5.Insert the new battery into the socket with the side labeled "+" facing up, and snap the battery into place.
6.Replace the computer cover. See Replacing the Computer Cover.
NOTICE: To connect a network cable, first plug the cable into the network port or device, and then plug it into the computer.
7.Connect your computer and devices to electrical outlets, and then turn them on.
8.Enter system setup (see System Setup) and restore the settings you recorded in step 1.
The system will log a low battery event in the event log. You can clear the log event from System Setup.
9.Properly dispose of the old battery. See the Product Information Guide for battery disposal information.
Processor
CAUTION: Before you begin any of the procedures in this section, follow the safety instructions located in the Product Information Guide.
Removing the Processor
1.Follow the procedures in Before You Begin.
2.Loosen the captive screw on each side of the heat sink assembly.
CAUTION: Despite having a plastic shield, the heat sink assembly may be very hot during normal operation. Be sure that it has had sufficient time to cool before you touch it.
NOTICE: To avoid damaging the processor or processor socket, slide the heat sink assembly forward and backwards to break the thermal grease seal between the processor and heat sink. If you do not break the seal first, the processor may stick to the heat sink assembly while rotating the assembly upward.
3. Rotate the heat sink assembly upward, and remove the assembly from the computer.
Lay the heat sink assembly down on its top, with the thermal grease facing upward.