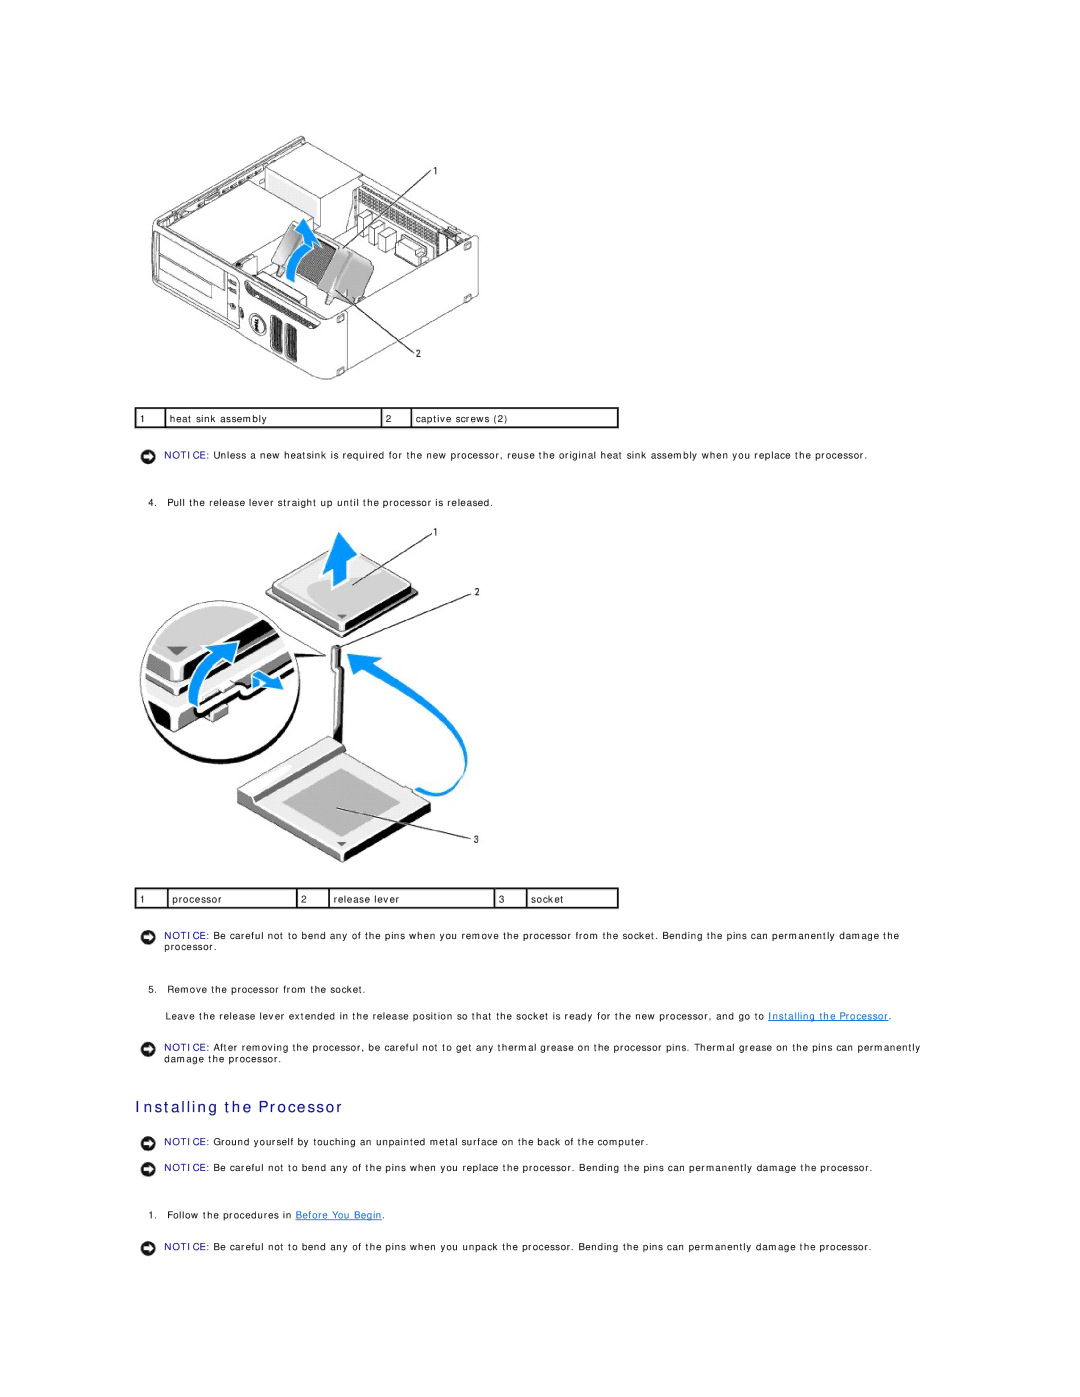
1 | heat sink assembly | 2 | captive screws (2) |
NOTICE: Unless a new heatsink is required for the new processor, reuse the original heat sink assembly when you replace the processor.
4. Pull the release lever straight up until the processor is released.
1 | processor | 2 | release lever | 3 | socket |
|
|
|
|
|
|
NOTICE: Be careful not to bend any of the pins when you remove the processor from the socket. Bending the pins can permanently damage the processor.
5.Remove the processor from the socket.
Leave the release lever extended in the release position so that the socket is ready for the new processor, and go to Installing the Processor.
NOTICE: After removing the processor, be careful not to get any thermal grease on the processor pins. Thermal grease on the pins can permanently damage the processor.
Installing the Processor
NOTICE: Ground yourself by touching an unpainted metal surface on the back of the computer.
NOTICE: Be careful not to bend any of the pins when you replace the processor. Bending the pins can permanently damage the processor.
1. Follow the procedures in Before You Begin.
NOTICE: Be careful not to bend any of the pins when you unpack the processor. Bending the pins can permanently damage the processor.