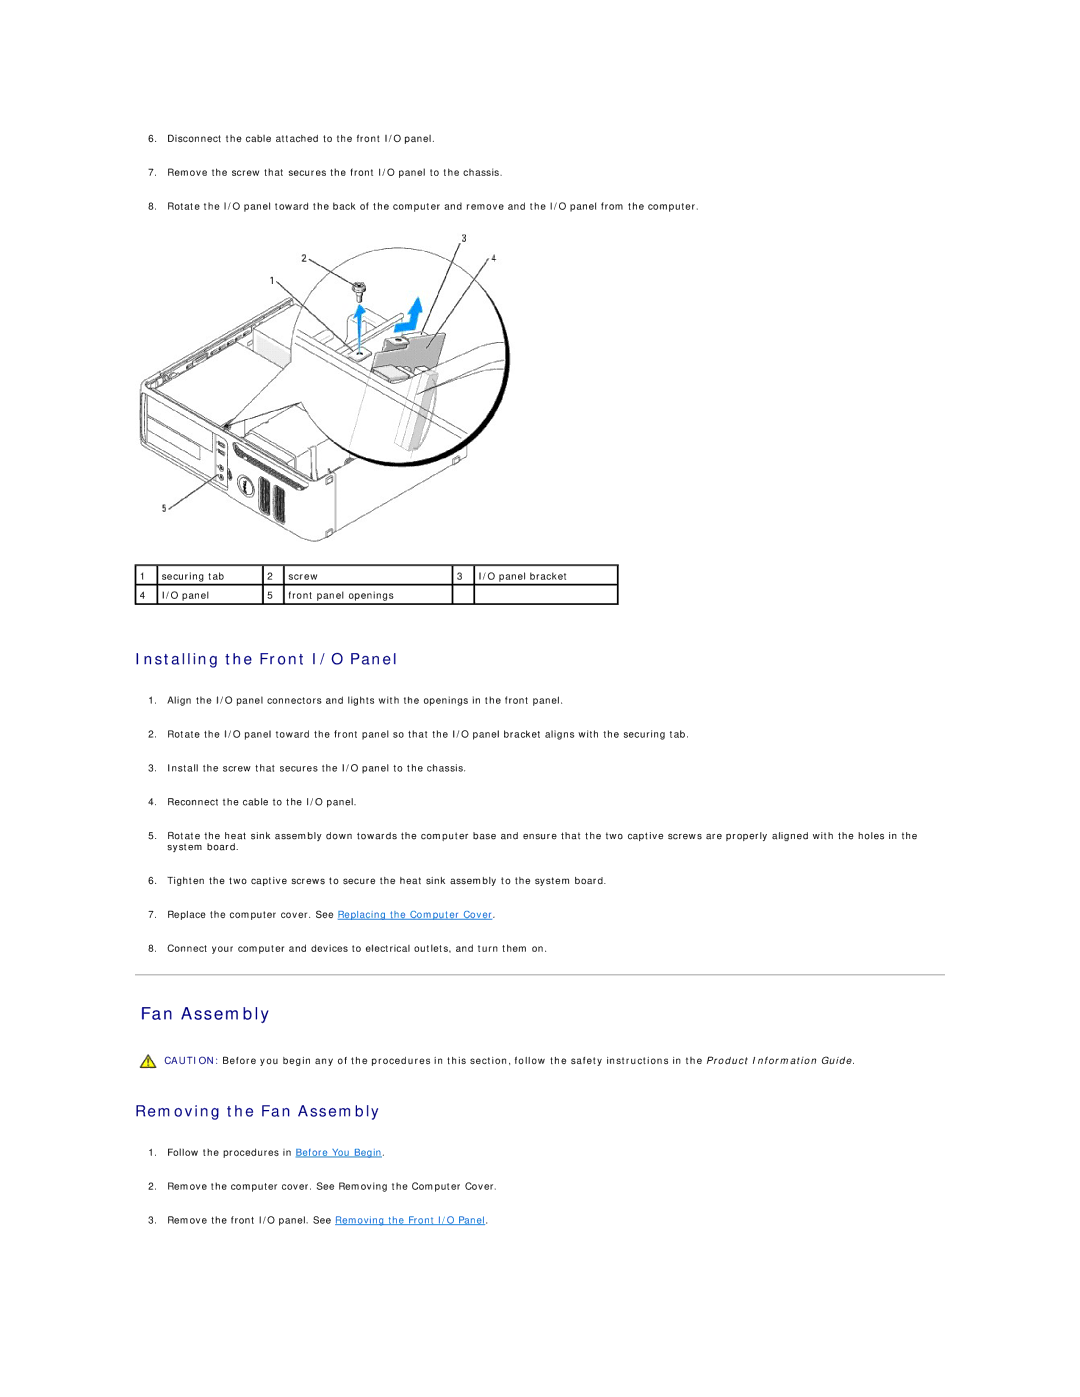
6.Disconnect the cable attached to the front I/O panel.
7.Remove the screw that secures the front I/O panel to the chassis.
8.Rotate the I/O panel toward the back of the computer and remove and the I/O panel from the computer.
1 | securing tab | 2 | screw | 3 | I/O panel bracket |
|
|
|
|
|
|
4 | I/O panel | 5 | front panel openings |
|
|
|
|
|
|
|
|
Installing the Front I/O Panel
1.Align the I/O panel connectors and lights with the openings in the front panel.
2.Rotate the I/O panel toward the front panel so that the I/O panel bracket aligns with the securing tab.
3.Install the screw that secures the I/O panel to the chassis.
4.Reconnect the cable to the I/O panel.
5.Rotate the heat sink assembly down towards the computer base and ensure that the two captive screws are properly aligned with the holes in the system board.
6.Tighten the two captive screws to secure the heat sink assembly to the system board.
7.Replace the computer cover. See Replacing the Computer Cover.
8.Connect your computer and devices to electrical outlets, and turn them on.
Fan Assembly
CAUTION: Before you begin any of the procedures in this section, follow the safety instructions in the Product Information Guide.
Removing the Fan Assembly
1.Follow the procedures in Before You Begin.
2.Remove the computer cover. See Removing the Computer Cover.
3.Remove the front I/O panel. See Removing the Front I/O Panel.