1.Enter system setup, select Boot Sequence from the System group. See System Setup Options.
2.Press <Enter> to access the menu.
NOTE: Write down your current boot sequence in case you want to restore it.
3.Press the up- and
4.Press the U or D key to move the option up or down in the boot sequence.
5.Press <Enter> to Save the changes or <Esc> to Cancel.
Clearing Forgotten Passwords and CMOS Settings
CAUTION: Before you begin any of the procedures in this section, follow the safety instructions located in the Product Information Guide.
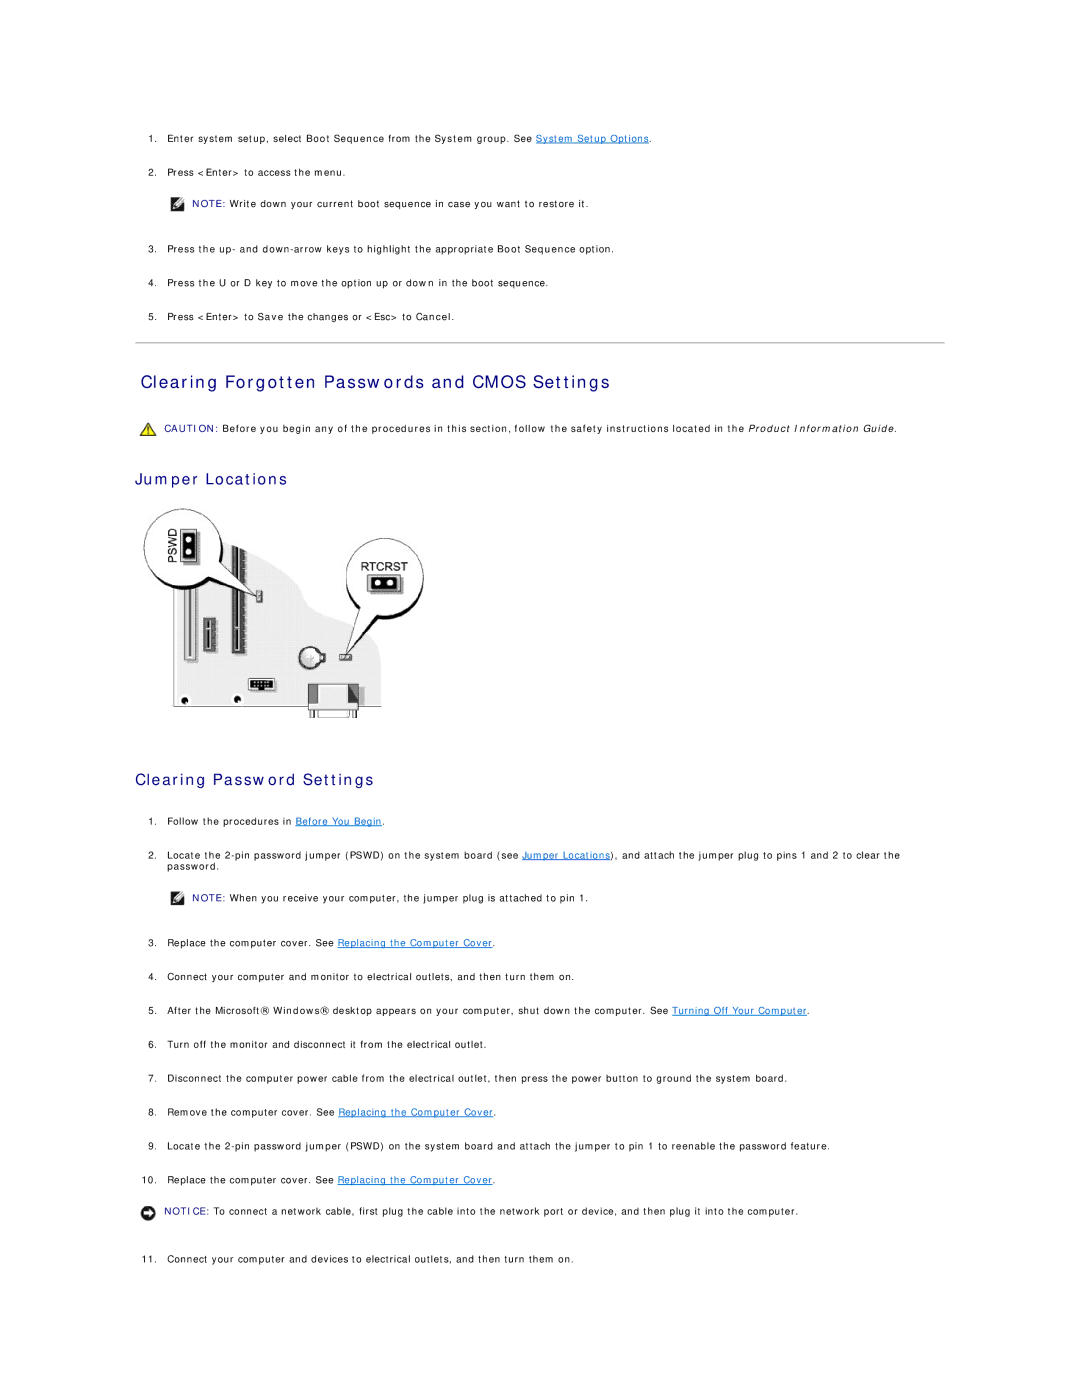
Jumper Locations
Clearing Password Settings
1.Follow the procedures in Before You Begin.
2.Locate the
NOTE: When you receive your computer, the jumper plug is attached to pin 1.
3.Replace the computer cover. See Replacing the Computer Cover.
4.Connect your computer and monitor to electrical outlets, and then turn them on.
5.After the Microsoft® Windows® desktop appears on your computer, shut down the computer. See Turning Off Your Computer.
6.Turn off the monitor and disconnect it from the electrical outlet.
7.Disconnect the computer power cable from the electrical outlet, then press the power button to ground the system board.
8.Remove the computer cover. See Replacing the Computer Cover.
9.Locate the
10.Replace the computer cover. See Replacing the Computer Cover.
NOTICE: To connect a network cable, first plug the cable into the network port or device, and then plug it into the computer.
11. Connect your computer and devices to electrical outlets, and then turn them on.