Microprocessor Module: Dell Latitude C610/C510 Service Manual
Back to Contents Page
Microprocessor Module
Dell™ Latitude™ C610/C510 Service Manual
![]() Removing the Microprocessor Module
Removing the Microprocessor Module
![]() Replacing the Microprocessor Module
Replacing the Microprocessor Module
Removing the Microprocessor Module
NOTICE: Disconnect the computer and any attached devices from electrical outlets, and remove any installed batteries.
NOTICE: To avoid ESD, ground yourself by using a wrist grounding strap or by touching an unpainted metal surface on the computer.
NOTICE: Read "Preparing to Work Inside the Computer" before performing the following procedure.
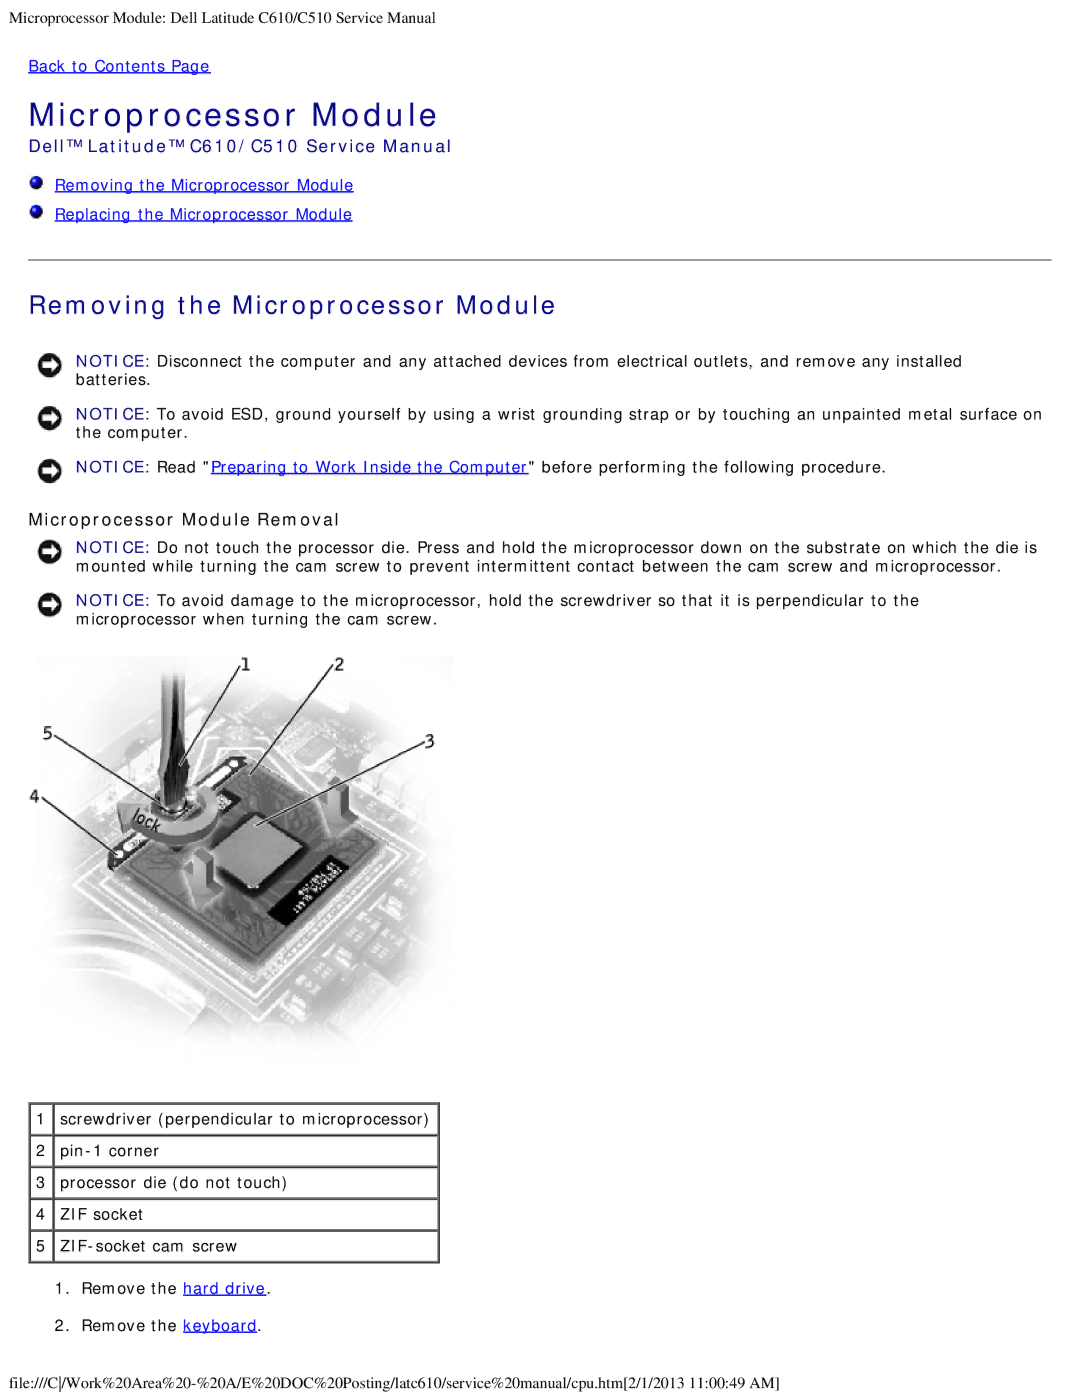
Microprocessor Module Removal
NOTICE: Do not touch the processor die. Press and hold the microprocessor down on the substrate on which the die is mounted while turning the cam screw to prevent intermittent contact between the cam screw and microprocessor.
NOTICE: To avoid damage to the microprocessor, hold the screwdriver so that it is perpendicular to the microprocessor when turning the cam screw.
![]() 1
1 ![]() screwdriver (perpendicular to microprocessor)
screwdriver (perpendicular to microprocessor) ![]()
![]() 2
2 ![]()
![]() 3
3 ![]() processor die (do not touch)
processor die (do not touch)
![]() 4
4 ![]() ZIF socket
ZIF socket ![]() 5
5 ![]()
1.Remove the hard drive.
2.Remove the keyboard.