Keyboard: Dell Latitude C610/C510 Service Manual
Back to Contents Page
Keyboard
Dell™ Latitude™ C610/C510 Service Manual
![]() Removing the Keyboard
Removing the Keyboard
![]() Replacing the Keyboard
Replacing the Keyboard
Removing the Keyboard
NOTICE: Disconnect the computer and any attached devices from electrical outlets, and remove any installed batteries.
NOTICE: To avoid ESD, ground yourself by using a wrist grounding strap or by touching an unpainted metal surface on the computer.
NOTICE: Read "Preparing to Work Inside the Computer" before performing the following procedure.
1.Remove the hard drive.
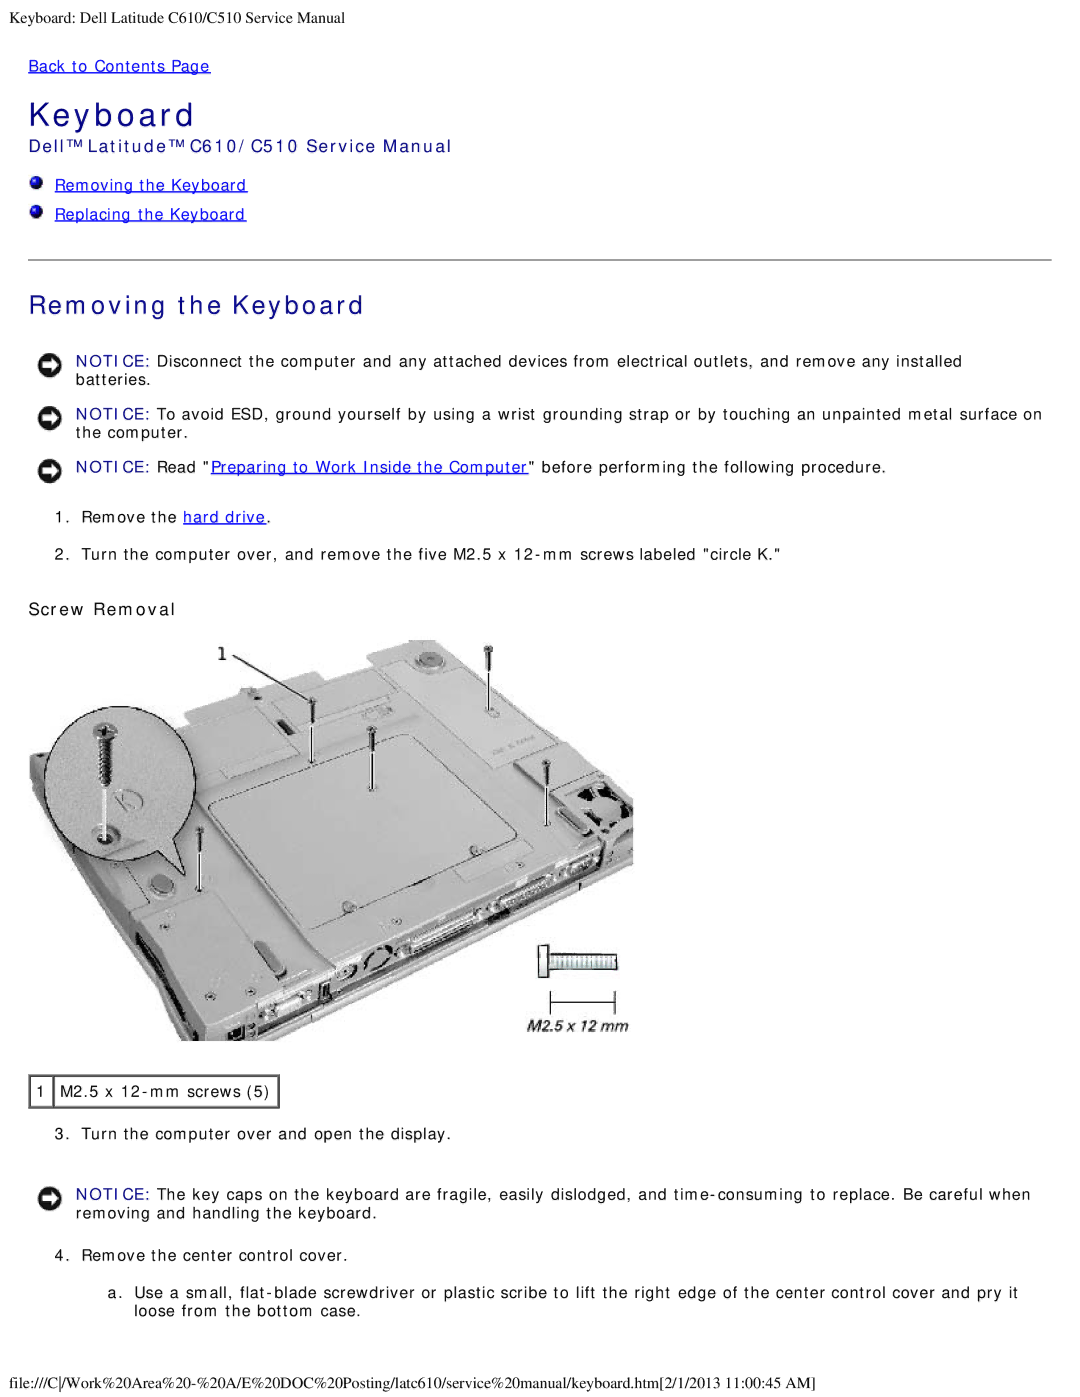
2.Turn the computer over, and remove the five M2.5 x
Screw Removal
![]() 1
1 ![]() M2.5 x
M2.5 x ![]()
3. Turn the computer over and open the display.
NOTICE: The key caps on the keyboard are fragile, easily dislodged, and
4.Remove the center control cover.
a.Use a small,
