Dell™ Latitude™ E6400 XFR Service Manual
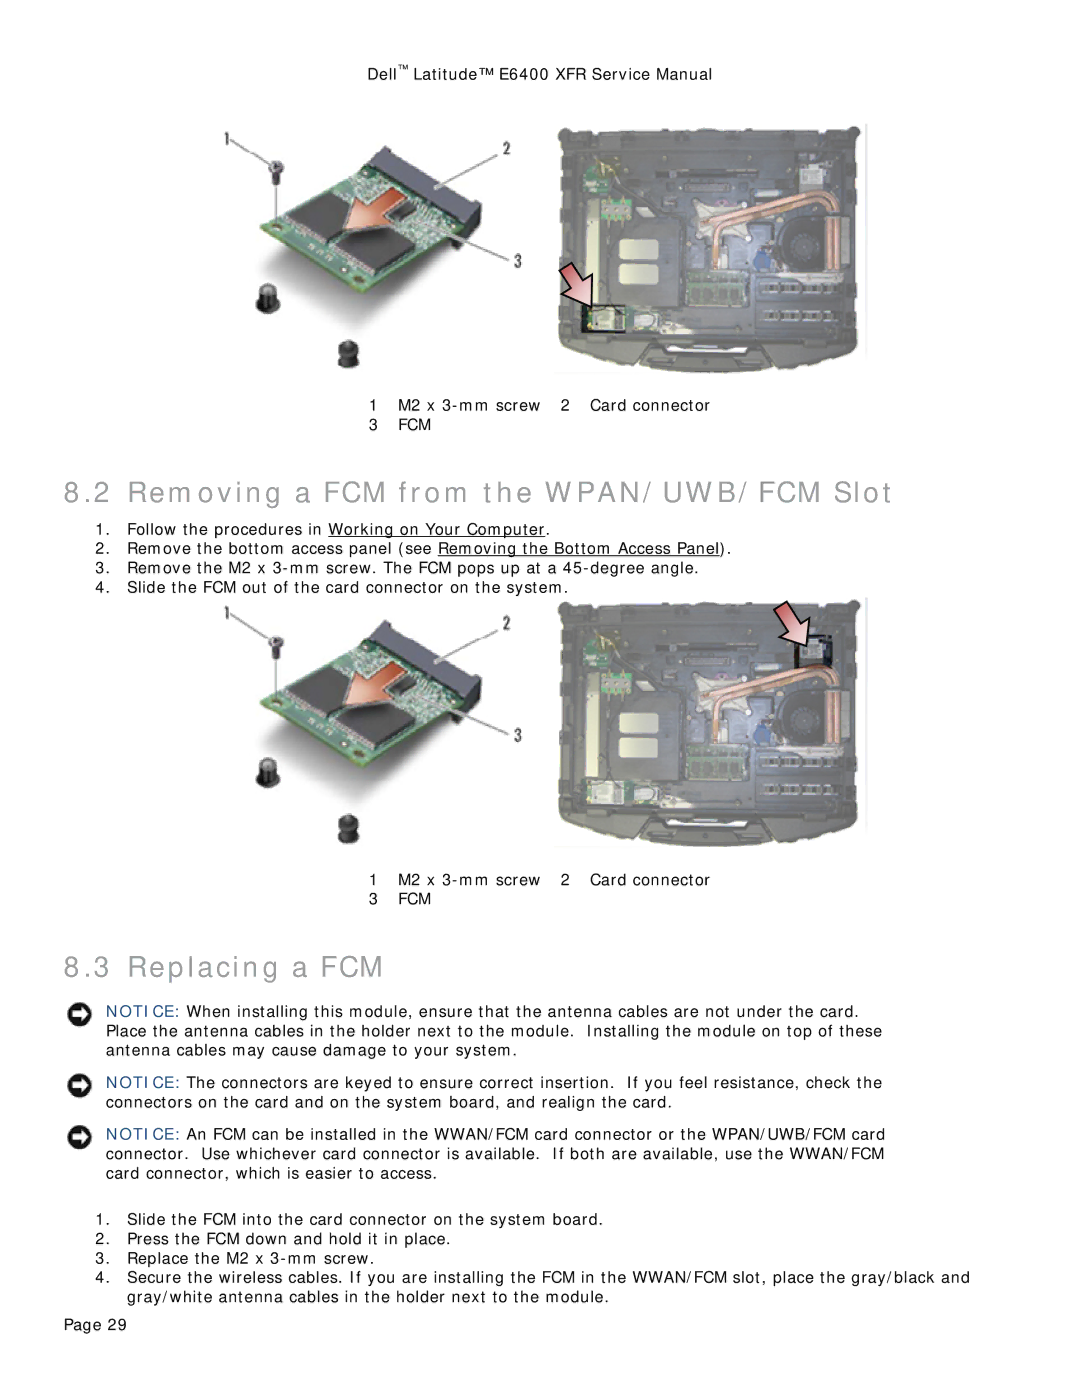
1 M2 x
3FCM
8.2Removing a FCM from the WPAN/UWB/FCM Slot
1.Follow the procedures in Working on Your Computer.
2.Remove the bottom access panel (see Removing the Bottom Access Panel).
3.Remove the M2 x
4.Slide the FCM out of the card connector on the system.
1 M2 x
3FCM
8.3Replacing a FCM
NOTICE: When installing this module, ensure that the antenna cables are not under the card. Place the antenna cables in the holder next to the module. Installing the module on top of these antenna cables may cause damage to your system.
NOTICE: The connectors are keyed to ensure correct insertion. If you feel resistance, check the connectors on the card and on the system board, and realign the card.
NOTICE: An FCM can be installed in the WWAN/FCM card connector or the WPAN/UWB/FCM card connector. Use whichever card connector is available. If both are available, use the WWAN/FCM card connector, which is easier to access.
1.Slide the FCM into the card connector on the system board.
2.Press the FCM down and hold it in place.
3.Replace the M2 x
4.Secure the wireless cables. If you are installing the FCM in the WWAN/FCM slot, place the gray/black and gray/white antenna cables in the holder next to the module.
Page 29
