Dell™ Latitude™ E6400 XFR Service Manual
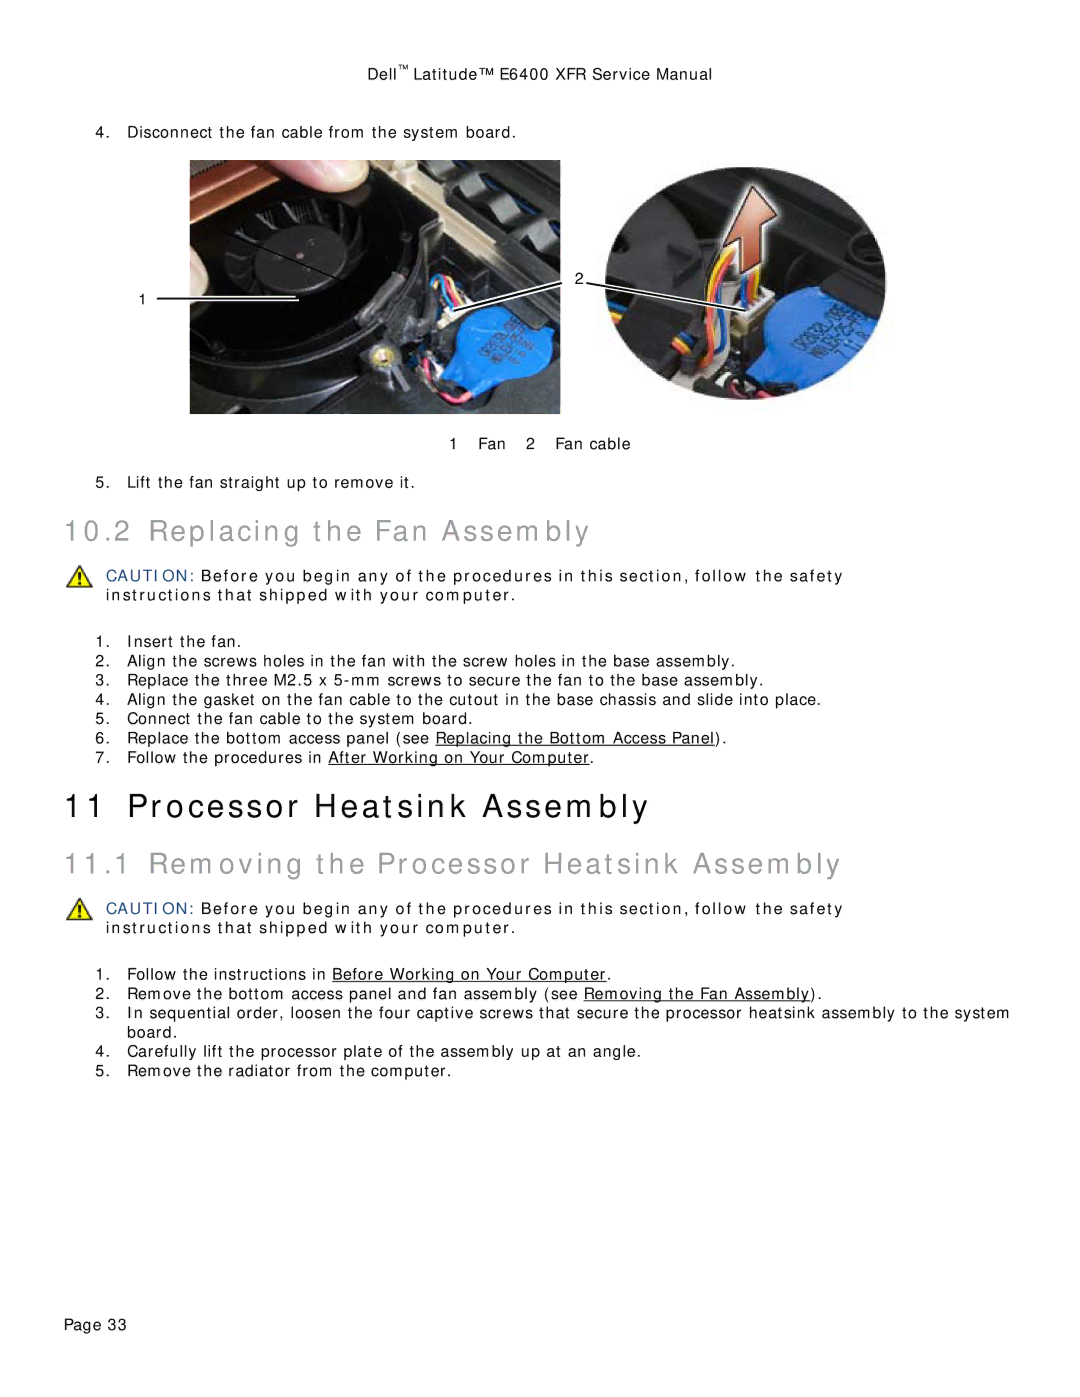
4.Disconnect the fan cable from the system board.
2
1
1 Fan 2 Fan cable
5.Lift the fan straight up to remove it.
10.2 Replacing the Fan Assembly
CAUTION: Before you begin any of the procedures in this section, follow the safety instructions that shipped with your computer.
1.Insert the fan.
2.Align the screws holes in the fan with the screw holes in the base assembly.
3.Replace the three M2.5 x
4.Align the gasket on the fan cable to the cutout in the base chassis and slide into place.
5.Connect the fan cable to the system board.
6.Replace the bottom access panel (see Replacing the Bottom Access Panel).
7.Follow the procedures in After Working on Your Computer.
11 Processor Heatsink Assembly
11.1 Removing the Processor Heatsink Assembly
CAUTION: Before you begin any of the procedures in this section, follow the safety instructions that shipped with your computer.
1.Follow the instructions in Before Working on Your Computer.
2.Remove the bottom access panel and fan assembly (see Removing the Fan Assembly).
3.In sequential order, loosen the four captive screws that secure the processor heatsink assembly to the system board.
4.Carefully lift the processor plate of the assembly up at an angle.
5.Remove the radiator from the computer.
Page 33
