NOTE: Ensure that the SATA power cable is routed under the hard drive bracket cable retaining clip.
5.Replace the hard drive bracket assembly (see Replacing the Hard Drive Bracket Assembly).
6.Perform the procedure in After Working on Your Computer.
Removing the Hard Drive Fan
1.Perform the procedure in Before Working on Your Computer.
1.Remove the hard drive bracket assembly (see Removing the Hard Drive Bracket Assembly).
2.Remove the hard drive, if installed (see Removing the Hard Drive).
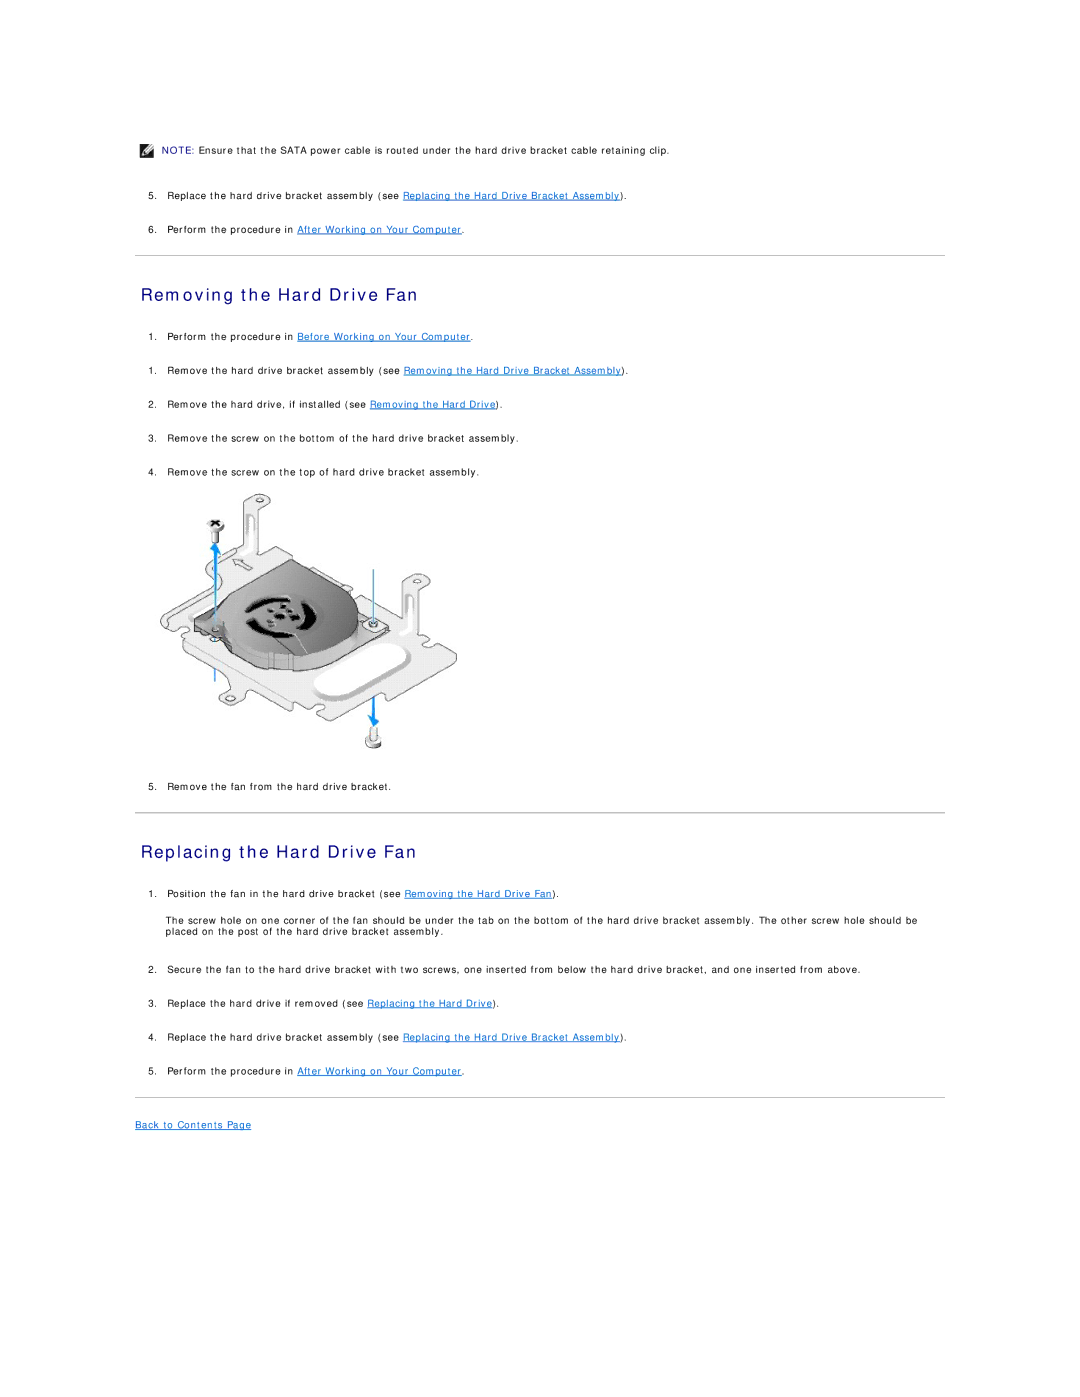
3.Remove the screw on the bottom of the hard drive bracket assembly.
4.Remove the screw on the top of hard drive bracket assembly.
5. Remove the fan from the hard drive bracket.
Replacing the Hard Drive Fan
1.Position the fan in the hard drive bracket (see Removing the Hard Drive Fan).
The screw hole on one corner of the fan should be under the tab on the bottom of the hard drive bracket assembly. The other screw hole should be placed on the post of the hard drive bracket assembly.
2.Secure the fan to the hard drive bracket with two screws, one inserted from below the hard drive bracket, and one inserted from above.
3.Replace the hard drive if removed (see Replacing the Hard Drive).
4.Replace the hard drive bracket assembly (see Replacing the Hard Drive Bracket Assembly).
5.Perform the procedure in After Working on Your Computer.
Back to Contents Page