BAND SAW USED WITH A DUST
COLLECTOR
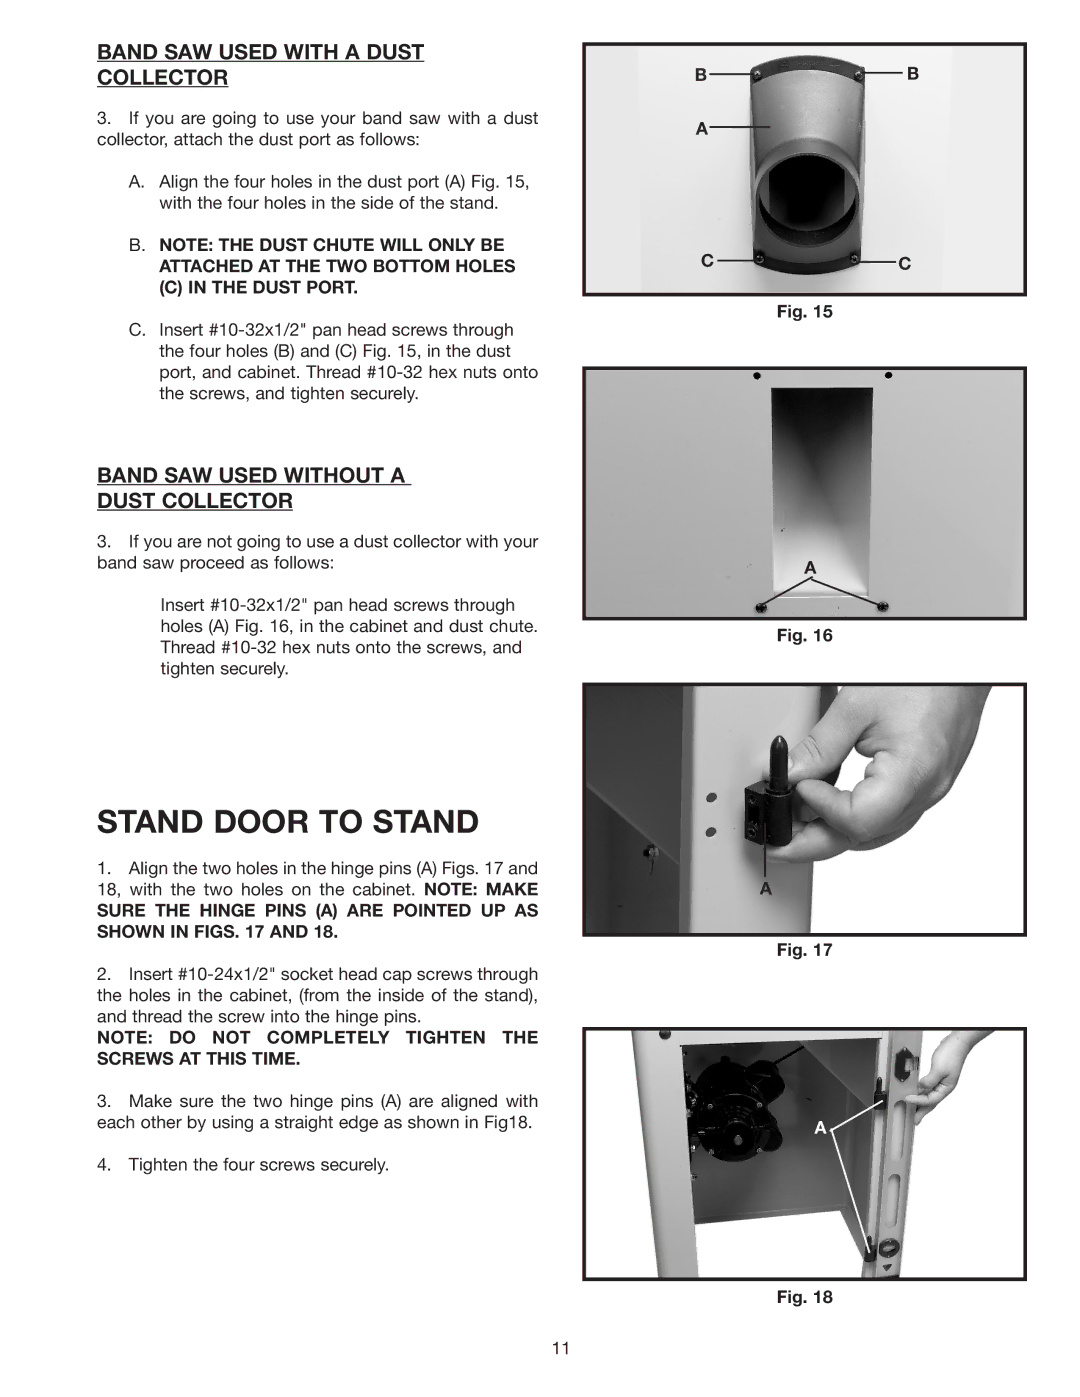
3.If you are going to use your band saw with a dust collector, attach the dust port as follows:
A.Align the four holes in the dust port (A) Fig. 15, with the four holes in the side of the stand.
B.NOTE: THE DUST CHUTE WILL ONLY BE ATTACHED AT THE TWO BOTTOM HOLES
(C) IN THE DUST PORT.
C.Insert
BAND SAW USED WITHOUT A
DUST COLLECTOR
3.If you are not going to use a dust collector with your band saw proceed as follows:
Insert
STAND DOOR TO STAND
1.Align the two holes in the hinge pins (A) Figs. 17 and 18, with the two holes on the cabinet. NOTE: MAKE
SURE THE HINGE PINS (A) ARE POINTED UP AS SHOWN IN FIGS. 17 AND 18.
2.Insert
NOTE: DO NOT COMPLETELY TIGHTEN THE SCREWS AT THIS TIME.
3.Make sure the two hinge pins (A) are aligned with each other by using a straight edge as shown in Fig18.
4.Tighten the four screws securely.
BB
A
CC
Fig. 15
A
Fig. 16
A
Fig. 17
A ![]()
Fig. 18
11
