A
C
B
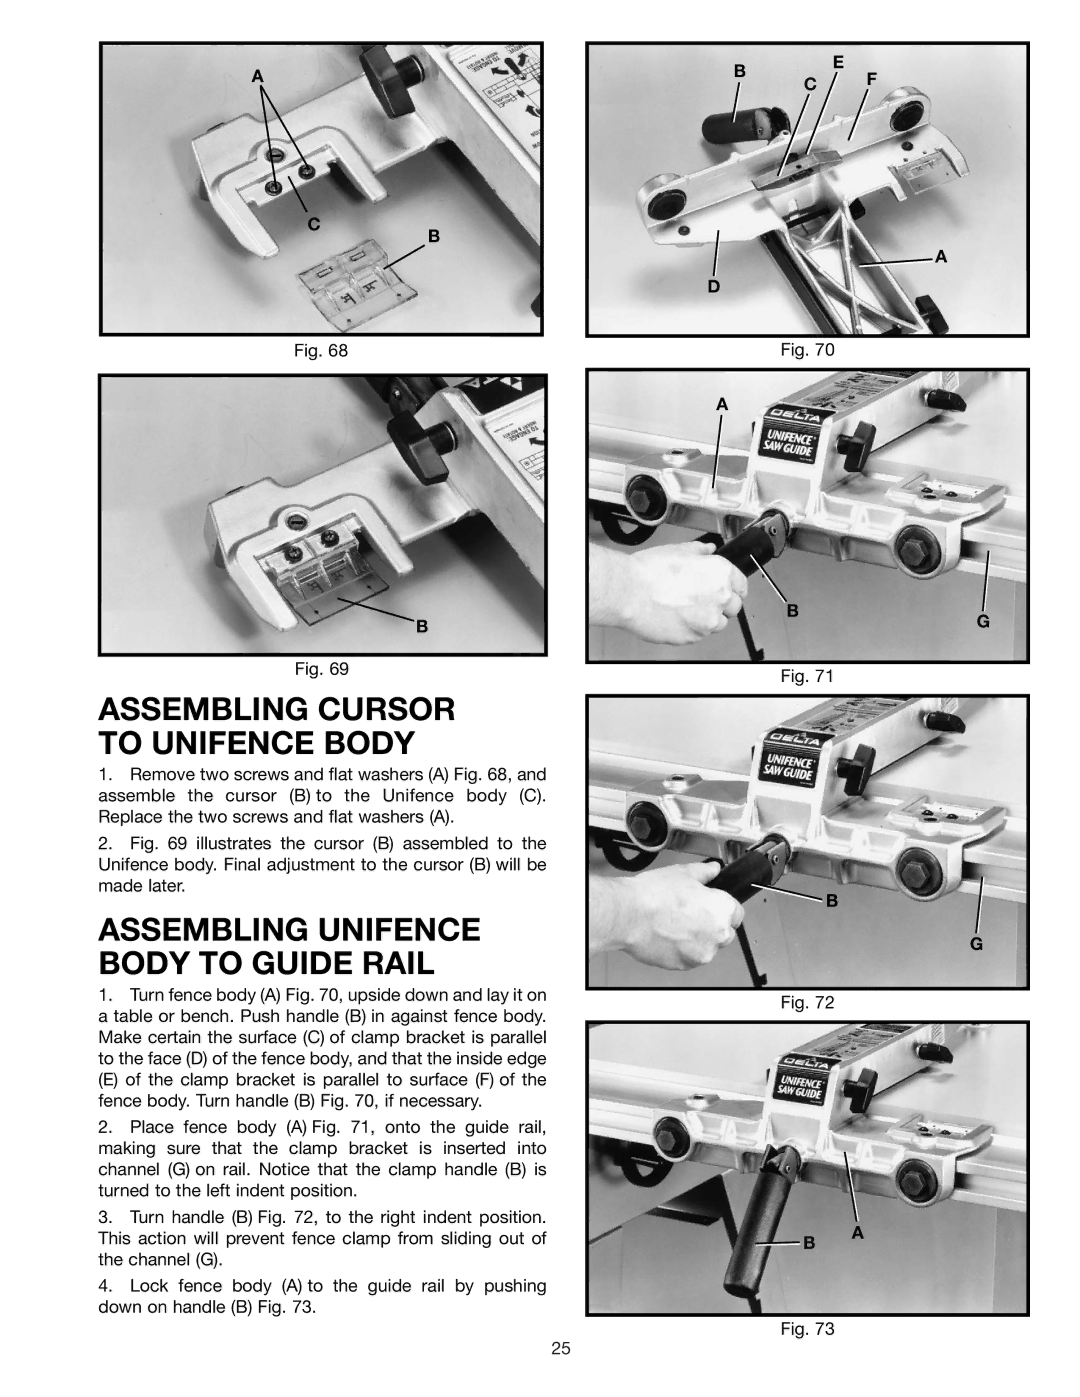
Fig. 68
B
Fig. 69
ASSEMBLING CURSOR TO UNIFENCE BODY
1.Remove two screws and flat washers (A) Fig. 68, and assemble the cursor (B) to the Unifence body (C). Replace the two screws and flat washers (A).
2.Fig. 69 illustrates the cursor (B) assembled to the Unifence body. Final adjustment to the cursor (B) will be made later.
ASSEMBLING UNIFENCE BODY TO GUIDE RAIL
1. | Turn fence body (A) Fig. 70, upside down and lay it on |
a table or bench. Push handle (B) in against fence body. | |
Make certain the surface (C) of clamp bracket is parallel | |
to the face (D) of the fence body, and that the inside edge | |
(E) of the clamp bracket is parallel to surface (F) of the | |
fence body. Turn handle (B) Fig. 70, if necessary. | |
2. | Place fence body (A) Fig. 71, onto the guide rail, |
making sure that the clamp bracket is inserted into | |
channel (G) on rail. Notice that the clamp handle (B) is | |
turned to the left indent position. | |
3. | Turn handle (B) Fig. 72, to the right indent position. |
E
B C F
![]() A
A
D
Fig. 70
A
B
G
Fig. 71
![]() B
B
G
Fig. 72
This action will prevent fence clamp from sliding out of |
the channel (G). |
4. Lock fence body (A) to the guide rail by pushing |
down on handle (B) Fig. 73. |
![]() B
B
A
Fig. 73
25