ADJUSTING FENCE
90 DEGREES TO TABLE
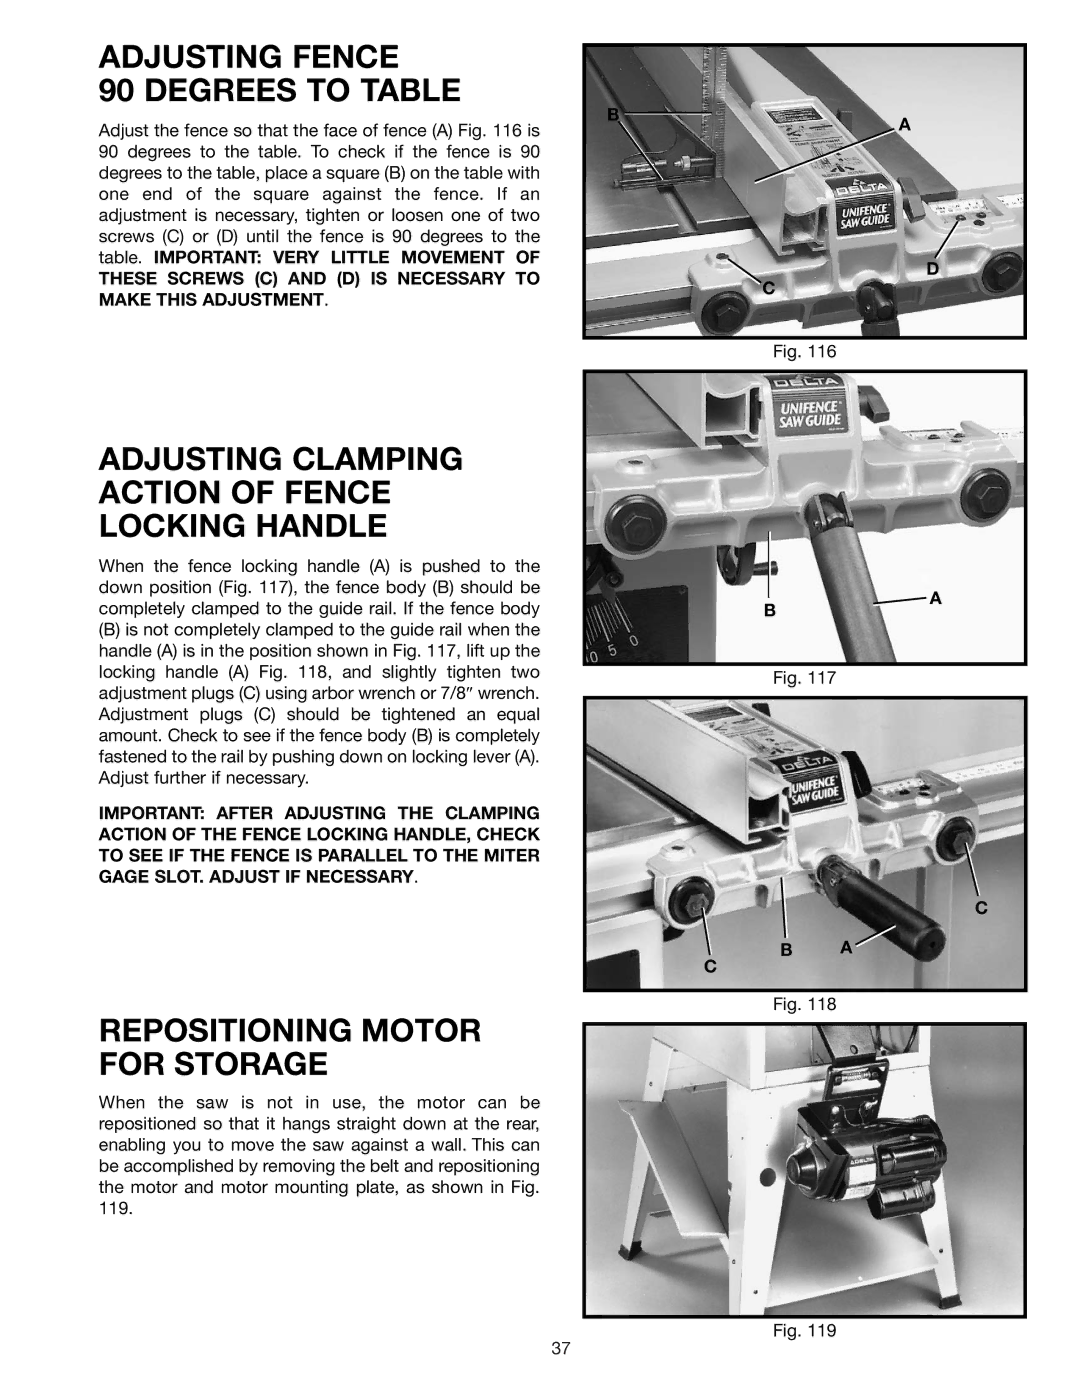
Adjust the fence so that the face of fence (A) Fig. 116 is 90 degrees to the table. To check if the fence is 90 degrees to the table, place a square (B) on the table with one end of the square against the fence. If an adjustment is necessary, tighten or loosen one of two screws (C) or (D) until the fence is 90 degrees to the table. IMPORTANT: VERY LITTLE MOVEMENT OF
THESE SCREWS (C) AND (D) IS NECESSARY TO MAKE THIS ADJUSTMENT.
B
A
D
C
Fig. 116
ADJUSTING CLAMPING ACTION OF FENCE LOCKING HANDLE
When the fence locking handle (A) is pushed to the down position (Fig. 117), the fence body (B) should be completely clamped to the guide rail. If the fence body
B
![]() A
A
(B)is not completely clamped to the guide rail when the handle (A) is in the position shown in Fig. 117, lift up the locking handle (A) Fig. 118, and slightly tighten two adjustment plugs (C) using arbor wrench or 7/8″ wrench. Adjustment plugs (C) should be tightened an equal amount. Check to see if the fence body (B) is completely fastened to the rail by pushing down on locking lever (A). Adjust further if necessary.
IMPORTANT: AFTER ADJUSTING THE CLAMPING ACTION OF THE FENCE LOCKING HANDLE, CHECK TO SEE IF THE FENCE IS PARALLEL TO THE MITER GAGE SLOT. ADJUST IF NECESSARY.
REPOSITIONING MOTOR FOR STORAGE
When the saw is not in use, the motor can be repositioned so that it hangs straight down at the rear, enabling you to move the saw against a wall. This can be accomplished by removing the belt and repositioning the motor and motor mounting plate, as shown in Fig. 119.
Fig. 117
C
B A
C
Fig. 118
Fig. 119
37
