BACKLASH ADJUSTMENTS FOR BLADE RAISING AND BLADE TILTING MECHANISMS
After a period of extended use, if any play is detected in the blade raising or blade tilting mechanisms, make the following adjustments:
![]() WARNING: Disconnect machine from power source.
WARNING: Disconnect machine from power source.
2.NOTE: The machine has been turned upside down and the blade removed for clarity and safety.
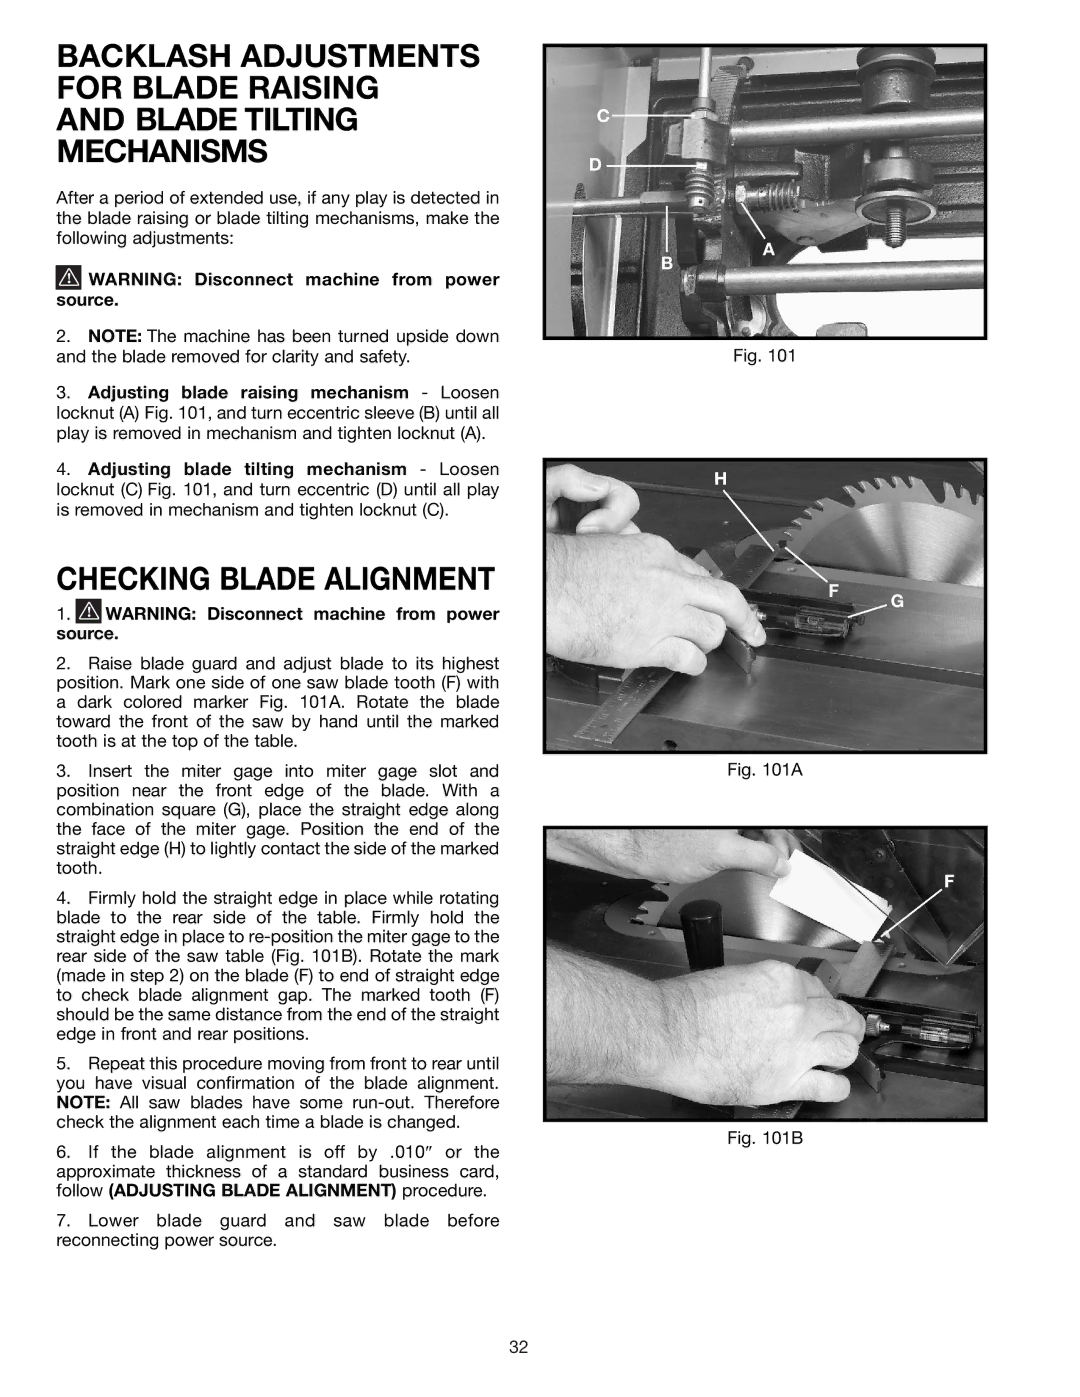
3.Adjusting blade raising mechanism - Loosen locknut (A) Fig. 101, and turn eccentric sleeve (B) until all play is removed in mechanism and tighten locknut (A).
4.Adjusting blade tilting mechanism - Loosen locknut (C) Fig. 101, and turn eccentric (D) until all play is removed in mechanism and tighten locknut (C).
CHECKING BLADE ALIGNMENT
1.![]() WARNING: Disconnect machine from power source.
WARNING: Disconnect machine from power source.
2.Raise blade guard and adjust blade to its highest position. Mark one side of one saw blade tooth (F) with a dark colored marker Fig. 101A. Rotate the blade toward the front of the saw by hand until the marked tooth is at the top of the table.
3.Insert the miter gage into miter gage slot and position near the front edge of the blade. With a combination square (G), place the straight edge along the face of the miter gage. Position the end of the straight edge (H) to lightly contact the side of the marked tooth.
4.Firmly hold the straight edge in place while rotating blade to the rear side of the table. Firmly hold the straight edge in place to
5.Repeat this procedure moving from front to rear until you have visual confirmation of the blade alignment. NOTE: All saw blades have some
6.If the blade alignment is off by .010″ or the approximate thickness of a standard business card, follow (ADJUSTING BLADE ALIGNMENT) procedure.
7.Lower blade guard and saw blade before reconnecting power source.
C
D
A
B
Fig. 101
H
F
Fig. 101A
Fig. 101B
G
F
32