D
B
A ![]()
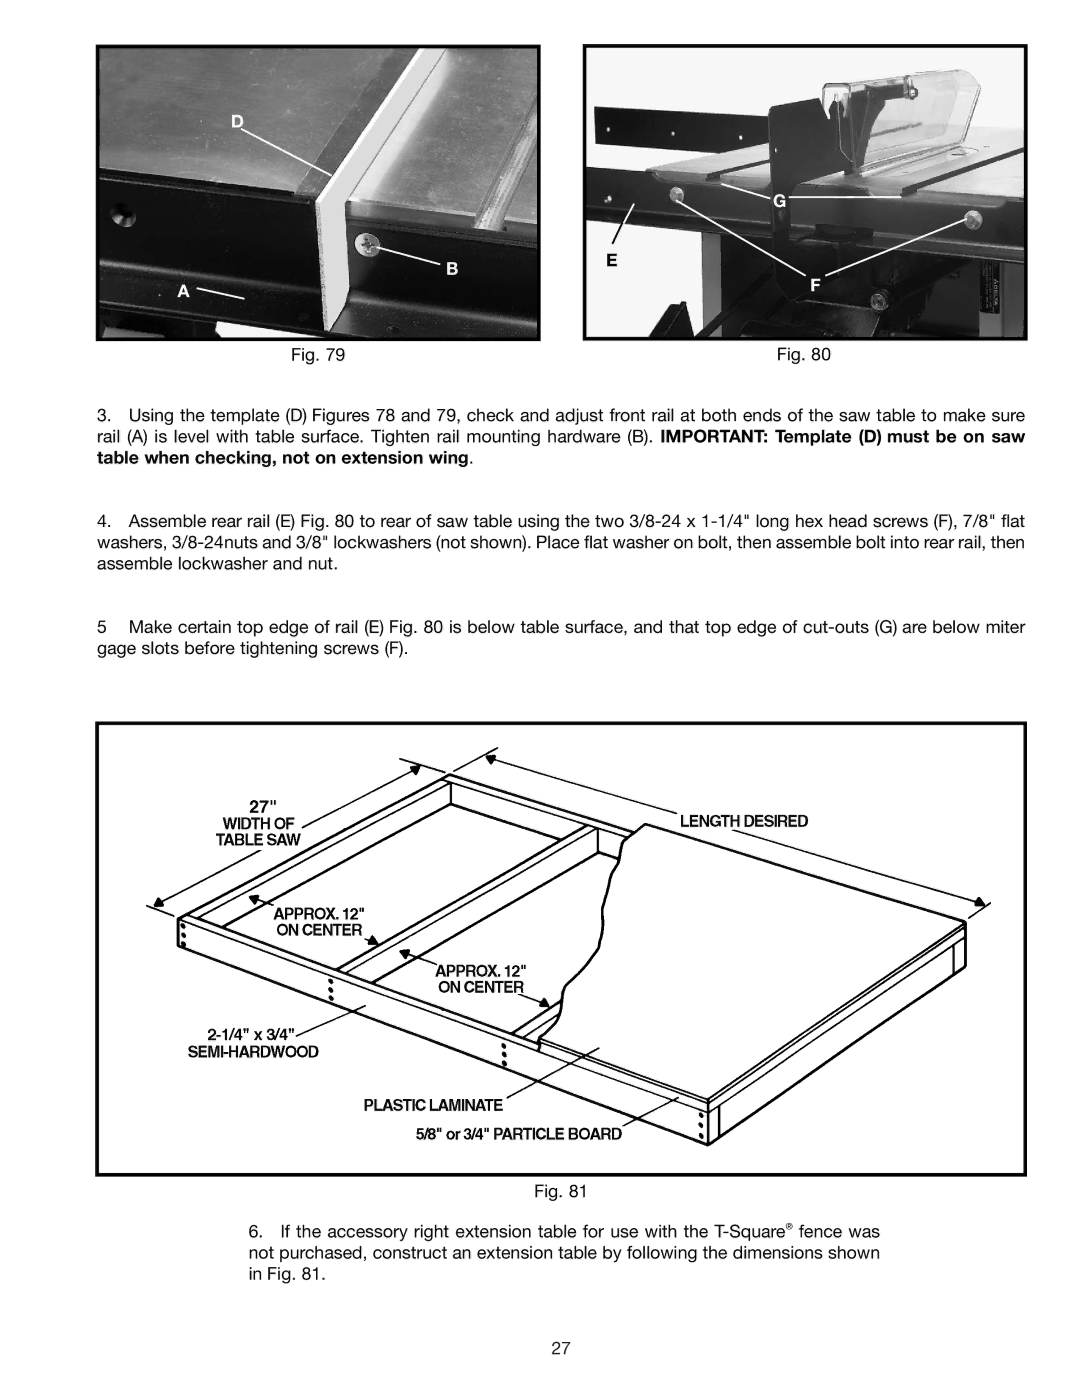
Fig. 79
G
E
F
Fig. 80
3.Using the template (D) Figures 78 and 79, check and adjust front rail at both ends of the saw table to make sure rail (A) is level with table surface. Tighten rail mounting hardware (B). IMPORTANT: Template (D) must be on saw table when checking, not on extension wing.
4.Assemble rear rail (E) Fig. 80 to rear of saw table using the two
5Make certain top edge of rail (E) Fig. 80 is below table surface, and that top edge of
Fig. 81
6.If the accessory right extension table for use with the
27