TABLE TILT POINTER
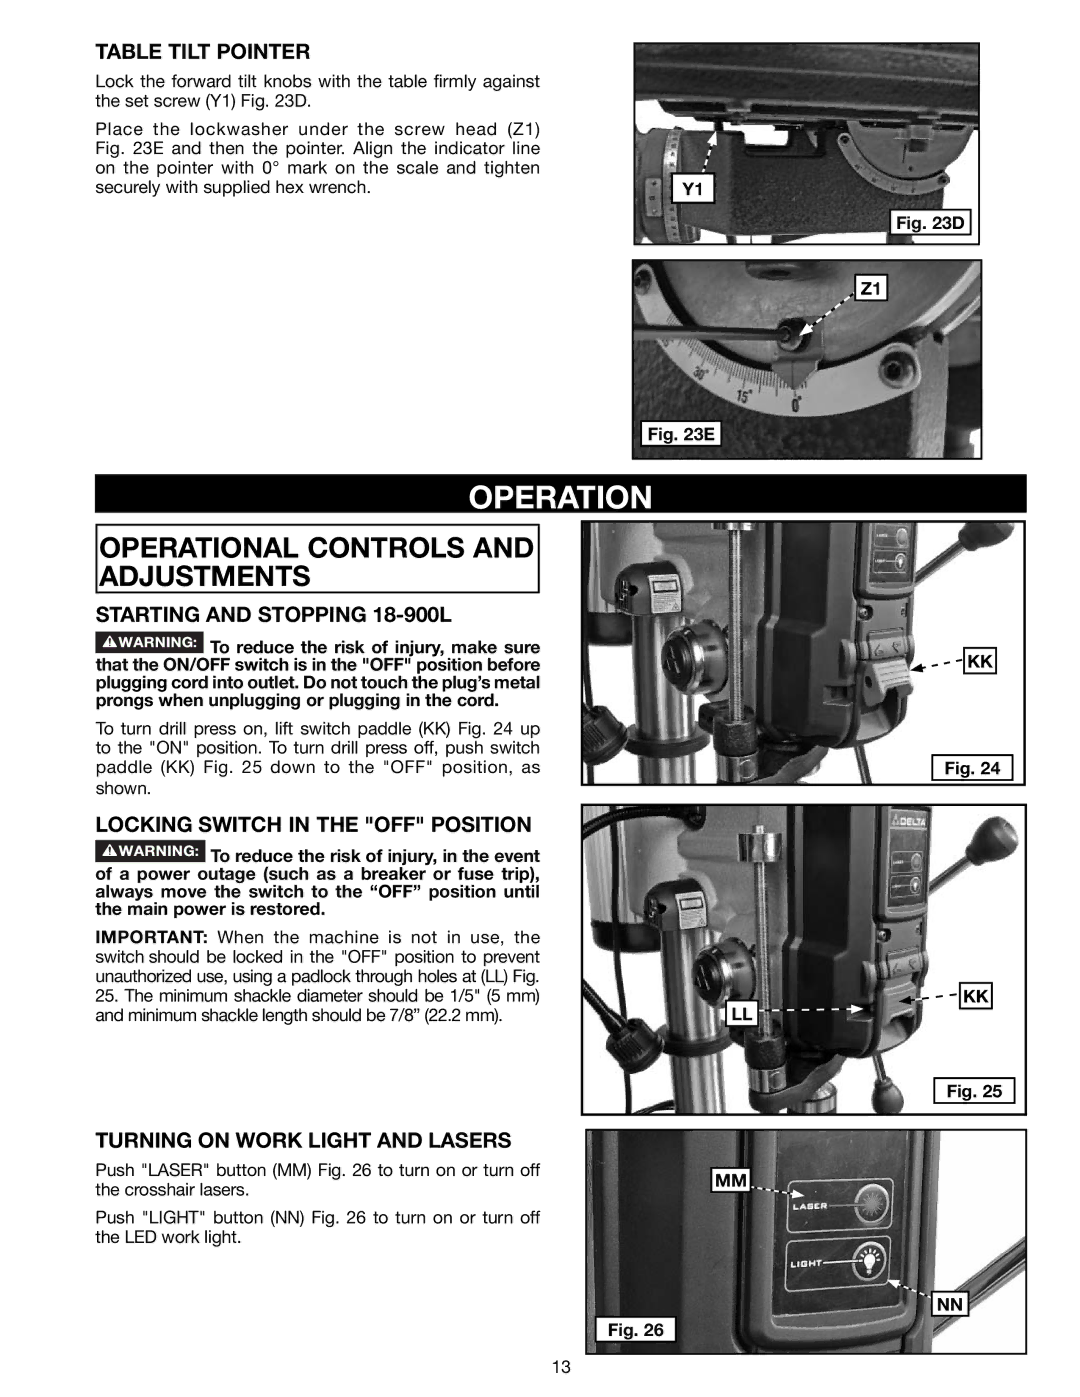
Lock the forward tilt knobs with the table firmly against the set screw (Y1) Fig. 23D.
Place the lockwasher under the screw head (Z1) Fig. 23E and then the pointer. Align the indicator line on the pointer with 0° mark on the scale and tighten securely with supplied hex wrench.
Y1 |
Fig. 23D
Z1
Fig. 23E
OPERATION
OPERATIONAL CONTROLS AND ADJUSTMENTS
STARTING AND STOPPING 18-900L
![]() To reduce the risk of injury, make sure that the ON/OFF switch is in the "OFF" position before plugging cord into outlet. Do not touch the plug’s metal prongs when unplugging or plugging in the cord.
To reduce the risk of injury, make sure that the ON/OFF switch is in the "OFF" position before plugging cord into outlet. Do not touch the plug’s metal prongs when unplugging or plugging in the cord.
To turn drill press on, lift switch paddle (KK) Fig. 24 up to the "ON" position. To turn drill press off, push switch paddle (KK) Fig. 25 down to the "OFF" position, as shown.
![]()
![]() KK
KK
Fig. 24
LOCKING SWITCH IN THE "OFF" POSITION
![]() To reduce the risk of injury, in the event of a power outage (such as a breaker or fuse trip), always move the switch to the “OFF” position until the main power is restored.
To reduce the risk of injury, in the event of a power outage (such as a breaker or fuse trip), always move the switch to the “OFF” position until the main power is restored.
IMPORTANT: When the machine is not in use, the switch should be locked in the "OFF" position to prevent unauthorized use, using a padlock through holes at (LL) Fig.
25.The minimum shackle diameter should be 1/5" (5 mm) and minimum shackle length should be 7/8” (22.2 mm).
![]()
![]() KK LL
KK LL ![]()
Fig. 25
TURNING ON WORK LIGHT AND LASERS
Push "LASER" button (MM) Fig. 26 to turn on or turn off the crosshair lasers.
Push "LIGHT" button (NN) Fig. 26 to turn on or turn off the LED work light.
MM
NN
Fig. 26
13