9PLAYING CDs
About Compact Discs
ENGLISH
Normal Playback
CD player
2,435
COMPACT
Only discs with the mark shown left can be played on the
Disc | Remarks |
B![]()
![]()
PERSONAL COMPONENT SYSTEM / COMPACT DISC PLAYER
DIGITAL AUDIO
| COMPACT |
Use compact discs that include the | mark. |
| DIGITAL AUDIO |
CD’s with special shapes
Attempting to do so may damage the set. Do not use such CD’s.
CD |
| |
|
| |
CDV | Only the audio part is | |
played. | ||
| ||
|
| |
CD singles |
| |
(8 cm discs) |
|
OPEN/CLOSE
3
ON / STANDBY
/ | / |
1 |
|
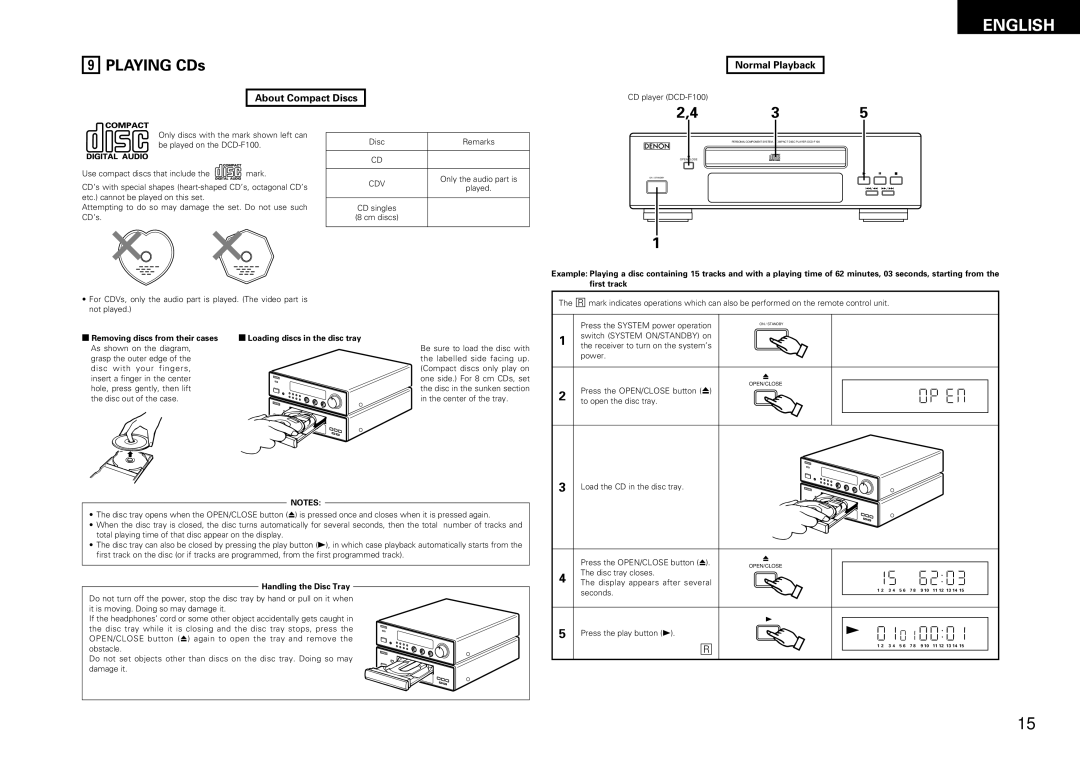
Example: Playing a disc containing 15 tracks and with a playing time of 62 minutes, 03 seconds, starting from the first track
•For CDVs, only the audio part is played. (The video part is not played.)
2 Removing discs from their cases | 2 Loading discs in the disc tray |
|
As shown on the diagram, |
| Be sure to load the disc with |
grasp the outer edge of the |
| the labelled side facing up. |
disc with your fingers, |
| (Compact discs only play on |
insert a finger in the center | B | one side.) For 8 cm CDs, set |
hole, press gently, then lift |
| the disc in the sunken section |
the disc out of the case. | B | in the center of the tray. |
|
|
NOTES:
•The disc tray opens when the OPEN/CLOSE button (5) is pressed once and closes when it is pressed again.
•When the disc tray is closed, the disc turns automatically for several seconds, then the total number of tracks and total playing time of that disc appear on the display.
•The disc tray can also be closed by pressing the play button (1), in which case playback automatically starts from the first track on the disc (or if tracks are programmed, from the first programmed track).
| Handling the Disc Tray |
|
|
|
|
| |
Do not turn off the power, stop the disc tray by hand or pull on it when |
| ||
it is moving. Doing so may damage it. |
| ||
If the headphones’ cord or some other object accidentally gets caught in |
| ||
the disc tray while it is closing and the disc tray stops, press the | B | ||
| |||
OPEN/CLOSE button (5) again to open the tray and remove the |
| ||
obstacle. | B | ||
Do not set objects other than discs on the disc tray. Doing so may |
| ||
damage it. |
| ||
|
|
|
|
The | R mark indicates operations which can also be performed on the remote control unit. | |
| Press the SYSTEM power operation | ON / STANDBY |
1 | switch (SYSTEM ON/STANDBY) on |
|
the receiver to turn on the system’s |
| |
| power. |
|
| Press the OPEN/CLOSE button (5) | OPEN/CLOSE |
2 |
| |
to open the disc tray. |
| |
| B |
3 Load the CD in the disc tray. | B |
| Press the OPEN/CLOSE button (5). | OPEN/CLOSE |
|
|
|
|
|
|
|
4 | The disc tray closes. |
|
|
|
|
|
|
|
|
The display appears after several |
|
|
|
|
|
|
|
| |
| seconds. | 1 2 | 3 4 | 5 6 | 7 8 | 9 10 | 11 12 | 13 14 | 15 |
|
|
|
|
|
|
|
|
| |
5 | Press the play button (1). |
|
|
|
|
|
|
|
|
| R | 1 2 | 3 4 | 5 6 | 7 8 | 9 10 | 11 12 | 13 14 | 15 |
|
|
|
|
|
|
|
|
|
15
