Channel Calibration

The next step is to adjust the output level of each channel so that they are properly matched. This must be done to insure a correct presentation of multi- channel sound sources. The adjustment must be as precise as possible, and is almost impossible to accomplish by ear. Therefore, we recommend that you use a Sound Level Meter. This device insures that all loudspeaker levels are precisely matched and set accurately. (The Radio Shack Analog Sound level Meter is inexpensive and suitable for this task.)

NOTE: If for any reason you are not sure that you can accomplish this calibration task or have any doubts as to how it should be done, please contact Outlaw Audio’s technical support BEFORE attempting this process.

Set the meter to Slow response and “C” weighting. Set it to the 70 or 80dB sensitivity scale. Position the meter at the approximate center of your listening area, at average ear height [approximately 40-46 inches (102-117 cm)] with its microphone positioned vertically (pointing at the ceiling). Don’t aim the microphone at the speakers, as this will produce inaccurate results.

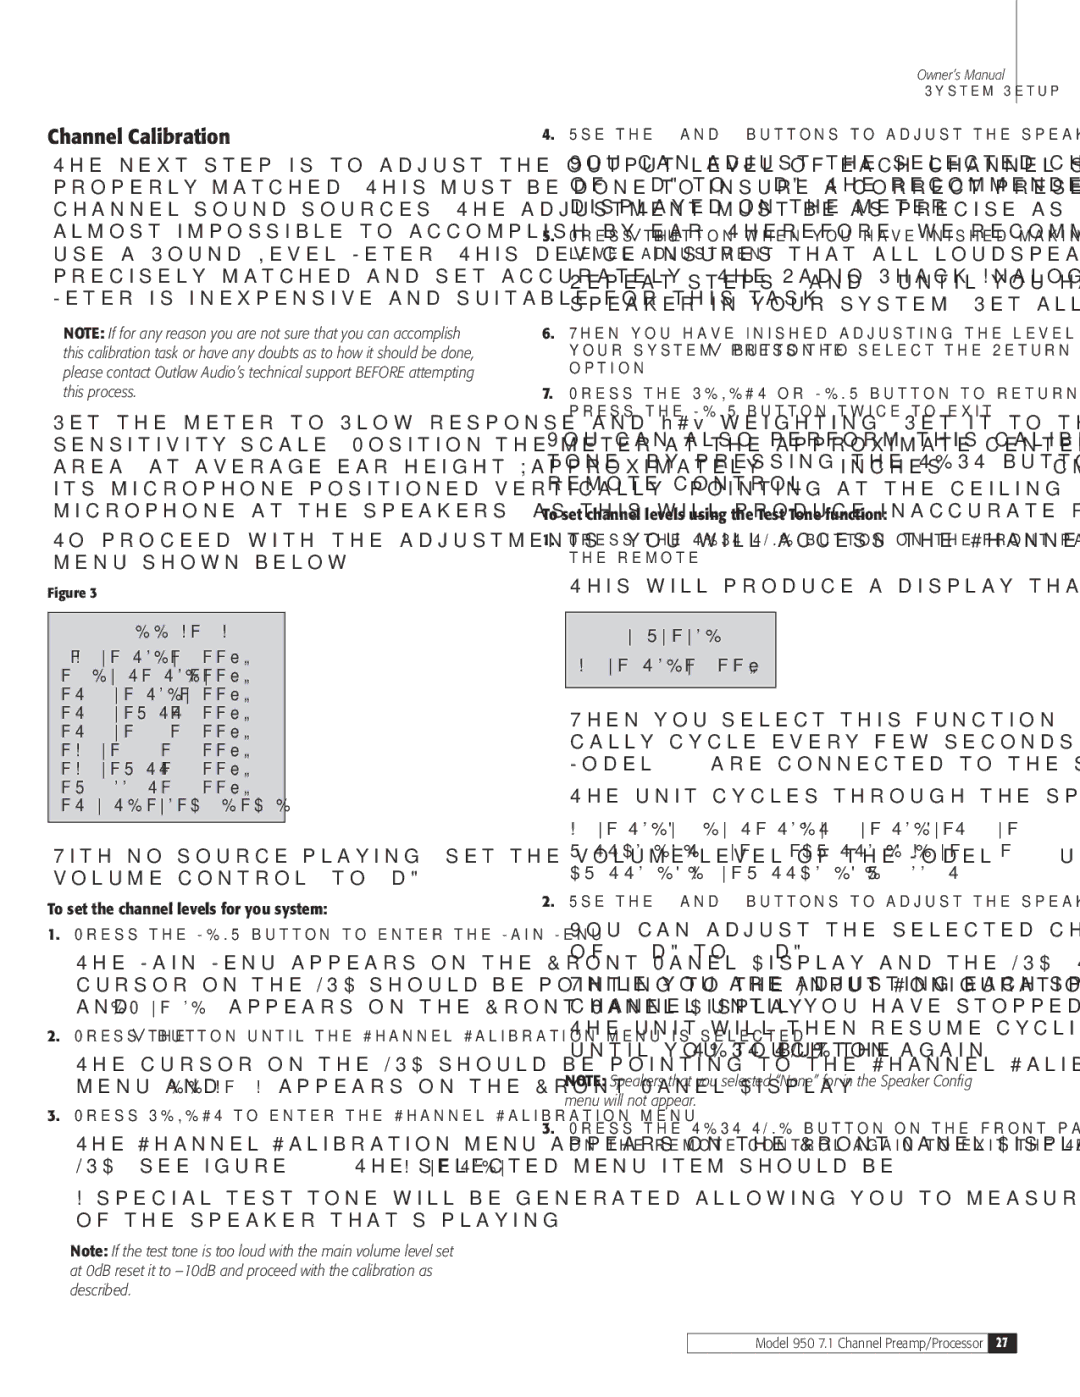
To proceed with the adjustments, you will access the Channel Calibration menu shown below.

Figure 3

CHANNEL CALIB

>LEFT FRONT : 0dB

CENTER FRONT : 0dB

RIGHT FRONT : 0dB

RIGHT SURR : 0dB

RIGHT BACK : 0dB

LEFT

BACK

:

0dB

LEFT

SURR

:

0dB

SUBWOOFER

:

0dB

RETURN TO MAIN MENU

With no source playing, set the volume level of the Model 950, using the main volume control, to 0dB.

To set the channel levels for you system:

1.Press the MENU button to enter the Main Menu.

The Main Menu appears on the Front Panel Display and the OSD. The

cursor on the OSD should be pointing to the Input Configuration menu and INPUT CONFIG appears on the Front Panel Display.

2.Press the button until the Channel Calibration menu is selected.

The cursor on the OSD should be pointing to the Channel Calibration menu and CHANNEL CALIB appears on the Front Panel Display.

3.Press SELECT to enter the Channel Calibration menu.

The Channel Calibration menu appears on the Front Panel Display and the OSD (see figure 3). The selected menu item should be LEFT FRONT.

A special test tone will be generated allowing you to measure the output of the speaker that’s playing.

Note: If the test tone is too loud with the main volume level set at 0dB reset it to –10dB and proceed with the calibration as described.

Owner’s Manual

System Setup

4.Use the < and > buttons to adjust the speaker level.

You can adjust the selected channel level in 1dB steps across a range of -15dB to +10dB. The recommended calibration level is 75dB/SPL as displayed on the meter.

5.Press the button when you have finished making the Left Front level adjustment.

Repeat steps 5 and 6 until you have completed setting the level for each speaker in your system. Set all the levels to 75dB.

6.When you have finished adjusting the level for all the speakers in your system, press the button to select the Return to Main Menu option.

7.Press the SELECT or MENU button to return to the Main Menu, or press the MENU button twice to exit.

You can also perform this calibration at any time by using the built in test tone, by pressing the TEST button the front panel of the Model 950 or the remote control.

To set channel levels using the Test Tone function:

1.Press the TEST TONE button on the front panel or TEST button on the remote.

This will produce a display that shows:

TEST TONE

LEFT FRONT : 0dB

When you select this function, the Model 950’s Test Tone will automati- cally cycle every few seconds through all the speakers you have told the Model 950 are connected to the system.

The unit cycles through the speakers in the following sequence:

LEFT FRONTCENTER FRONTRIGHT FRONTRIGHT SURR(OUND)RIGHT BACK (SURROUND)LEFT BACK (SURROUND)LEFT SURR(OUND)SUBWOOFER

2.Use the < and > buttons to adjust the speaker level.

You can adjust the selected channel level in 1dB steps across a range of -15dB to +10dB.

While you are adjusting each speaker, the Test Tone will remain on that channel until you have stopped changing the volume for a few seconds. The unit will then resume cycling the Test Tone from speaker to speaker, until you touch the TEST TONE button again.

NOTE: Speakers that you selected “None” for in the Speaker Config menu will not appear.

3.Press the TEST TONE button on the front panel or the TEST button on the remote control again to exit the Test Tone function.

Model 950 7.1 Channel Preamp/Processor

27

Page 27
Image 27
Dolby Laboratories 950 7.1 owner manual Channel Calibration, This will produce a display that shows, Left, Test Tone

950 7.1 specifications

Dolby Laboratories has long been synonymous with cutting-edge audio technology, and the introduction of the Dolby 950 7.1 system is a testament to its commitment to delivering immersive sound experiences. Designed for both professional and home environments, the Dolby 950 7.1 system offers a comprehensive suite of features that elevate audio quality to new heights.

At its core, the Dolby 950 7.1 system incorporates a seven-channel setup, which includes left, center, right, left surround, right surround, left back, and right back channels, coupled with a powerful subwoofer for enhanced low-frequency response. This arrangement allows for a truly enveloping soundstage, capable of recreating the nuances of a live performance or the explosive action of a blockbuster film.

One of the standout features of the Dolby 950 7.1 system is its sophisticated audio processing technology. Dolby Digital Plus support ensures that users can experience high-definition audio without compromising on quality. This format allows for increased bit rates and efficient compression, making it ideal for streaming services and Blu-ray content.

Additionally, the system benefits from Dolby Atmos technology, which adds a new dimension of sound by allowing sound designers to place audio elements in three-dimensional space. This innovative approach creates a more natural and realistic listening experience, as sounds can now come from above as well as from the traditional horizontal plane.

Furthermore, the Dolby 950 7.1 is designed with user-friendliness in mind, featuring intuitive setup and calibration options. Advanced room correction technology adjusts audio output based on the unique acoustics of any given space, ensuring optimal performance regardless of environmental factors.

For those looking to integrate this system into a home theater, the Dolby 950 7.1 provides seamless connectivity options. HDMI inputs, optical and coaxial digital inputs, and support for various streaming protocols make it easy to connect to a wide range of devices, from gaming consoles to smart TVs.

In summary, the Dolby 950 7.1 system exemplifies the pinnacle of modern audio technology, boasting features such as seven-channel surround sound, Dolby Digital Plus, and Dolby Atmos capabilities. With its focus on immersive experiences, user-friendly setup, and versatile connectivity, the Dolby 950 7.1 is truly a game-changer for audio enthusiasts and content creators alike. Whether in a professional studio or a personal home theater, this system delivers an unparalleled auditory experience.