CONNECTING A PC
Use a standard DB9 (male/female) computer cable to connect a PC to the DX810. The
UPGRADING THE FIRMWARE
Before attempting to go "Online" with the DX810, you must upgrade the firmware in the DX810's flash memory.
1.Connect the PC to the DX810 as described above.
2.Open the DX810 v3.3 software. DO NOT click the On Line button yet.
3.Click Advanced in the top menu bar and select Firmware Upgrade.
4.Click Select File in the Firmware Upgrade window and the Select OS Upgrade File dialog box opens. Browse to the location of the OS upgrade file (with a .pkt extension) on your hard drive, CD, or floppy drive and click Open, then click Upgrade. You can monitor the progress in the Firmware Upgrade window.
5.Upgrade Successful appears in the Status window when it is complete.
6.Close the Firmware Upgrade window and click the On Line button to connect to the DX810.
Crosspoint
Matrix
Section
Input
Section
Important!
Note: Due to software reallocation necessary to provide new features in Version 3.x, files from previous DX810
OVERVIEW
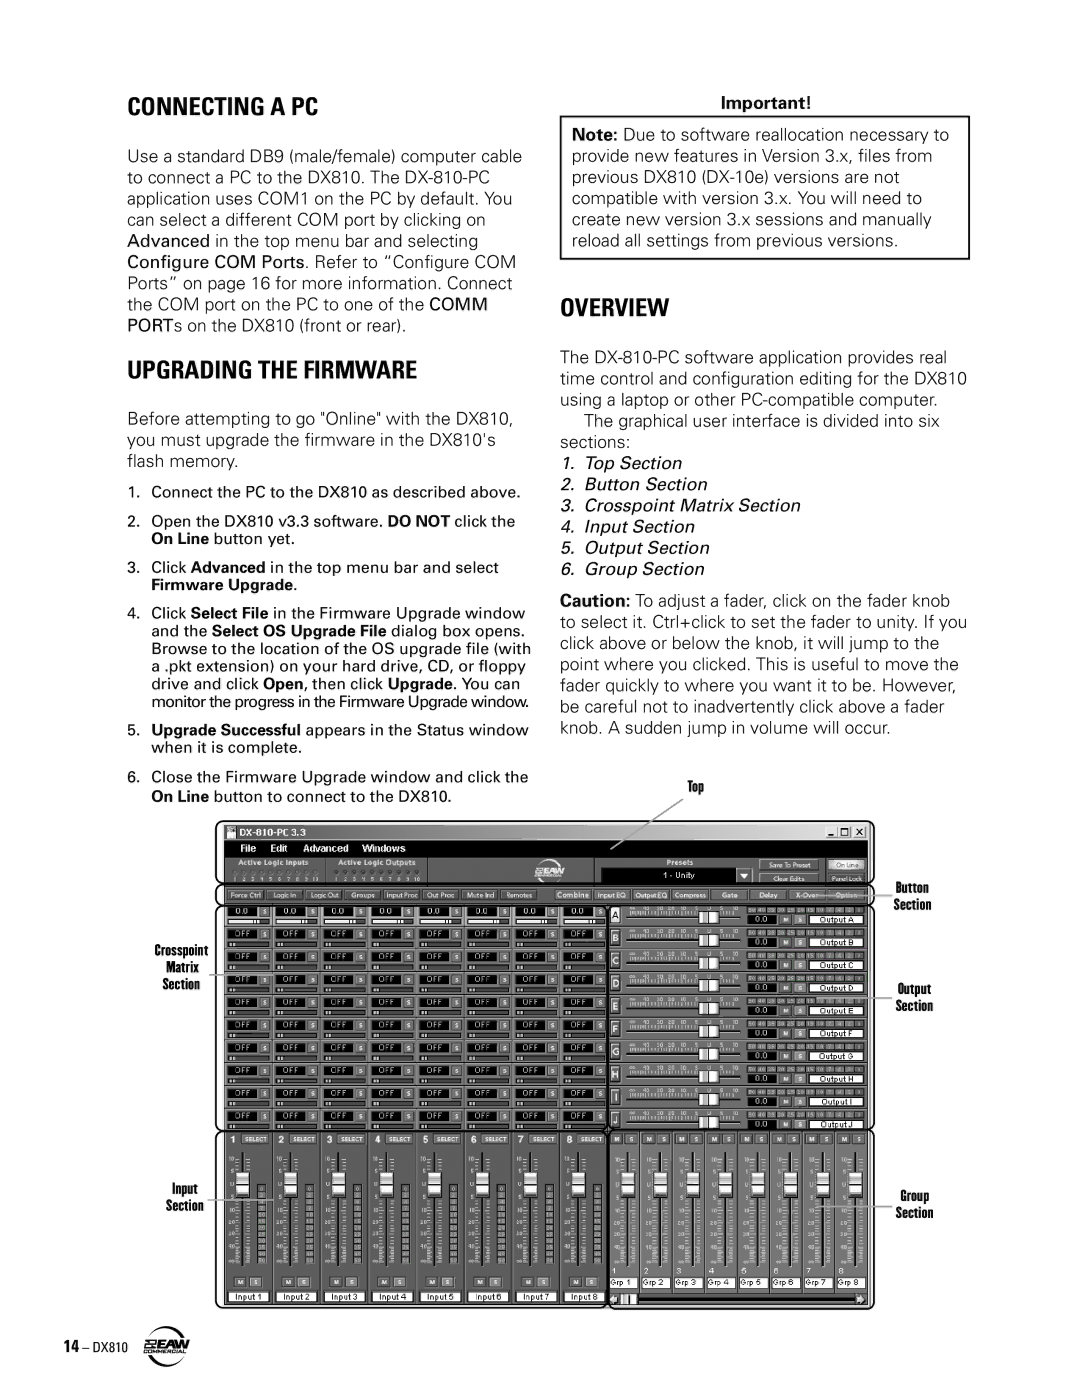
The
The graphical user interface is divided into six sections:
1.Top Section
2.Button Section
3.Crosspoint Matrix Section
4.Input Section
5.Output Section
6.Group Section
Caution: To adjust a fader, click on the fader knob to select it. Ctrl+click to set the fader to unity. If you click above or below the knob, it will jump to the point where you clicked. This is useful to move the fader quickly to where you want it to be. However, be careful not to inadvertently click above a fader knob. A sudden jump in volume will occur.
Top
Button
Section
Output
Section
Group
Section
14 – DX810
