General Setup Procedure
The following is a general guideline for the setup procedure you must follow when setting up the device on a LAN.
1.Connect the Diva 2440 to the hub on your LAN.
2.Contact the Diva 2440 using a computer on your LAN as described in Step 2: Access the Diva 2440 Web Interface on page 18. If you are using Windows, this is more easily done with the Diva Assistant (see Using the Diva Assistant to set on a LAN).
Note: If you cannot contact the device over a LAN, use a single
3.Complete the Internet Wizard as described in Step 3: Complete the Internet Wizard on page 19, then verify that the Internet is accessible from the required machines.
4.Adjust other LAN settings, such as those on a router or on the Diva 2440 itself.
Built-in DHCP Server
The Diva 2440 has a
Using the Diva Assistant to set on a LAN
The default LAN IP address for the Diva 2440 is 192.168.1.1. Normally, in order to contact the Diva 2440 through TCP/IP, your computer’s IP address must be on the same subnet as the device. For example, your computer could be set to 192.168.1.2.
If at least once computer on your LAN uses Windows, install the Diva Assistant on that computer and use it to contact and configure the Diva 2440. The Network Wizard, a feature of the Diva Assistant, will contact the Diva 2440 over a network, without having to change the computer’s TCP/IP settings.
To use the Network Wizard,
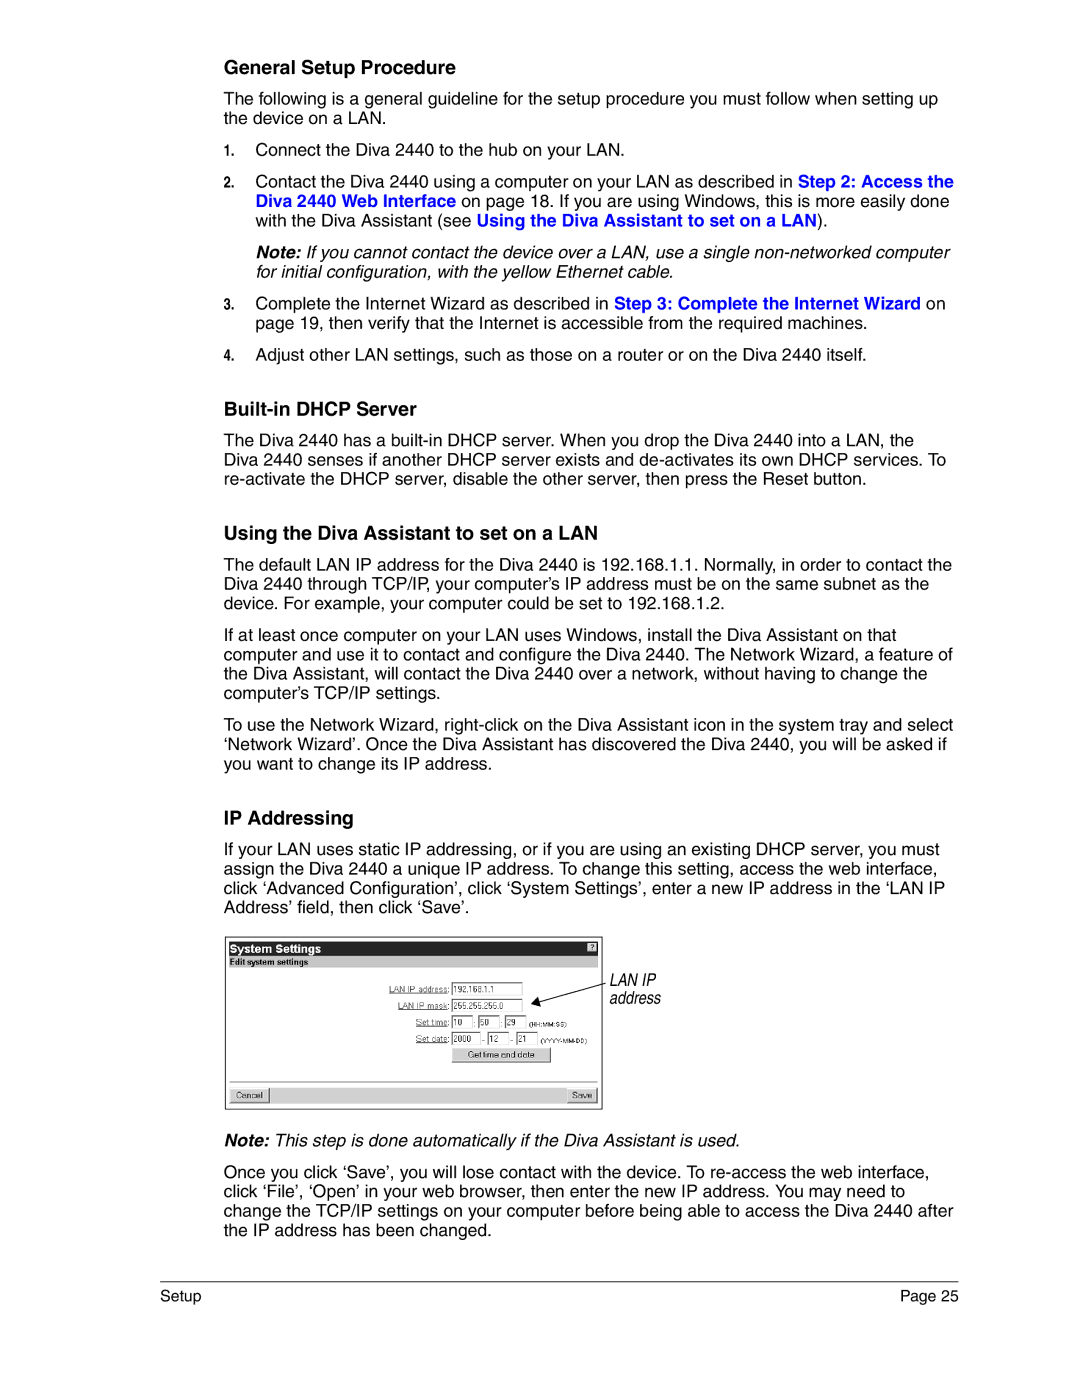
IP Addressing
If your LAN uses static IP addressing, or if you are using an existing DHCP server, you must assign the Diva 2440 a unique IP address. To change this setting, access the web interface, click ‘Advanced Configuration’, click ‘System Settings’, enter a new IP address in the ‘LAN IP Address’ field, then click ‘Save’.
LAN IP address
Note: This step is done automatically if the Diva Assistant is used.
Once you click ‘Save’, you will lose contact with the device. To
Setup | Page 25 |