Computer Input
Image Level Adjustment
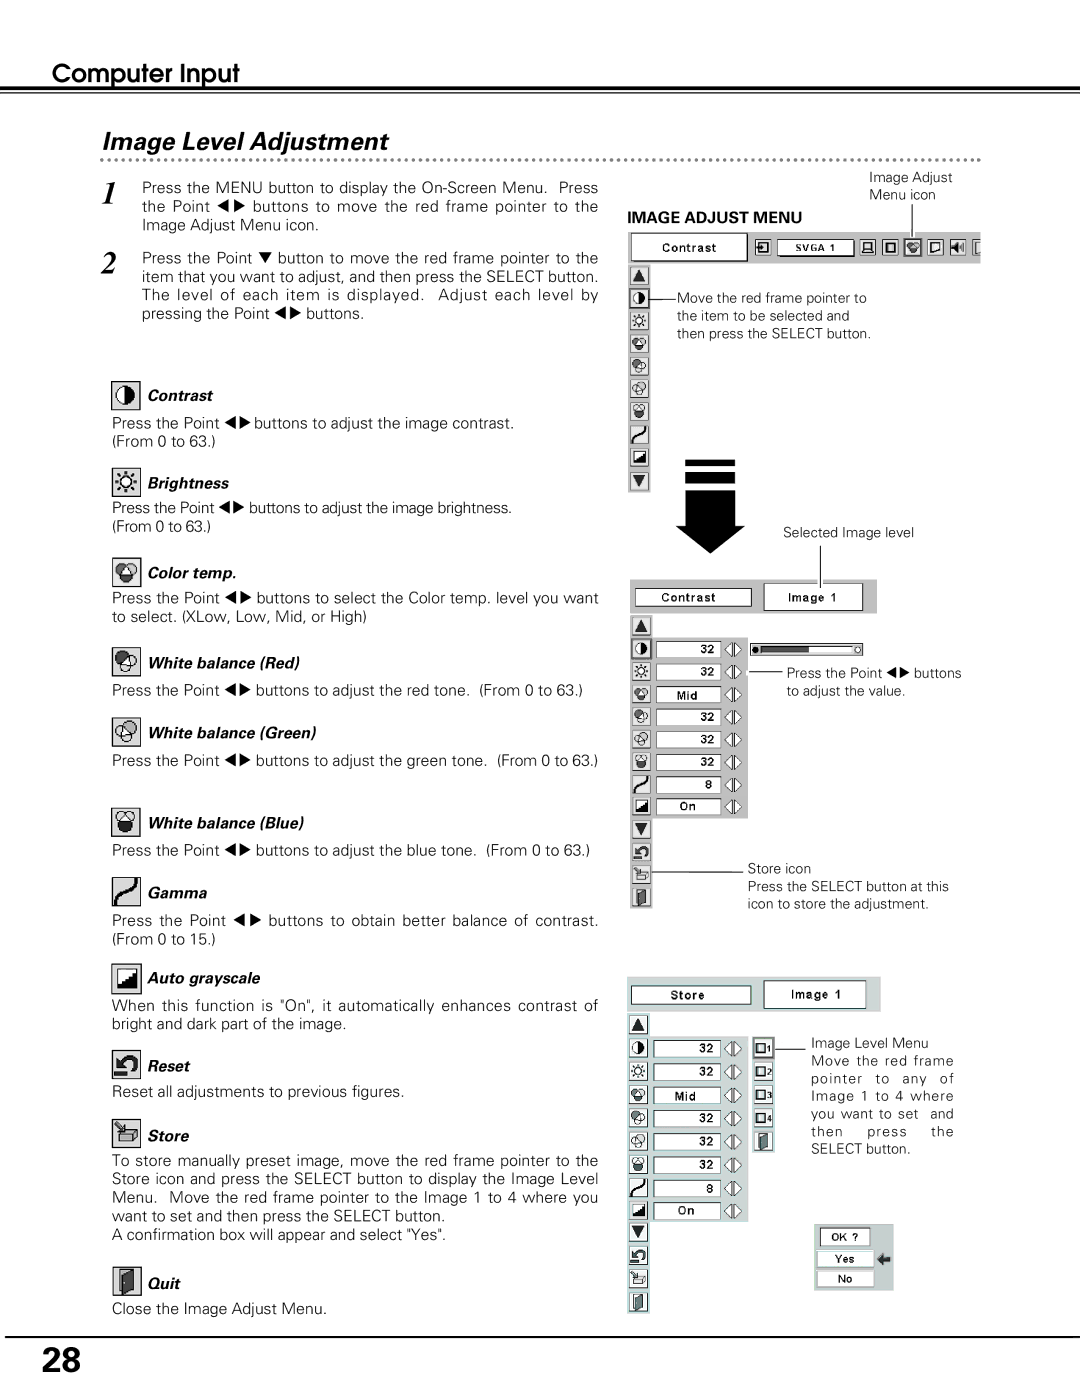
1 | Press the MENU button to display the |
| the Point 7 8 buttons to move the red frame pointer to the |
| Image Adjust Menu icon. |
2 | Press the Point d button to move the red frame pointer to the |
| item that you want to adjust, and then press the SELECT button. |
The level of each item is displayed. Adjust each level by pressing the Point 78 buttons.
![]() Contrast
Contrast
Press the Point 78buttons to adjust the image contrast. (From 0 to 63.)
![]() Brightness
Brightness
Press the Point 78 buttons to adjust the image brightness. (From 0 to 63.)
 Color temp.
Press the Point 78 buttons to select the Color temp. level you want to select. (XLow, Low, Mid, or High)
![]() White balance (Red)
White balance (Red)
Press the Point 78 buttons to adjust the red tone. (From 0 to 63.)
![]() White balance (Green)
White balance (Green)
Press the Point 78 buttons to adjust the green tone. (From 0 to 63.)
![]() White balance (Blue)
White balance (Blue)
Press the Point 78 buttons to adjust the blue tone. (From 0 to 63.)
![]() Gamma
Gamma
Press the Point 7 8 buttons to obtain better balance of contrast. (From 0 to 15.)
 Auto grayscale
When this function is "On", it automatically enhances contrast of bright and dark part of the image.
 Reset
Reset
Reset all adjustments to previous figures.
 Store
Store
To store manually preset image, move the red frame pointer to the Store icon and press the SELECT button to display the Image Level Menu. Move the red frame pointer to the Image 1 to 4 where you want to set and then press the SELECT button.
A confirmation box will appear and select "Yes".
 Quit
Quit
Close the Image Adjust Menu.
Image Adjust
Menu icon
IMAGE ADJUST MENU
Move the red frame pointer to the item to be selected and then press the SELECT button.
Selected Image level
![]() Press the Point 78 buttons to adjust the value.
Press the Point 78 buttons to adjust the value.
Store icon
Press the SELECT button at this icon to store the adjustment.
Image Level Menu Move the red frame pointer to any of Image 1 to 4 where you want to set and then press the SELECT button.
28