2. CABLE CONNECTION
Digital Input
The monitor supports the following resolutions only.
CE210W
Resolution | Frequency | Dot Clock | Remarks | |
640×480 | 60Hz |
| VGA | |
720×400 | 70Hz |
| VGA TEXT | |
800×600 | 60Hz |
| VESA | |
1024×768 | 60Hz | 120 MHz (Max.) | VESA | |
1280×960 | 60Hz | VESA | ||
| ||||
1280×1024 | 60Hz |
| VESA | |
1680×1050 | 60Hz |
| VESA CVT RB | |
|
|
| (Reduced Blanking) |
CE240W
Resolution | Frequency | Dot Clock | Remarks | |
640×480 | 60Hz |
| VGA | |
720×400 | 70Hz |
| VGA TEXT | |
800×600 | 60Hz |
| VESA | |
1024×768 | 60Hz |
| VESA | |
1280×960 | 60Hz |
| VESA | |
1280×1024 | 60Hz | 162 MHz (Max.) | VESA | |
1600×1200 | 60Hz | VESA | ||
| ||||
1680×1050 | 60Hz |
| VESA CVT, | |
|
|
| VESA CVT RB | |
|
|
| (Reduced Blanking) | |
1920×1200 | 60Hz |
| VESA CVT RB | |
|
|
| (Reduced Blanking) |
2-2. Connecting the Signal Cable
NOTE
•Be sure that the power switches of both the PC and the monitor are OFF.
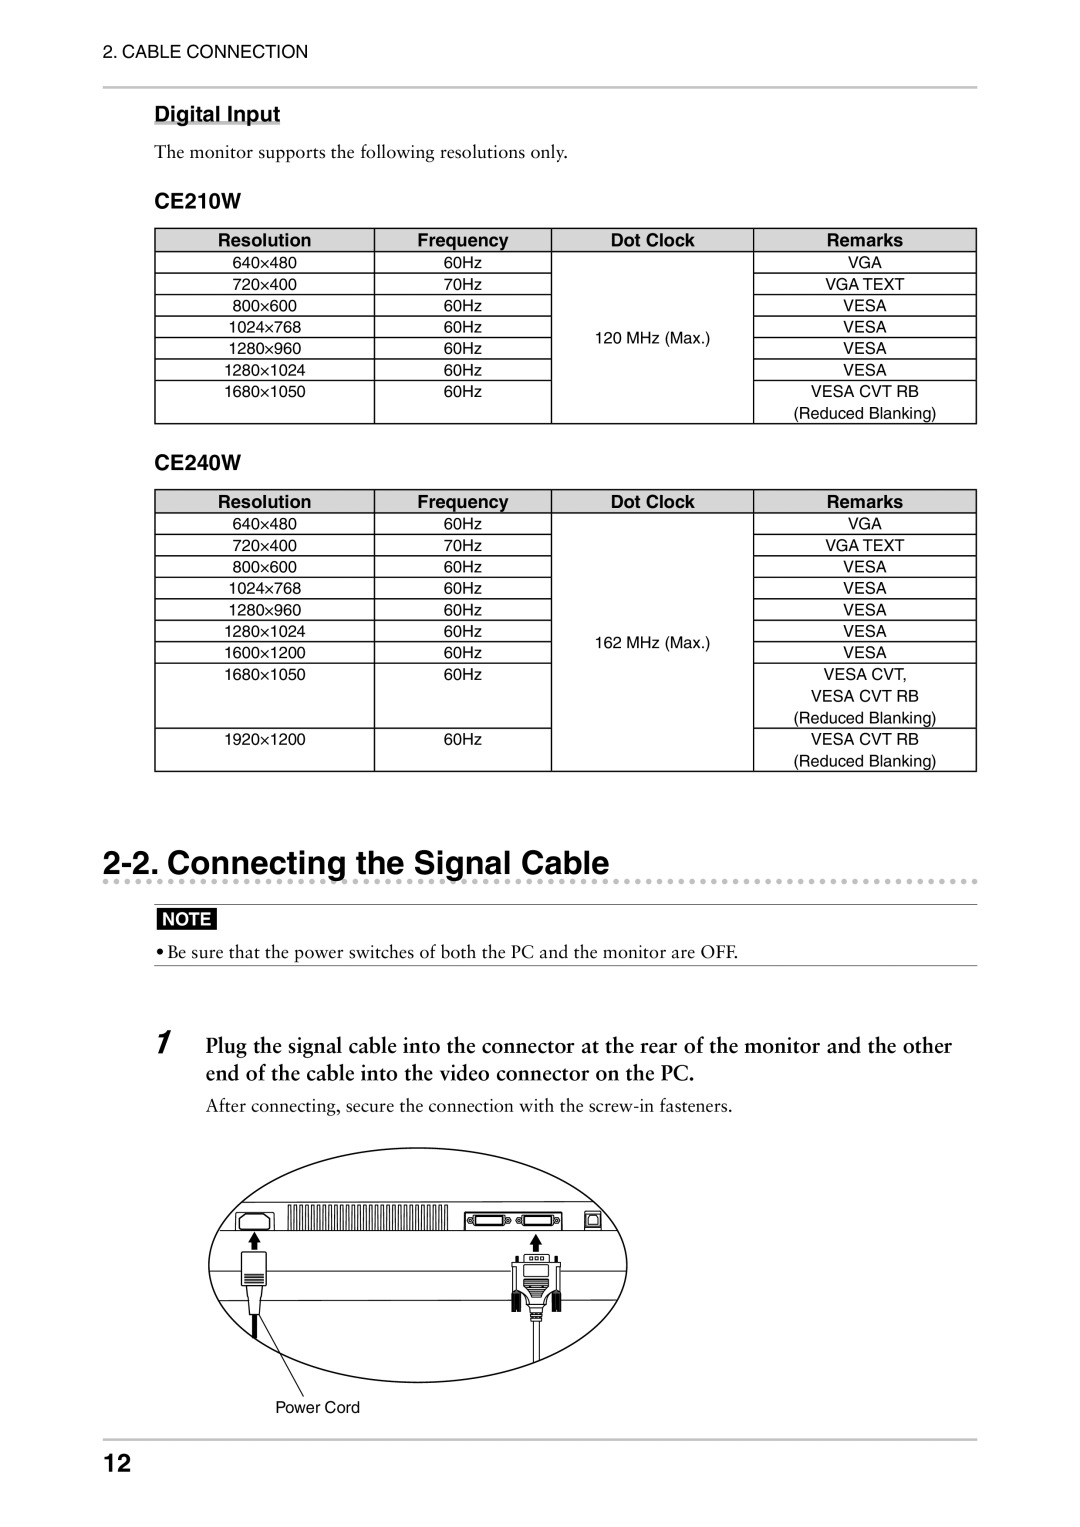
1Plug the signal cable into the connector at the rear of the monitor and the other end of the cable into the video connector on the PC.
After connecting, secure the connection with the
Power Cord
12