1 | Splitting the Screen | |
The live image currently on camera and an image in the | ||
| ||
| memory can be displayed together on the split screen. | |
2 | 1. Read out the image to be displayed in the split | |
screen from the memory by the image memory | ||
| ||
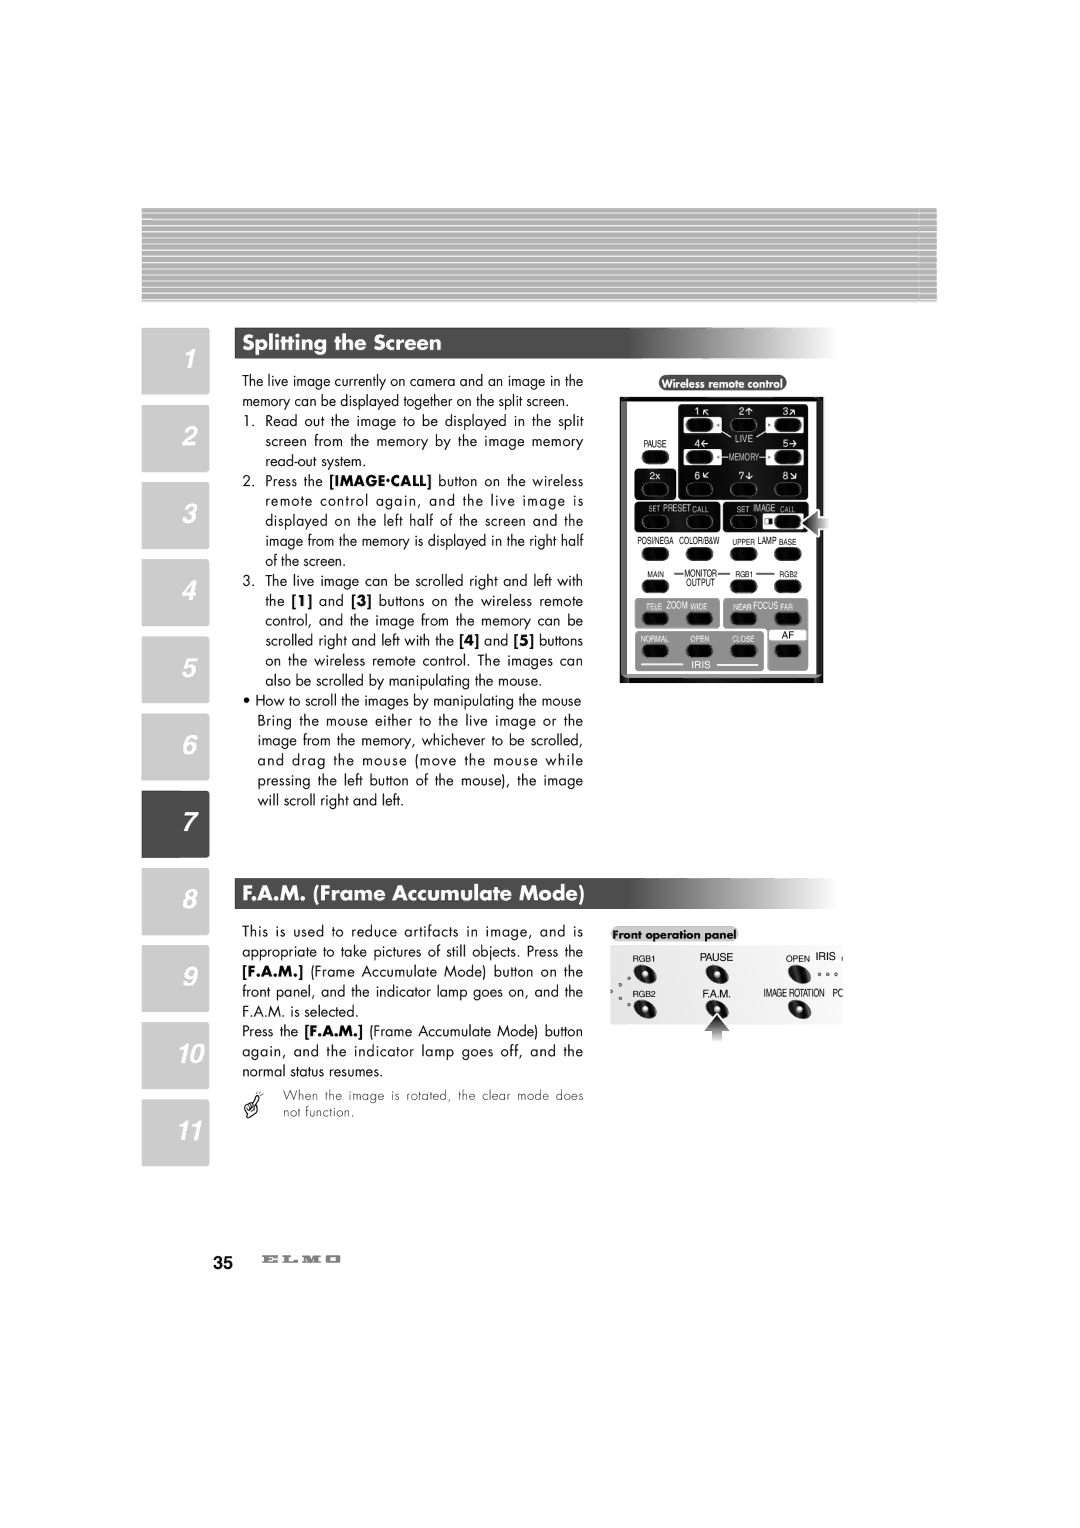
| 2. Press the [IMAGE.CALL] button on the wireless | |
3 | remote control again, and the live image is | |
displayed on the left half of the screen and the | ||
| image from the memory is displayed in the right half | |
| of the screen. | |
4 | 3. The live image can be scrolled right and left with | |
the [1] and [3] buttons on the wireless remote | ||
| control, and the image from the memory can be | |
| scrolled right and left with the [4] and [5] buttons | |
5 | on the wireless remote control. The images can | |
also be scrolled by manipulating the mouse. | ||
| ||
| • How to scroll the images by manipulating the mouse | |
6 | Bring the mouse either to the live image or the | |
image from the memory, whichever to be scrolled, | ||
and drag the mouse (move the mouse while | ||
| ||
| pressing the left button of the mouse), the image | |
7 | will scroll right and left. | |
|
8 | F.A.M. (Frame Accumulate Mode) | |
| This is used to reduce artifacts in image, and is | |
9 | appropriate to take pictures of still objects. Press the | |
[F.A.M.] (Frame Accumulate Mode) button on the | ||
front panel, and the indicator lamp goes on, and the | ||
| ||
| F.A.M. is selected. | |
10 | Press the [F.A.M.] (Frame Accumulate Mode) button | |
again, and the indicator lamp goes off, and the | ||
| normal status resumes. |
When the image is rotated, the clear mode does not function.
11
Wireless remote control
PAUSE |
| LIVE |
|
|
|
| |
|
| MEMORY |
|
2x |
|
|
|
SET PRESET CALL | SET IMAGE CALL | ||
POSI/NEGA | COLOR/B&W | UPPER LAMP BASE | |
MAIN | MONITOR | RGB1 | RGB2 |
| OUTPUT |
|
|
TELE ZOOM WIDE | NEAR FOCUS FAR | ||
NORMAL | OPEN | CLOSE | AF |
| |||
IRIS
Front operation panel
RGB1 | PAUSE | OPEN IRIS C |
RGB2 | F.A.M. | IMAGE ROTATION PO |
35
