Secondary Installation
Note: The Adjustable Surround can only be installed onto the Colonial or Classic Surrounds, it is not intended to be installed on its own with the Sonnet unit.
ASSEMBLY:
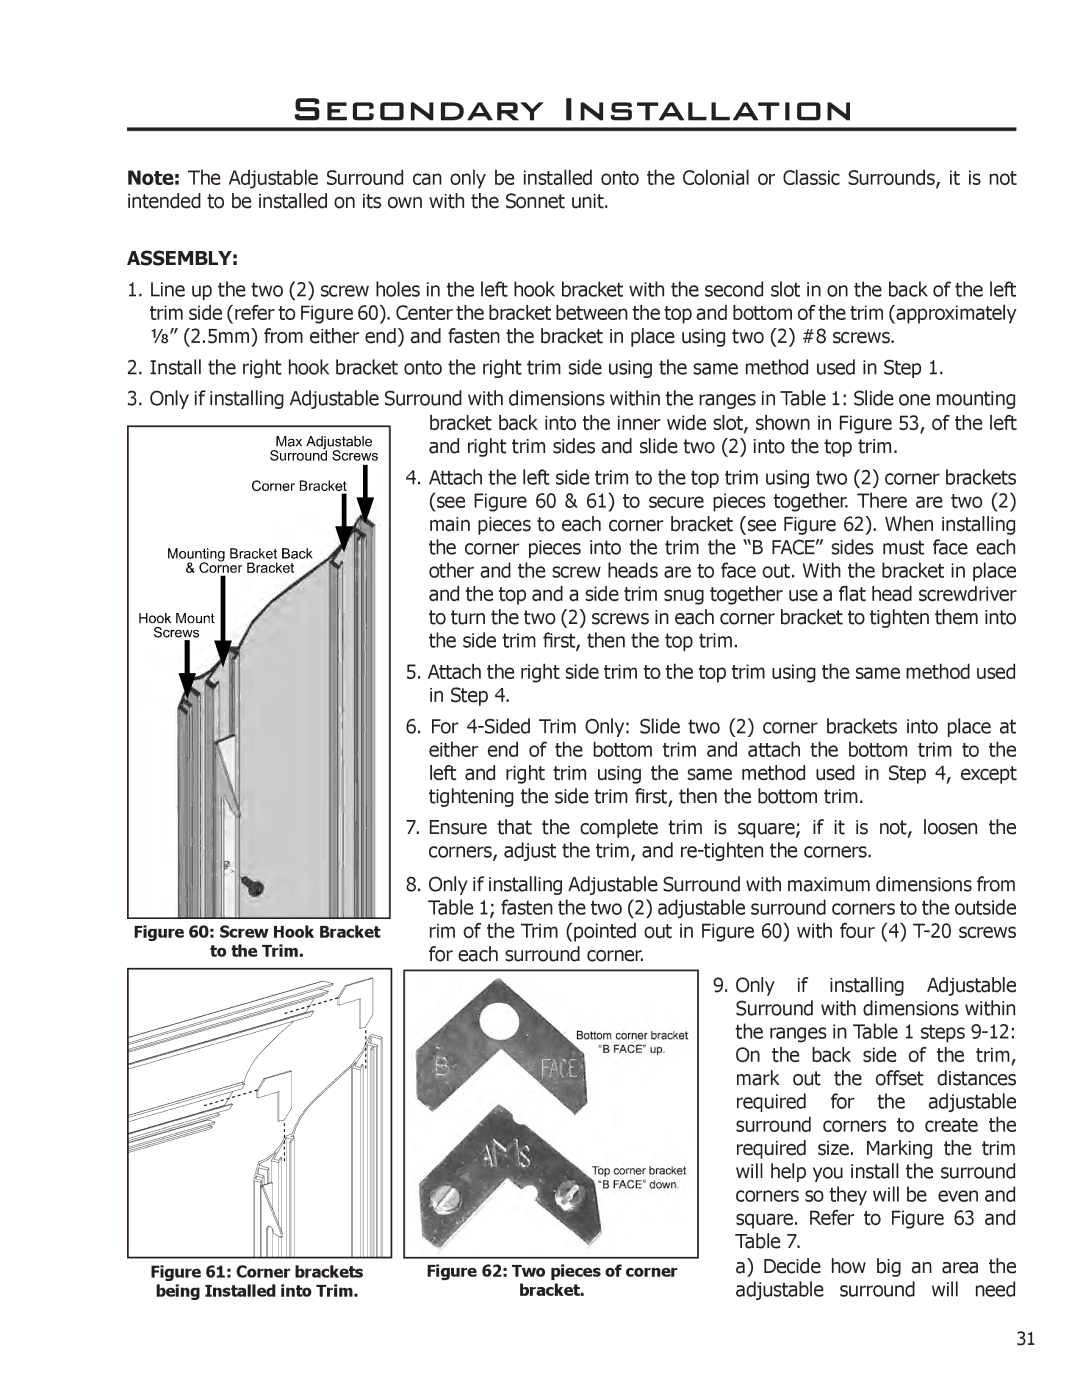
1.Line up the two (2) screw holes in the left hook bracket with the second slot in on the back of the left trim side (refer to Figure 60). Center the bracket between the top and bottom of the trim (approximately 1⁄8” (2.5mm) from either end) and fasten the bracket in place using two (2) #8 screws.
2.Install the right hook bracket onto the right trim side using the same method used in Step 1.
3.Only if installing Adjustable Surround with dimensions within the ranges in Table 1: Slide one mounting
Figure 60: Screw Hook Bracket
to the Trim.
bracket back into the inner wide slot, shown in Figure 53, of the left and right trim sides and slide two (2) into the top trim.
4.Attach the left side trim to the top trim using two (2) corner brackets (see Figure 60 & 61) to secure pieces together. There are two (2) main pieces to each corner bracket (see Figure 62). When installing the corner pieces into the trim the “B FACE” sides must face each other and the screw heads are to face out. With the bracket in place and the top and a side trim snug together use a flat head screwdriver to turn the two (2) screws in each corner bracket to tighten them into the side trim first, then the top trim.
5.Attach the right side trim to the top trim using the same method used in Step 4.
6.For
7.Ensure that the complete trim is square; if it is not, loosen the corners, adjust the trim, and
8.Only if installing Adjustable Surround with maximum dimensions from Table 1; fasten the two (2) adjustable surround corners to the outside rim of the Trim (pointed out in Figure 60) with four (4)
Figure 61: Corner brackets being Installed into Trim.
Figure 62: Two pieces of corner
bracket.
9.Only if installing Adjustable Surround with dimensions within the ranges in Table 1 steps
a)Decide how big an area the adjustable surround will need
31