What’s on the Remote?
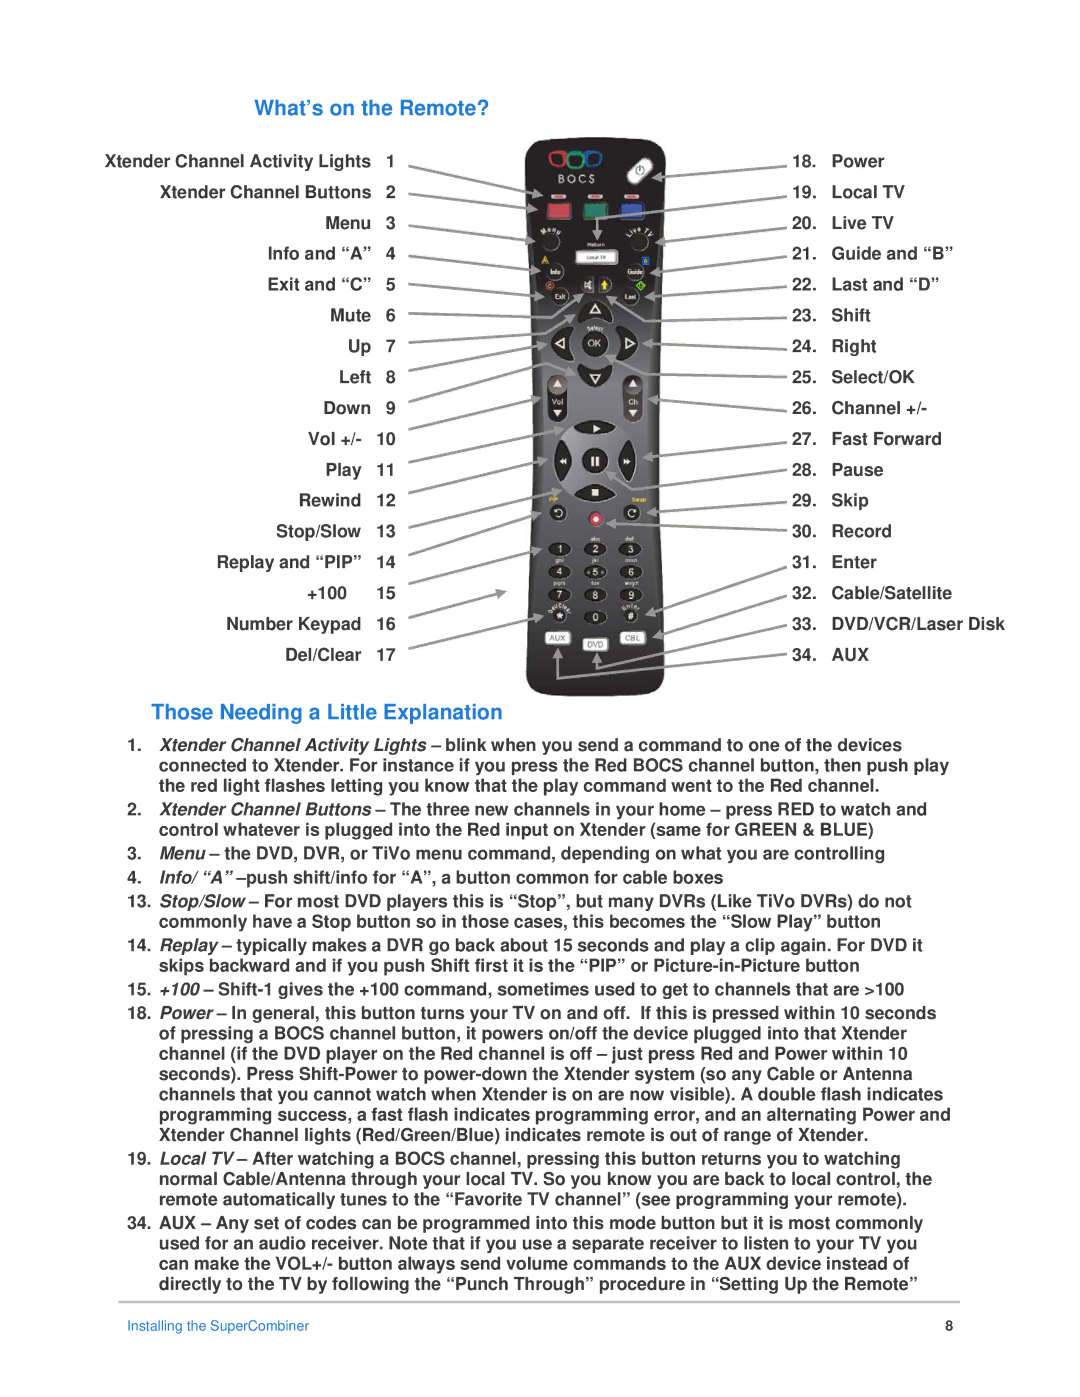
Xtender Channel Activity Lights | 1 | 18. | Power |
Xtender Channel Buttons | 2 | 19. | Local TV |
Menu | 3 | 20. | Live TV |
Info and “A” | 4 | 21. | Guide and “B” |
Exit and “C” | 5 | 22. | Last and “D” |
Mute | 6 | 23. | Shift |
Up | 7 | 24. | Right |
Left | 8 | 25. | Select/OK |
Down | 9 | 26. | Channel +/- |
Vol +/- | 10 | 27. | Fast Forward |
Play | 11 | 28. | Pause |
Rewind | 12 | 29. | Skip |
Stop/Slow | 13 | 30. | Record |
Replay and “PIP” | 14 | 31. | Enter |
+100 | 15 | 32. | Cable/Satellite |
Number Keypad | 16 | 33. | DVD/VCR/Laser Disk |
Del/Clear | 17 | 34. | AUX |
Those Needing a Little Explanation
1.Xtender Channel Activity Lights – blink when you send a command to one of the devices connected to Xtender. For instance if you press the Red BOCS channel button, then push play the red light flashes letting you know that the play command went to the Red channel.
2.Xtender Channel Buttons – The three new channels in your home – press RED to watch and control whatever is plugged into the Red input on Xtender (same for GREEN & BLUE)
3.Menu – the DVD, DVR, or TiVo menu command, depending on what you are controlling
4.Info/ “A”
13.Stop/Slow – For most DVD players this is “Stop”, but many DVRs (Like TiVo DVRs) do not commonly have a Stop button so in those cases, this becomes the “Slow Play” button
14.Replay – typically makes a DVR go back about 15 seconds and play a clip again. For DVD it skips backward and if you push Shift first it is the “PIP” or
15.+100 –
18.Power – In general, this button turns your TV on and off. If this is pressed within 10 seconds of pressing a BOCS channel button, it powers on/off the device plugged into that Xtender channel (if the DVD player on the Red channel is off – just press Red and Power within 10 seconds). Press
19.Local TV – After watching a BOCS channel, pressing this button returns you to watching normal Cable/Antenna through your local TV. So you know you are back to local control, the remote automatically tunes to the “Favorite TV channel” (see programming your remote).
34.AUX – Any set of codes can be programmed into this mode button but it is most commonly used for an audio receiver. Note that if you use a separate receiver to listen to your TV you can make the VOL+/- button always send volume commands to the AUX device instead of directly to the TV by following the “Punch Through” procedure in “Setting Up the Remote”
Installing the SuperCombiner | 8 |