Printer Set-up for the R800
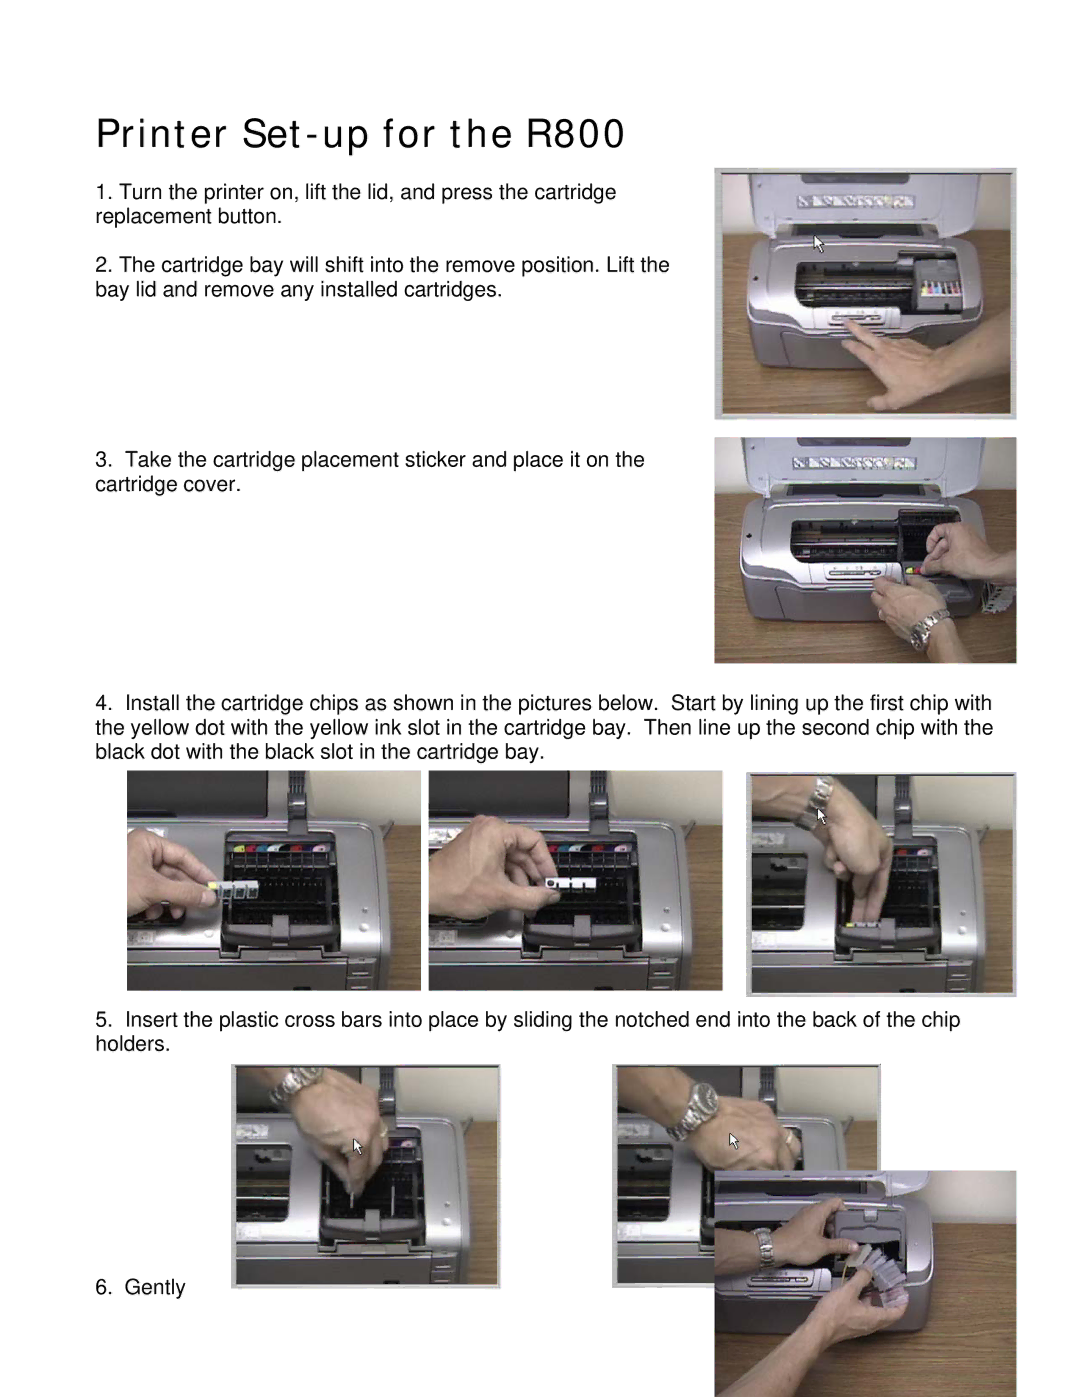
1.Turn the printer on, lift the lid, and press the cartridge replacement button.
2.The cartridge bay will shift into the remove position. Lift the bay lid and remove any installed cartridges.
3.Take the cartridge placement sticker and place it on the cartridge cover.
4.Install the cartridge chips as shown in the pictures below. Start by lining up the first chip with the yellow dot with the yellow ink slot in the cartridge bay. Then line up the second chip with the black dot with the black slot in the cartridge bay.
5.Insert the plastic cross bars into place by sliding the notched end into the back of the chip holders.
6. Gently