Open the PowerDriver window as instructed in “Printing the ColorSure Palette” outlined in Section II.
First, make sure you select your desired Substrate, Output (High Speed or High Quality), and the Mirror option from the Printing Preferences window. Click Apply at the bottom of the window. This is a very important step as it will affect the final printed output.
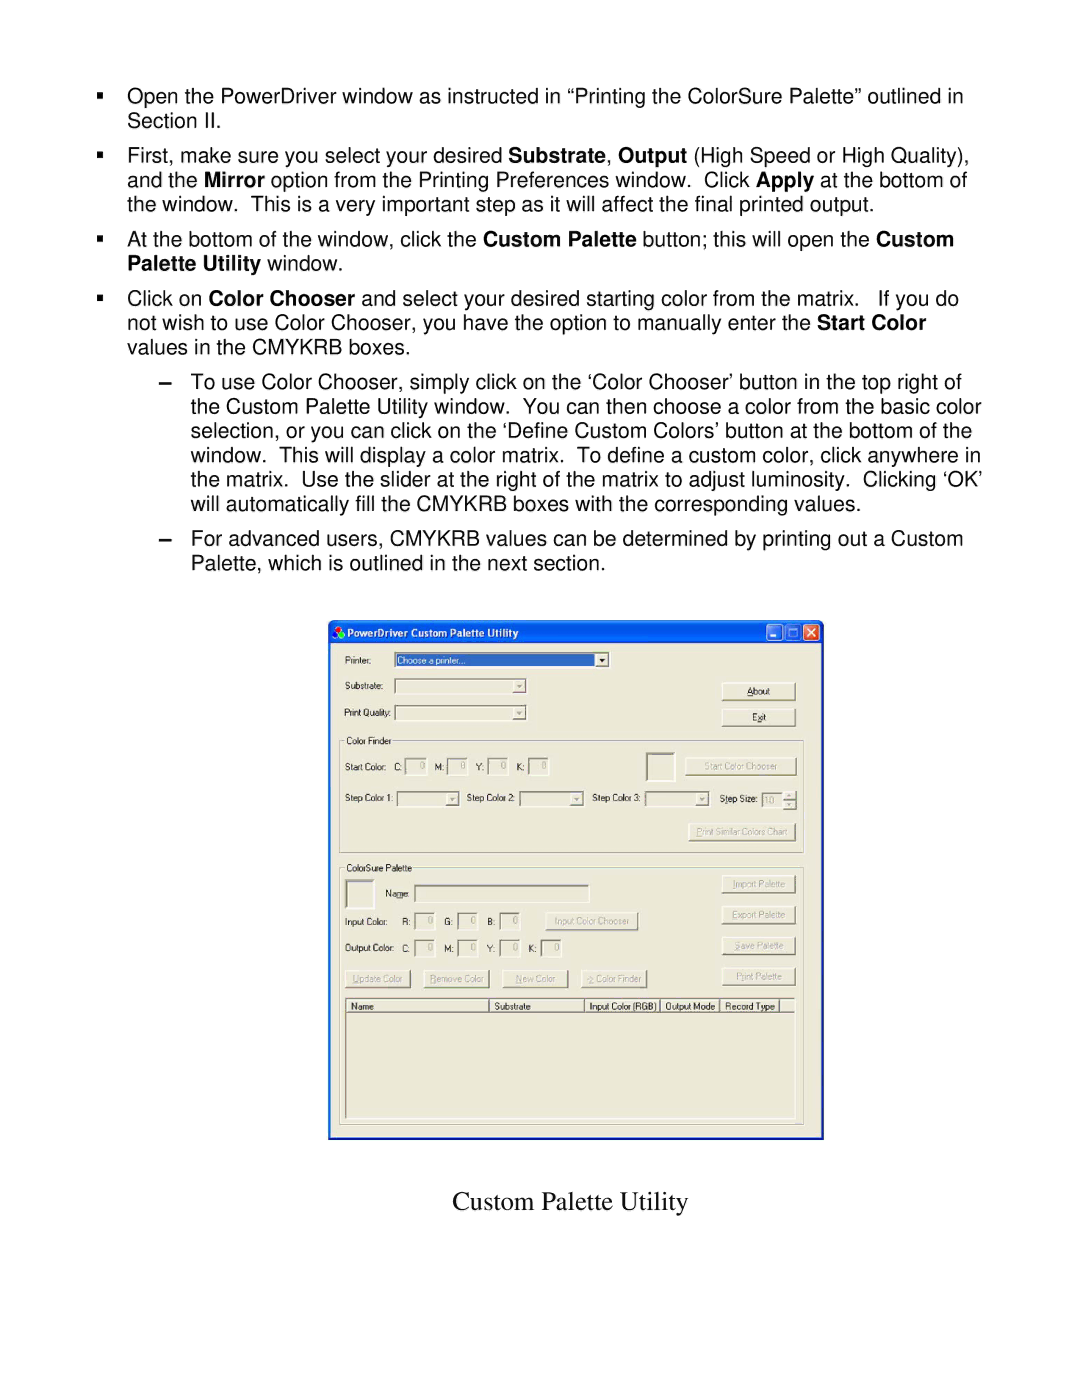
At the bottom of the window, click the Custom Palette button; this will open the Custom Palette Utility window.
Click on Color Chooser and select your desired starting color from the matrix. If you do not wish to use Color Chooser, you have the option to manually enter the Start Color values in the CMYKRB boxes.
▬To use Color Chooser, simply click on the ‘Color Chooser’ button in the top right of the Custom Palette Utility window. You can then choose a color from the basic color selection, or you can click on the ‘Define Custom Colors’ button at the bottom of the window. This will display a color matrix. To define a custom color, click anywhere in the matrix. Use the slider at the right of the matrix to adjust luminosity. Clicking ‘OK’ will automatically fill the CMYKRB boxes with the corresponding values.
▬For advanced users, CMYKRB values can be determined by printing out a Custom Palette, which is outlined in the next section.