ATTACHING THE LEGS TO THE SAW BASE
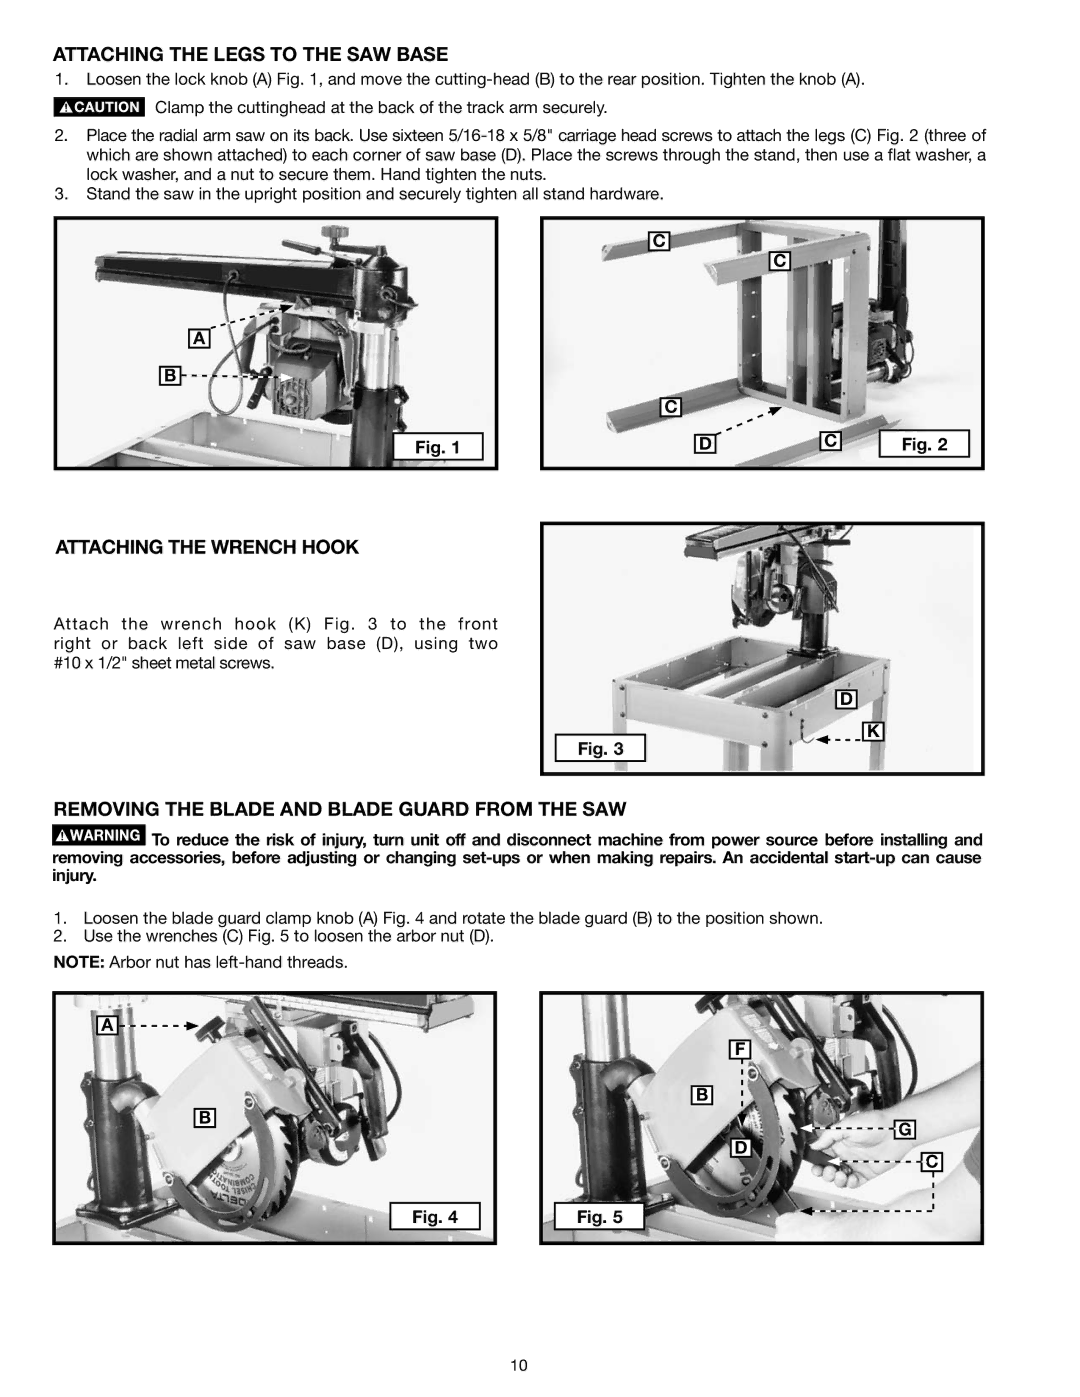
1.Loosen the lock knob (A) Fig. 1, and move the ![]() Clamp the cuttinghead at the back of the track arm securely.
Clamp the cuttinghead at the back of the track arm securely.
2.Place the radial arm saw on its back. Use sixteen
3.Stand the saw in the upright position and securely tighten all stand hardware.
A
B![]()
Fig. 1
C
C
D
C
C
Fig. 2
ATTACHING THE WRENCH HOOK
Attach the wrench hook (K) Fig. 3 to the front right or back left side of saw base (D), using two #10 x 1/2" sheet metal screws.
Fig. 3
D
K
REMOVING THE BLADE AND BLADE GUARD FROM THE SAW
![]() To reduce the risk of injury, turn unit off and disconnect machine from power source before installing and removing accessories, before adjusting or changing
To reduce the risk of injury, turn unit off and disconnect machine from power source before installing and removing accessories, before adjusting or changing
1.Loosen the blade guard clamp knob (A) Fig. 4 and rotate the blade guard (B) to the position shown.
2.Use the wrenches (C) Fig. 5 to loosen the arbor nut (D).
NOTE: Arbor nut has
A![]()
![]()
B
Fig. 4
F
B
D
Fig. 5
![]()
![]() G
G
![]()
![]() C
C
10
