COMPOUND MITER CUTTING
![]() To reduce the risk of injury, turn unit off and disconnect the machine from the power source before installing and removing accessories, before adjusting or changing
To reduce the risk of injury, turn unit off and disconnect the machine from the power source before installing and removing accessories, before adjusting or changing
![]() Use caution when starting the cut to prevent binding of the guard against the workpiece resulting in damage to the saw and possible personal injury.
Use caution when starting the cut to prevent binding of the guard against the workpiece resulting in damage to the saw and possible personal injury.
![]() Before connecting the radial arm saw to the power source or operating the saw, always inspect the guard and splitter for proper operation alignment and clearance with the saw blade. Check the alignment after each change of bevel angle.
Before connecting the radial arm saw to the power source or operating the saw, always inspect the guard and splitter for proper operation alignment and clearance with the saw blade. Check the alignment after each change of bevel angle.
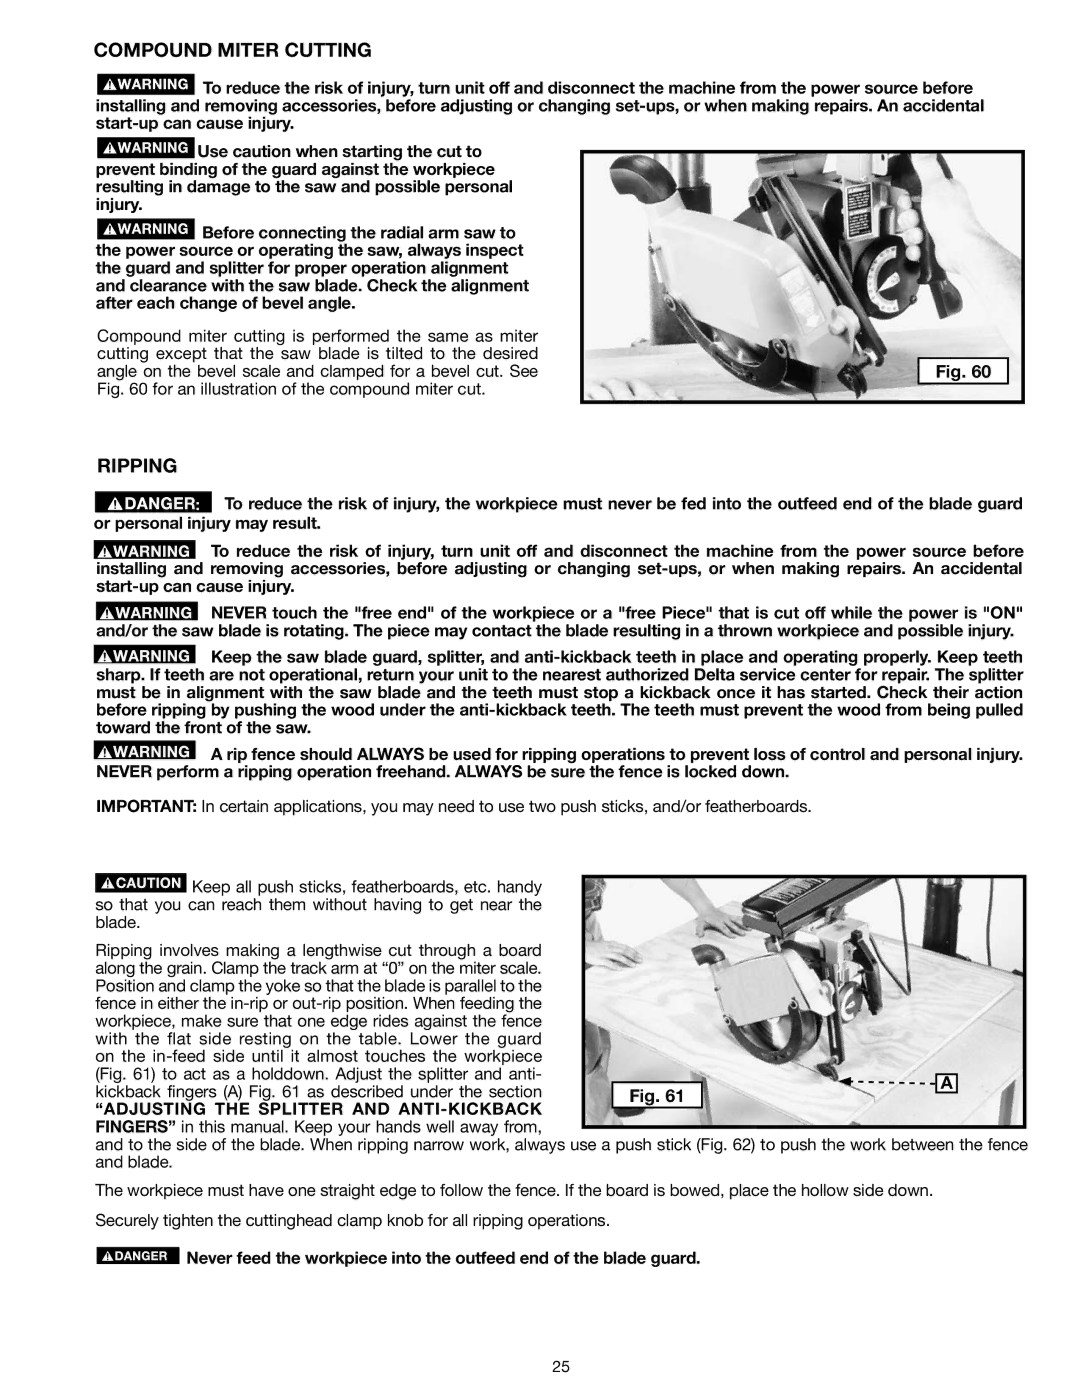
Compound miter cutting is performed the same as miter cutting except that the saw blade is tilted to the desired angle on the bevel scale and clamped for a bevel cut. See Fig. 60 for an illustration of the compound miter cut.
Fig. 60
RIPPING
![]() To reduce the risk of injury, the workpiece must never be fed into the outfeed end of the blade guard or personal injury may result.
To reduce the risk of injury, the workpiece must never be fed into the outfeed end of the blade guard or personal injury may result.
![]() To reduce the risk of injury, turn unit off and disconnect the machine from the power source before installing and removing accessories, before adjusting or changing
To reduce the risk of injury, turn unit off and disconnect the machine from the power source before installing and removing accessories, before adjusting or changing
![]() NEVER touch the "free end" of the workpiece or a "free Piece" that is cut off while the power is "ON" and/or the saw blade is rotating. The piece may contact the blade resulting in a thrown workpiece and possible injury.
NEVER touch the "free end" of the workpiece or a "free Piece" that is cut off while the power is "ON" and/or the saw blade is rotating. The piece may contact the blade resulting in a thrown workpiece and possible injury.
![]() Keep the saw blade guard, splitter, and
Keep the saw blade guard, splitter, and
![]() A rip fence should ALWAYS be used for ripping operations to prevent loss of control and personal injury. NEVER perform a ripping operation freehand. ALWAYS be sure the fence is locked down.
A rip fence should ALWAYS be used for ripping operations to prevent loss of control and personal injury. NEVER perform a ripping operation freehand. ALWAYS be sure the fence is locked down.
IMPORTANT: In certain applications, you may need to use two push sticks, and/or featherboards.
![]() Keep all push sticks, featherboards, etc. handy so that you can reach them without having to get near the blade.
Keep all push sticks, featherboards, etc. handy so that you can reach them without having to get near the blade.
Ripping involves making a lengthwise cut through a board |
|
|
|
|
|
along the grain. Clamp the track arm at “0” on the miter scale. |
|
|
|
|
|
Position and clamp the yoke so that the blade is parallel to the |
|
|
|
|
|
fence in either the |
|
|
|
|
|
workpiece, make sure that one edge rides against the fence |
|
|
|
|
|
with the flat side resting on the table. Lower the guard |
|
|
|
|
|
on the |
|
|
|
|
|
(Fig. 61) to act as a holddown. Adjust the splitter and anti- |
|
|
|
|
|
|
|
| A |
| |
kickback fingers (A) Fig. 61 as described under the section |
| Fig. 61 |
|
| |
|
|
|
| ||
“ADJUSTING THE SPLITTER AND |
|
|
|
|
|
|
|
|
|
| |
FINGERS” in this manual. Keep your hands well away from, |
|
|
|
|
|
|
|
|
|
|
and to the side of the blade. When ripping narrow work, always use a push stick (Fig. 62) to push the work between the fence and blade.
The workpiece must have one straight edge to follow the fence. If the board is bowed, place the hollow side down. Securely tighten the cuttinghead clamp knob for all ripping operations.
![]() Never feed the workpiece into the outfeed end of the blade guard.
Never feed the workpiece into the outfeed end of the blade guard.
25