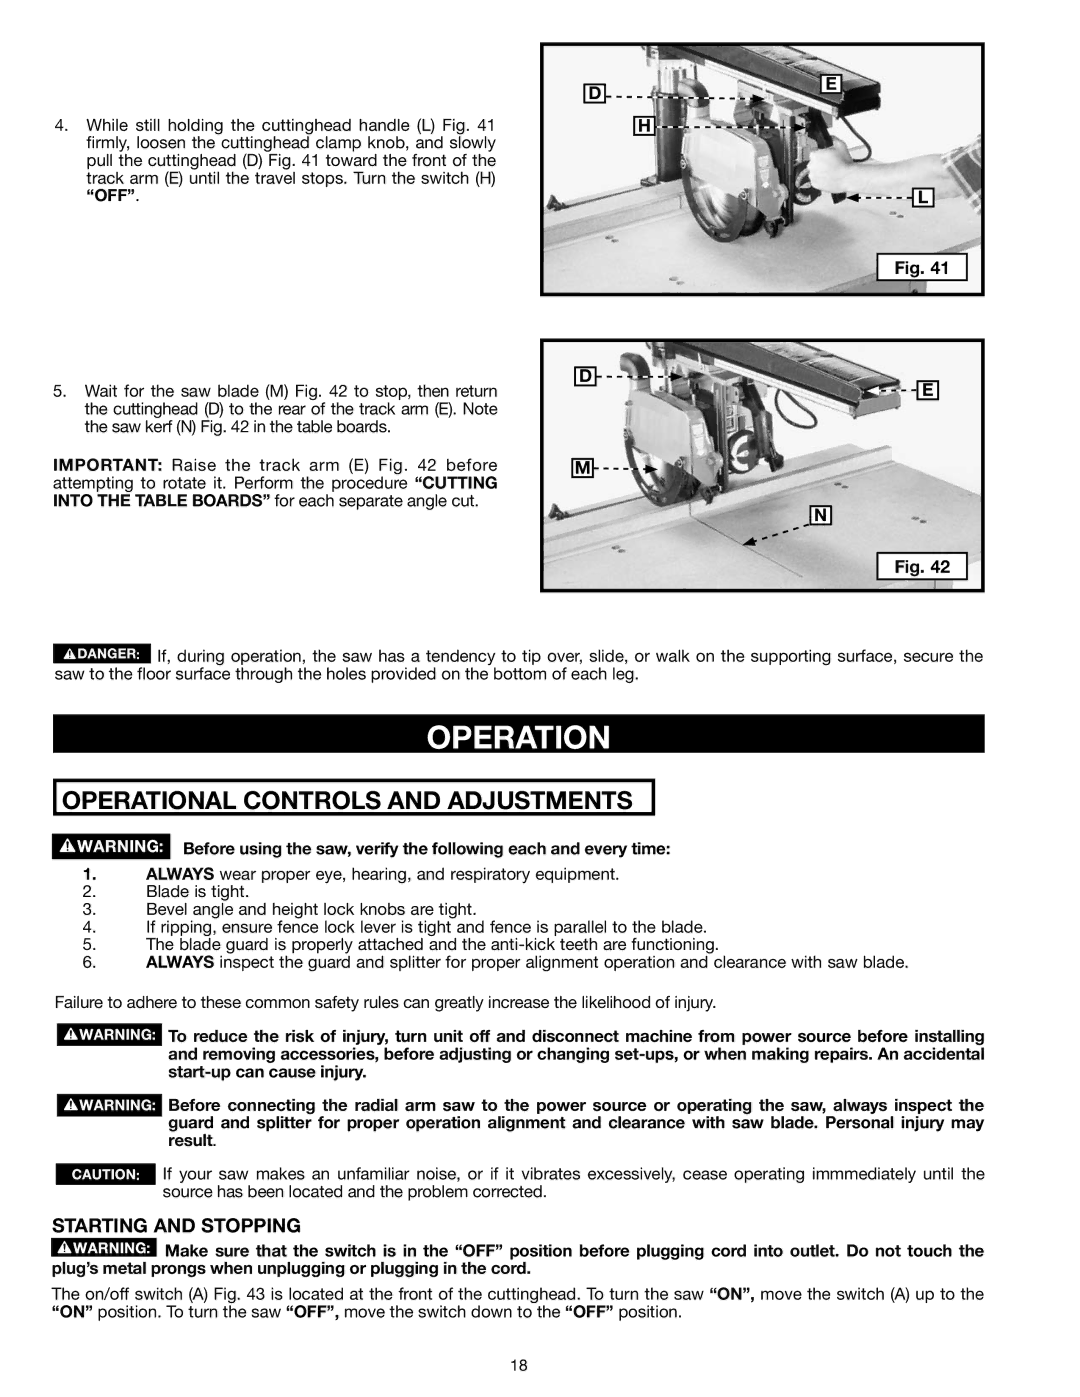
4.While still holding the cuttinghead handle (L) Fig. 41 firmly, loosen the cuttinghead clamp knob, and slowly pull the cuttinghead (D) Fig. 41 toward the front of the track arm (E) until the travel stops. Turn the switch (H) “OFF”.
D ![]()
![]()
![]() E
E
H![]()
![]()
![]() L
L
5.Wait for the saw blade (M) Fig. 42 to stop, then return the cuttinghead (D) to the rear of the track arm (E). Note the saw kerf (N) Fig. 42 in the table boards.
D
Fig. 41
![]() E
E
IMPORTANT: Raise the track arm (E) Fig. 42 before attempting to rotate it. Perform the procedure “CUTTING INTO THE TABLE BOARDS” for each separate angle cut.
M![]()
![]()
N
Fig. 42
![]() If, during operation, the saw has a tendency to tip over, slide, or walk on the supporting surface, secure the saw to the floor surface through the holes provided on the bottom of each leg.
If, during operation, the saw has a tendency to tip over, slide, or walk on the supporting surface, secure the saw to the floor surface through the holes provided on the bottom of each leg.
operation
OPERATIONAL Controls and ADJUSTMENTS
Before using the saw, verify the following each and every time:
1.ALWAYS wear proper eye, hearing, and respiratory equipment.
2.Blade is tight.
3.Bevel angle and height lock knobs are tight.
4.If ripping, ensure fence lock lever is tight and fence is parallel to the blade.
5.The blade guard is properly attached and the
6.ALWAYS inspect the guard and splitter for proper alignment operation and clearance with saw blade.
Failure to adhere to these common safety rules can greatly increase the likelihood of injury.
To reduce the risk of injury, turn unit off and disconnect machine from power source before installing and removing accessories, before adjusting or changing
Before connecting the radial arm saw to the power source or operating the saw, always inspect the guard and splitter for proper operation alignment and clearance with saw blade. Personal injury may result.
If your saw makes an unfamiliar noise, or if it vibrates excessively, cease operating immmediately until the source has been located and the problem corrected.
STARTING AND STOPPING
![]() Make sure that the switch is in the “OFF” position before plugging cord into outlet. Do not touch the plug’s metal prongs when unplugging or plugging in the cord.
Make sure that the switch is in the “OFF” position before plugging cord into outlet. Do not touch the plug’s metal prongs when unplugging or plugging in the cord.
The on/off switch (A) Fig. 43 is located at the front of the cuttinghead. To turn the saw “ON”, move the switch (A) up to the “ON” position. To turn the saw “OFF”, move the switch down to the “OFF” position.
18
