UNPACKING AND CLEANING
Carefully unpack the machine and all loose items from the shipping container(s). Remove the
![]()
![]()
![]()
![]()
![]()
![]() Do not use highly volatile solvents such as gasoline, naphtha, acetone or lacquer thinner for cleaning your machine.
Do not use highly volatile solvents such as gasoline, naphtha, acetone or lacquer thinner for cleaning your machine.
After cleaning, cover the unpainted surfaces with a good quality household floor paste wax.
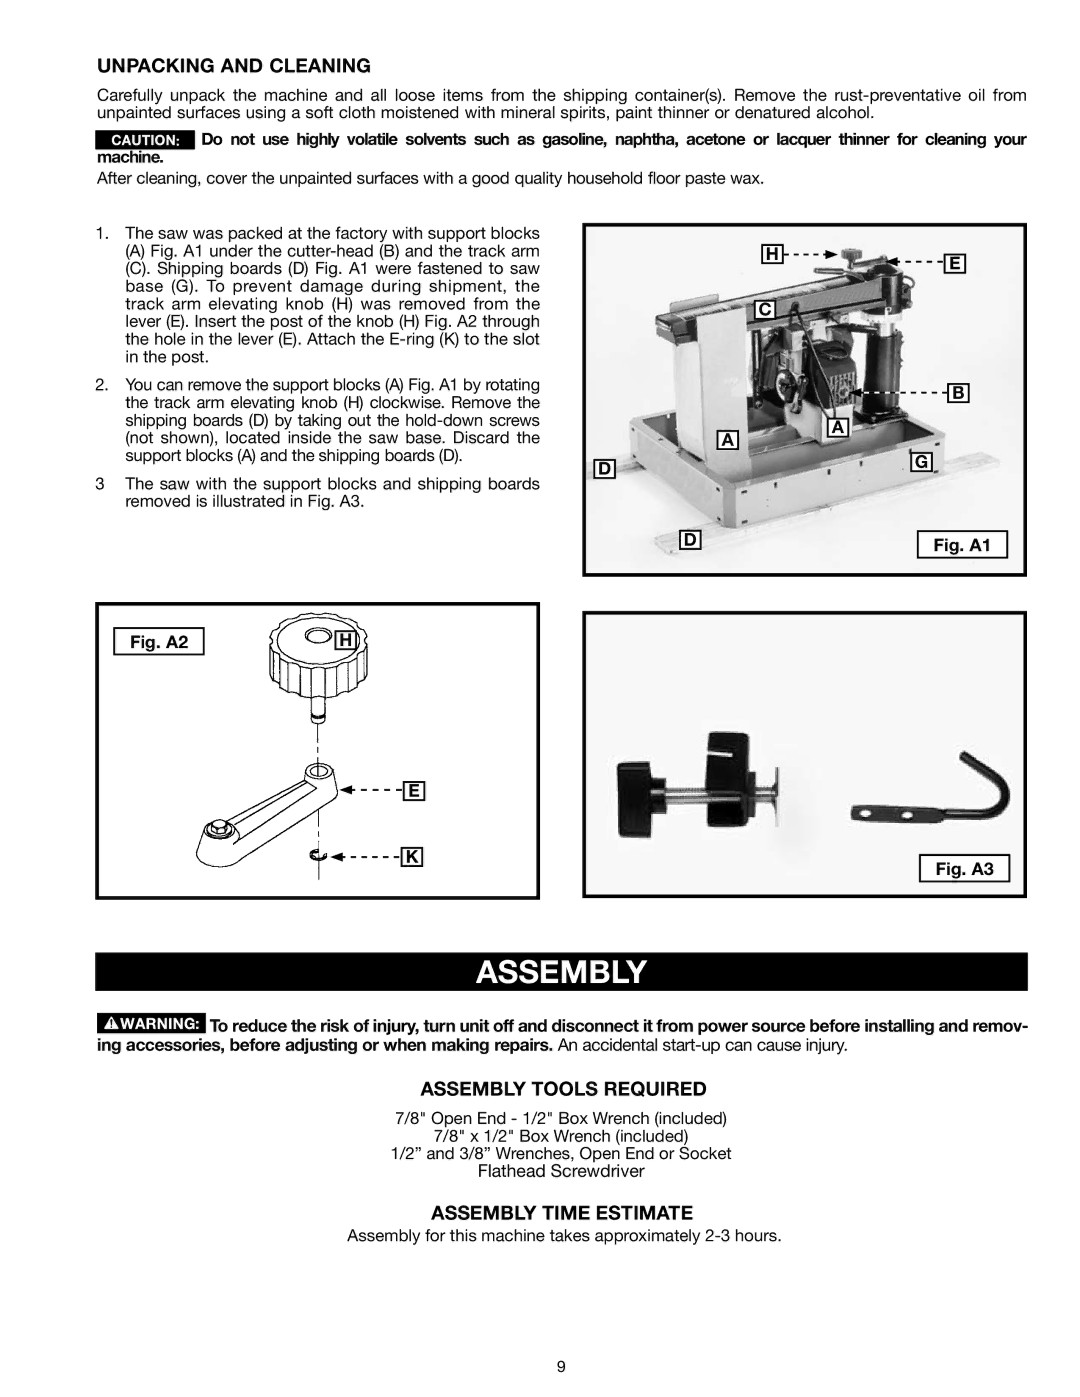
1. | The saw was packed at the factory with support blocks |
|
|
| (A) Fig. A1 under the |
|
|
| (C). Shipping boards (D) Fig. A1 were fastened to saw |
|
|
| base (G). To prevent damage during shipment, the |
|
|
| track arm elevating knob (H) was removed from the |
|
|
| lever (E). Insert the post of the knob (H) Fig. A2 through |
|
|
| the hole in the lever (E). Attach the |
|
|
| in the post. |
|
|
2. | You can remove the support blocks (A) Fig. A1 by rotating |
|
|
| the track arm elevating knob (H) clockwise. Remove the |
|
|
| shipping boards (D) by taking out the |
|
|
| (not shown), located inside the saw base. Discard the |
|
|
| support blocks (A) and the shipping boards (D). |
|
|
|
| D | |
3 | The saw with the support blocks and shipping boards |
| |
|
| ||
| removed is illustrated in Fig. A3. |
|
|
|
|
|
|
Fig. A2 |
|
|
| H | |
|
|
|
![]()
![]() E
E
![]()
![]() K
K
H | E |
|
C
![]()
![]() B
B
A ![]()
![]() A
A
G
D | Fig. A1 |
|
Fig. A3
assembly
![]() To reduce the risk of injury, turn unit off and disconnect it from power source before installing and remov- ing accessories, before adjusting or when making repairs. An accidental
To reduce the risk of injury, turn unit off and disconnect it from power source before installing and remov- ing accessories, before adjusting or when making repairs. An accidental
ASSEMBLY TOOLS REQUIRED
7/8" Open End - 1/2" Box Wrench (included)
7/8" x 1/2" Box Wrench (included)
1/2” and 3/8” Wrenches, Open End or Socket
Flathead Screwdriver
ASSEMBLY TIME ESTIMATE
Assembly for this machine takes approximately
9