240 VOLT SINGLE PHASE OPERATION
The 120/240 volt,
Use the following instructions to convert your saw to 240 volts.
![]() To reduce the risk of injury, turn unit off and disconnect machine from power source before installing and removing accessories, before adjusting or changing
To reduce the risk of injury, turn unit off and disconnect machine from power source before installing and removing accessories, before adjusting or changing
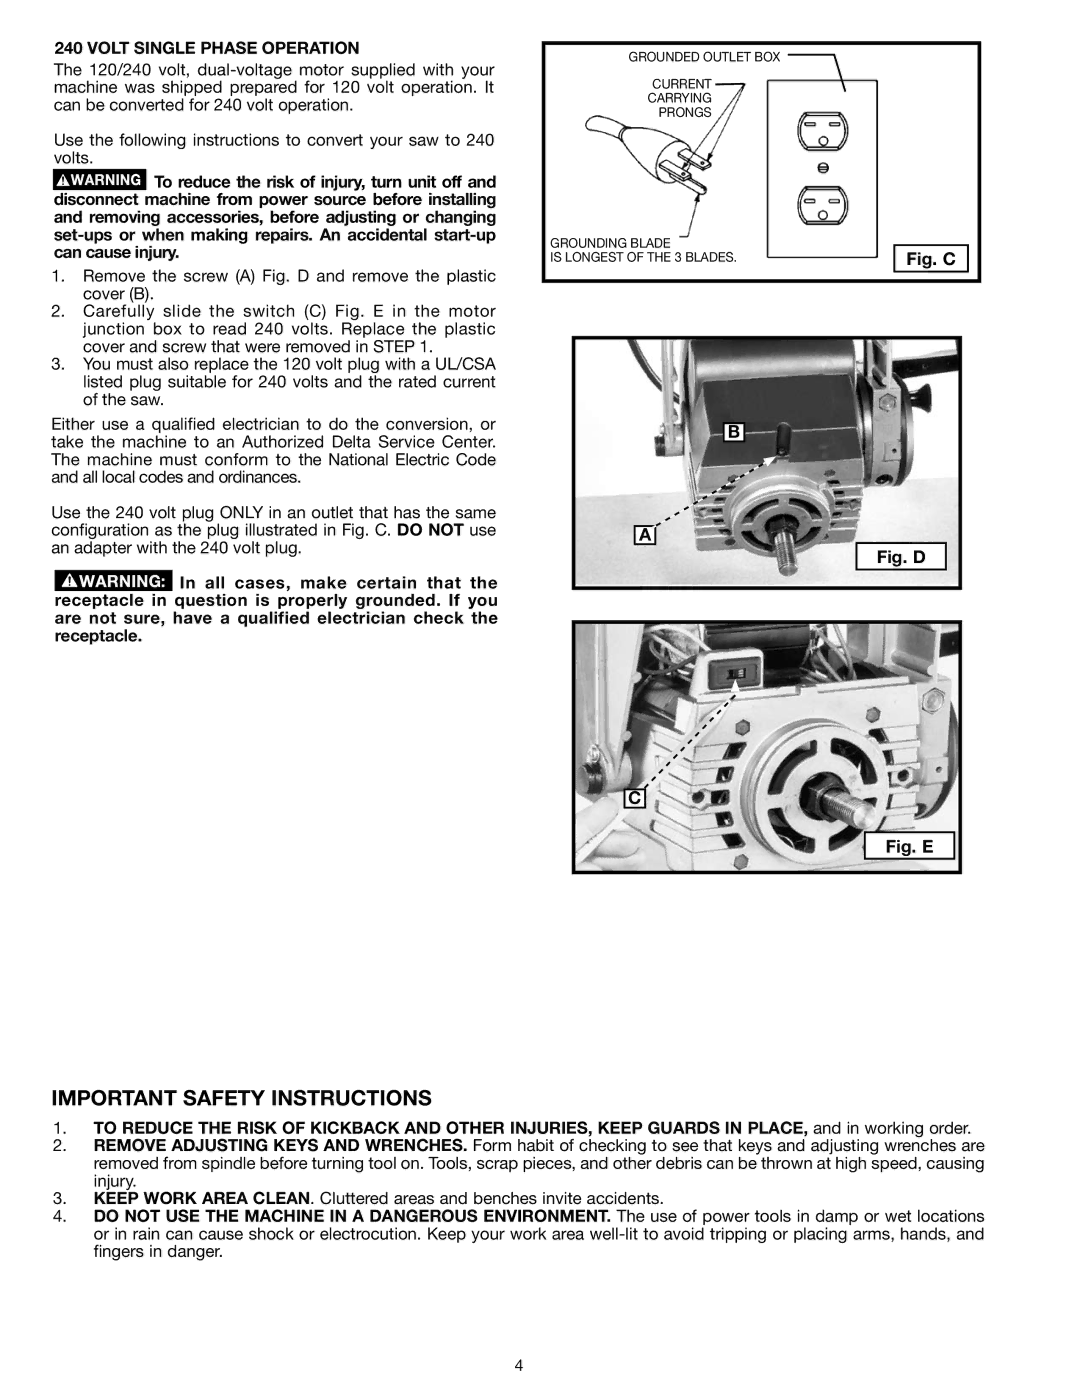
1.Remove the screw (A) Fig. D and remove the plastic cover (B).
2.Carefully slide the switch (C) Fig. E in the motor junction box to read 240 volts. Replace the plastic cover and screw that were removed in STEP 1.
3.You must also replace the 120 volt plug with a UL/CSA listed plug suitable for 240 volts and the rated current of the saw.
Either use a qualified electrician to do the conversion, or take the machine to an Authorized Delta Service Center. The machine must conform to the National Electric Code and all local codes and ordinances.
Use the 240 volt plug ONLY in an outlet that has the same configuration as the plug illustrated in Fig. C. DO NOT use an adapter with the 240 volt plug.
![]() In all cases, make certain that the receptacle in question is properly grounded. If you are not sure, have a qualified electrician check the receptacle.
In all cases, make certain that the receptacle in question is properly grounded. If you are not sure, have a qualified electrician check the receptacle.
GROUNDED OUTLET BOX
CURRENT
CARRYING
PRONGS
GROUNDING BLADE | Fig. C |
IS LONGEST OF THE 3 BLADES. |
B
A
Fig. D
C
Fig. E
important safety instructions
1.TO REDUCE THE RISK OF KICKBACK AND OTHER INJURIES, KEEP GUARDS IN PLACE, and in working order.
2.REMOVE ADJUSTING KEYS AND WRENCHES. Form habit of checking to see that keys and adjusting wrenches are removed from spindle before turning tool on. Tools, scrap pieces, and other debris can be thrown at high speed, causing injury.
3.KEEP WORK AREA CLEAN. Cluttered areas and benches invite accidents.
4.DO NOT USE THE MACHINE IN A DANGEROUS ENVIRONMENT. The use of power tools in damp or wet locations or in rain can cause shock or electrocution. Keep your work area
4