Quick Start — IN1502
Installation
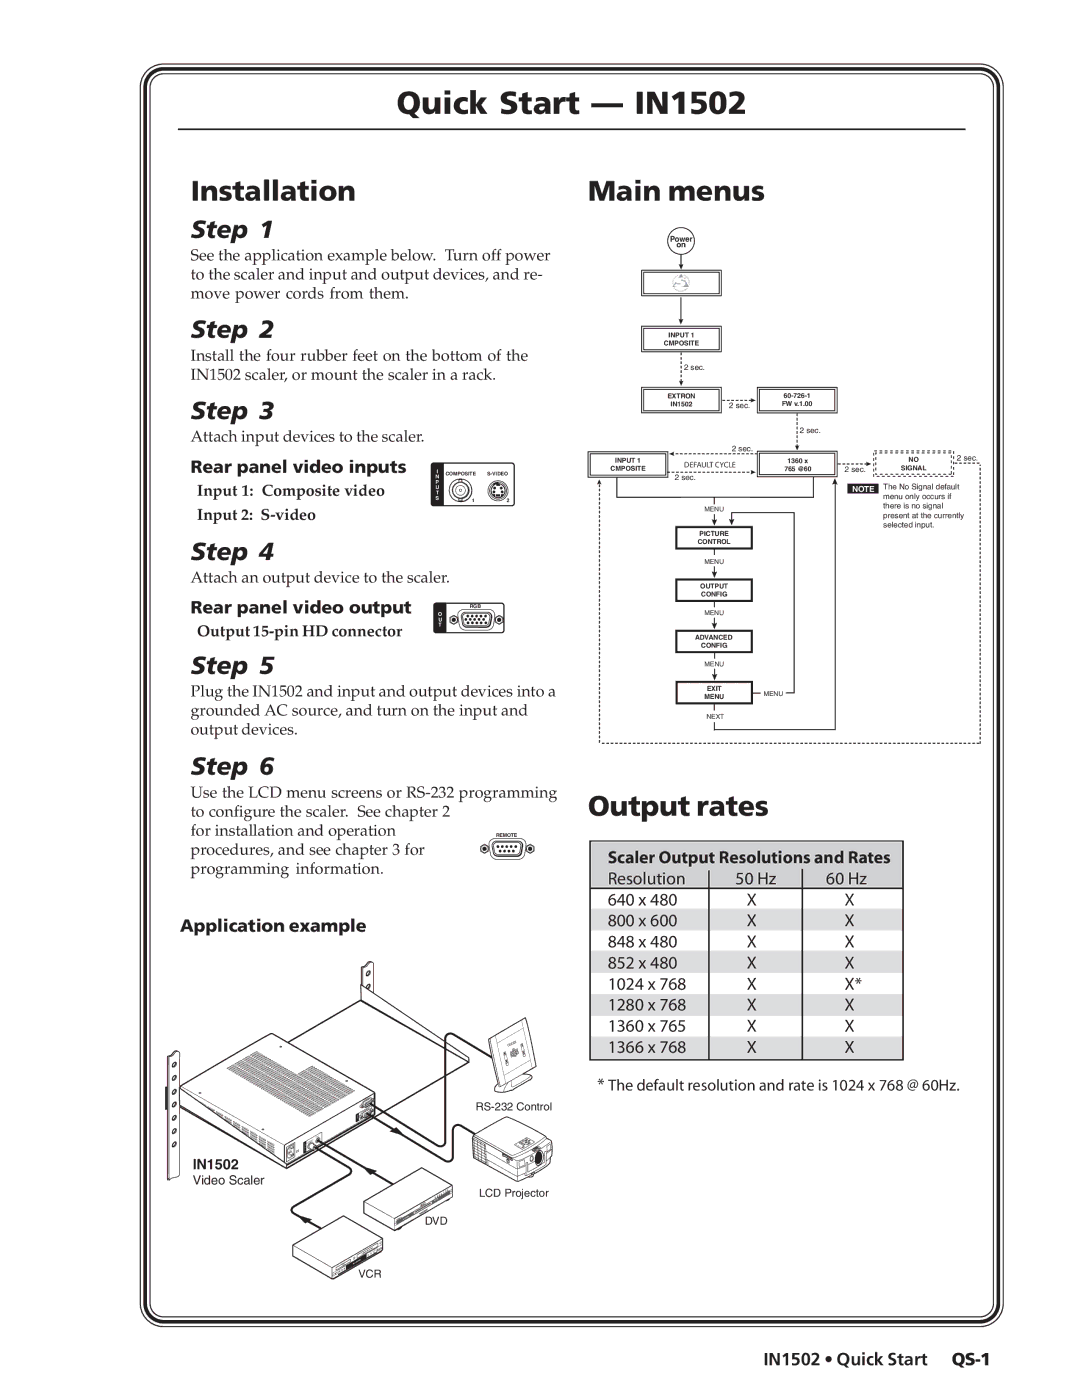
Main menus
Step 1
See the application example below. Turn off power to the scaler and input and output devices, and re- move power cords from them.
Step 2
Install the four rubber feet on the bottom of the IN1502 scaler, or mount the scaler in a rack.
Step 3
Attach input devices to the scaler.
Rear panel video inputs I | COMPOSITE |
N |
|
P |
|
Power
on
INPUT 1
CMPOSITE
2 sec.
EXTRON |
|
IN1502 | 2 sec. |
| 2 sec. | |
INPUT 1 | DEFAULT CYCLE | |
CMPOSITE | ||
| ||
| 2 sec. | |
|
2 sec.
1360 x
765 @60
2 sec.
NO | 2 sec. |
SIGNAL |
|
Input 1: Composite video | U |
|
|
T |
|
| |
S | 1 | 2 | |
Input 2: |
|
|
|
Step 4
Attach an output device to the scaler.
Rear panel video output O | |
| RGB |
| U |
Output | T |
| |
Step 5
Plug the IN1502 and input and output devices into a grounded AC source, and turn on the input and output devices.
| NOTE | |
MENU |
| |
PICTURE |
| |
CONTROL |
| |
MENU |
| |
OUTPUT |
| |
CONFIG |
| |
MENU |
| |
ADVANCED |
| |
CONFIG |
| |
MENU |
| |
EXIT | MENU | |
MENU | ||
| ||
NEXT |
|
The No Signal default menu only occurs if there is no signal present at the currently selected input.
Step 6
Use the LCD menu screens or
for installation and operation | REMOTE |
procedures, and see chapter 3 for |
|
programming information. |
|
Application example
IN1502
Video Scaler
LCD Projector
DVD
VCR
Output rates
Scaler Output Resolutions and Rates
Resolution | 50 Hz | 60 Hz |
|
640 x 480 | X | X |
|
800 x 600 | X | X |
|
848 x 480 | X | X |
|
852 x 480 | X | X |
|
1024 x 768 | X | X* |
|
1280 x 768 | X | X |
|
1360 x 765 | X | X |
|
1366 x 768 | X | X |
|
*The default resolution and rate is 1024 x 768 @ 60Hz.