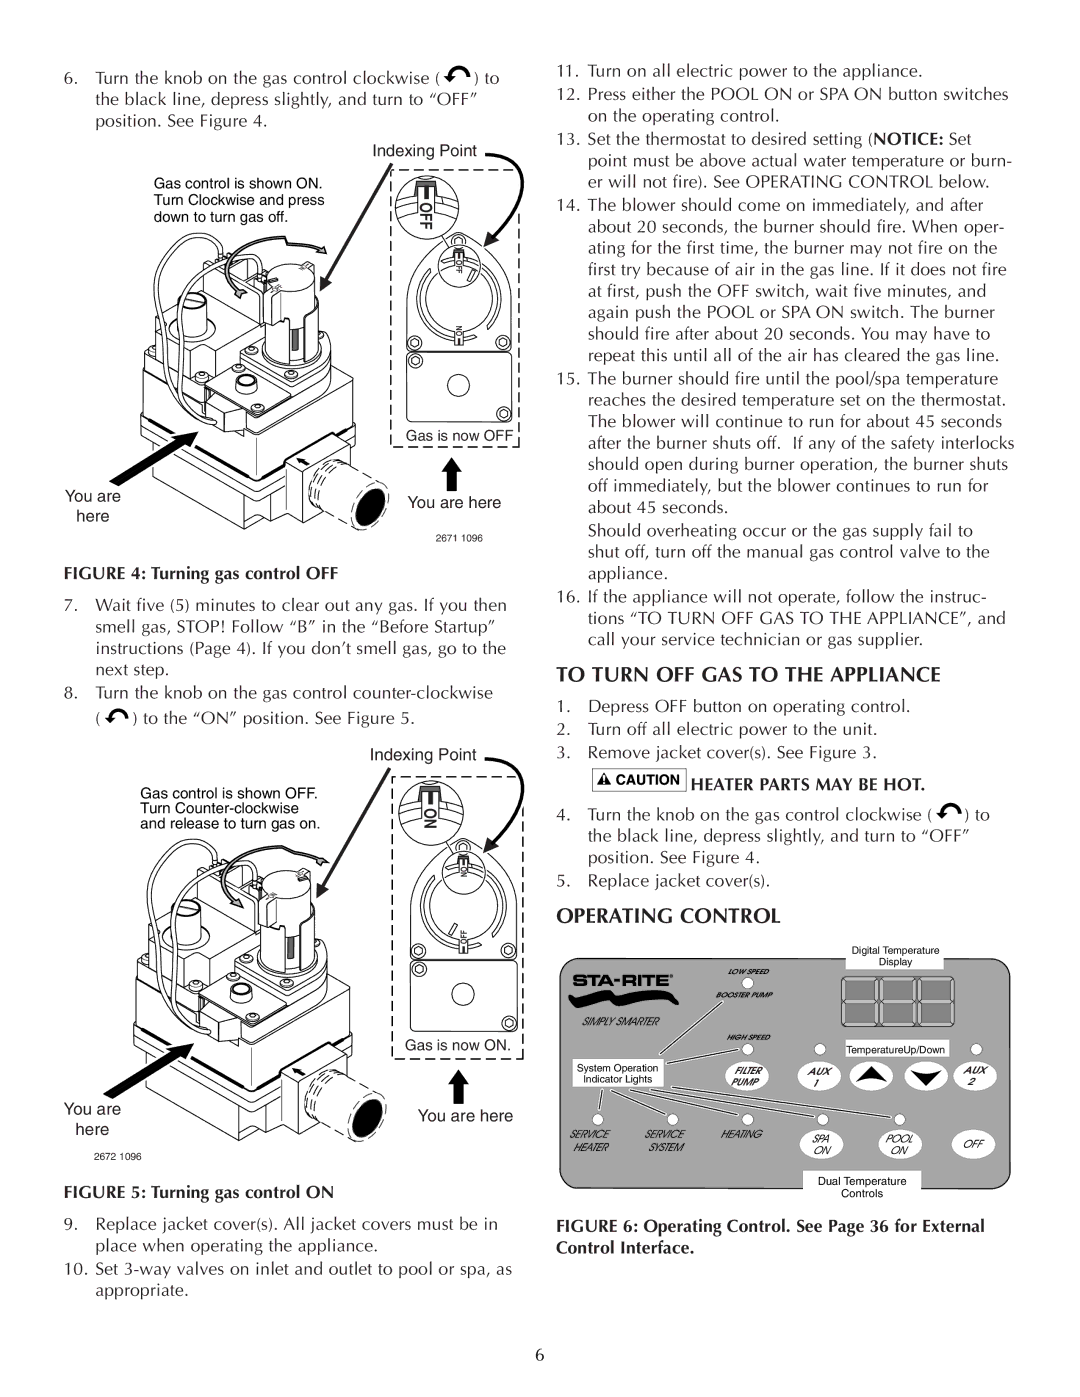
6.Turn the knob on the gas control clockwise ( ![]() ) to the black line, depress slightly, and turn to “OFF” position. See Figure 4.
) to the black line, depress slightly, and turn to “OFF” position. See Figure 4.
Indexing Point
Gas control is shown ON. |
| |
Turn Clockwise and press | OFF | |
down to turn gas off. | ||
| ||
| OFF | |
| ON |
Gas is now OFF
You are | You are here | |
here | ||
| ||
| 2671 1096 |
FIGURE 4: Turning gas control OFF
7.Wait five (5) minutes to clear out any gas. If you then smell gas, STOP! Follow “B” in the “Before Startup” instructions (Page 4). If you don’t smell gas, go to the next step.
8.Turn the knob on the gas control
( ![]() ) to the “ON” position. See Figure 5.
) to the “ON” position. See Figure 5.
| Indexing Point |
Gas control is shown OFF. |
|
Turn | ON |
and release to turn gas on. |
11.Turn on all electric power to the appliance.
12.Press either the POOL ON or SPA ON button switches on the operating control.
13.Set the thermostat to desired setting (NOTICE: Set point must be above actual water temperature or burn- er will not fire). See OPERATING CONTROL below.
14.The blower should come on immediately, and after about 20 seconds, the burner should fire. When oper- ating for the first time, the burner may not fire on the first try because of air in the gas line. If it does not fire at first, push the OFF switch, wait five minutes, and again push the POOL or SPA ON switch. The burner should fire after about 20 seconds. You may have to repeat this until all of the air has cleared the gas line.
15.The burner should fire until the pool/spa temperature reaches the desired temperature set on the thermostat. The blower will continue to run for about 45 seconds after the burner shuts off. If any of the safety interlocks should open during burner operation, the burner shuts off immediately, but the blower continues to run for about 45 seconds.
Should overheating occur or the gas supply fail to shut off, turn off the manual gas control valve to the appliance.
16.If the appliance will not operate, follow the instruc- tions “TO TURN OFF GAS TO THE APPLIANCE”, and call your service technician or gas supplier.
TO TURN OFF GAS TO THE APPLIANCE
1.Depress OFF button on operating control.
2.Turn off all electric power to the unit.
3.Remove jacket cover(s). See Figure 3.


 HEATER PARTS MAY BE HOT.
4. Turn the knob on the gas control clockwise ( | ) to |
the black line, depress slightly, and turn to “OFF” | |
position. See Figure 4. |
|
You are
here
2672 1096
ON
OFF
Gas is now ON.
You are here
5. Replace jacket cover(s). |
OPERATING CONTROL
|
|
| Digital Temperature |
|
|
| Display |
| LOW SPEED |
|
|
| BOOSTER PUMP |
|
|
| HIGH SPEED |
|
|
|
|
| TemperatureUp/Down |
System Operation | FILTER | AUX | AUX |
Indicator Lights | PUMP | 1 | 2 |
FIGURE 5: Turning gas control ON
9.Replace jacket cover(s). All jacket covers must be in place when operating the appliance.
10.Set
Dual Temperature
Controls
FIGURE 6: Operating Control. See Page 36 for External Control Interface.
6