24G SERIES FLATBOTTOM GAS FRYERS CHAPTER 1: SERVICE PROCEDURES
1.7 Replacing Fryer Components
1.7.1 Remove/Replace Temperature Probe or High-Limit Thermostat
1.Disconnect the fryer from the electrical supply.
2.Allow the frypot to cool for 10 minutes before draining. Drain cooking oil/shortening from the frypot. Allow the frypot to cool completely before proceeding.
3.Remove the fryer door(s) for access to control panel screws. Lift door up, disengage rod from lower door bracket, and then remove door. (Current production models have
4.Remove the marine edge (where applicable) from the topcap.
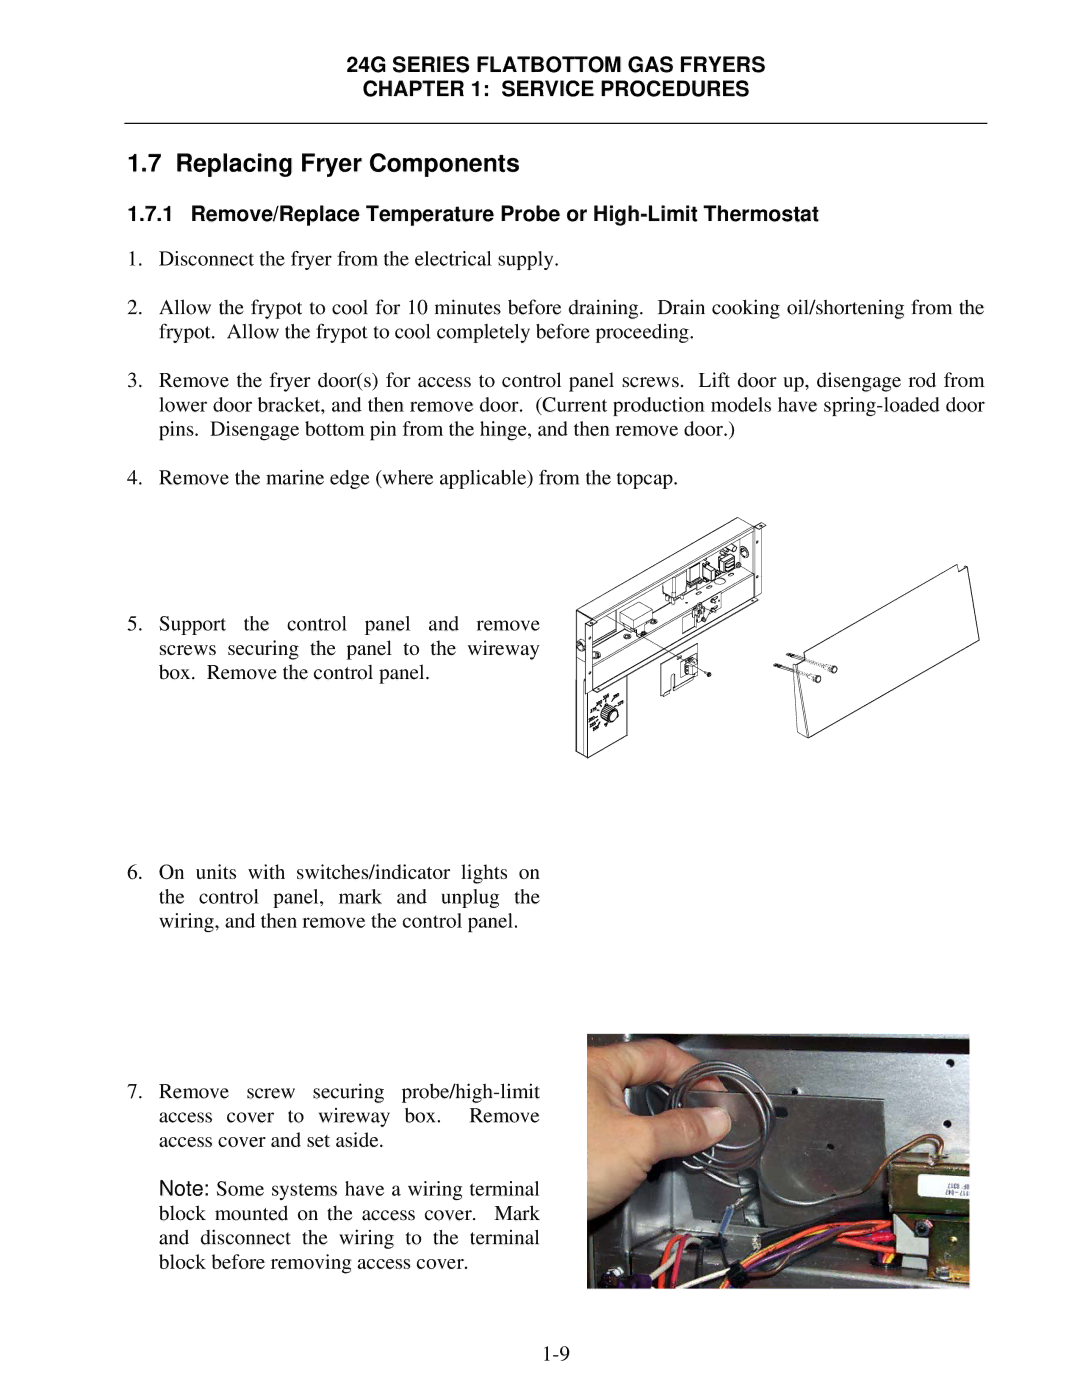
5. Support the control panel and remove screws securing the panel to the wireway box. Remove the control panel.
6.On units with switches/indicator lights on the control panel, mark and unplug the wiring, and then remove the control panel.
7.Remove screw securing
Note: Some systems have a wiring terminal block mounted on the access cover. Mark and disconnect the wiring to the terminal block before removing access cover.