2.
3.Click the [Computer Name] tab.
4.Check [Full computer name] and [Workgroup]. Ask your network administrator and check the setting.
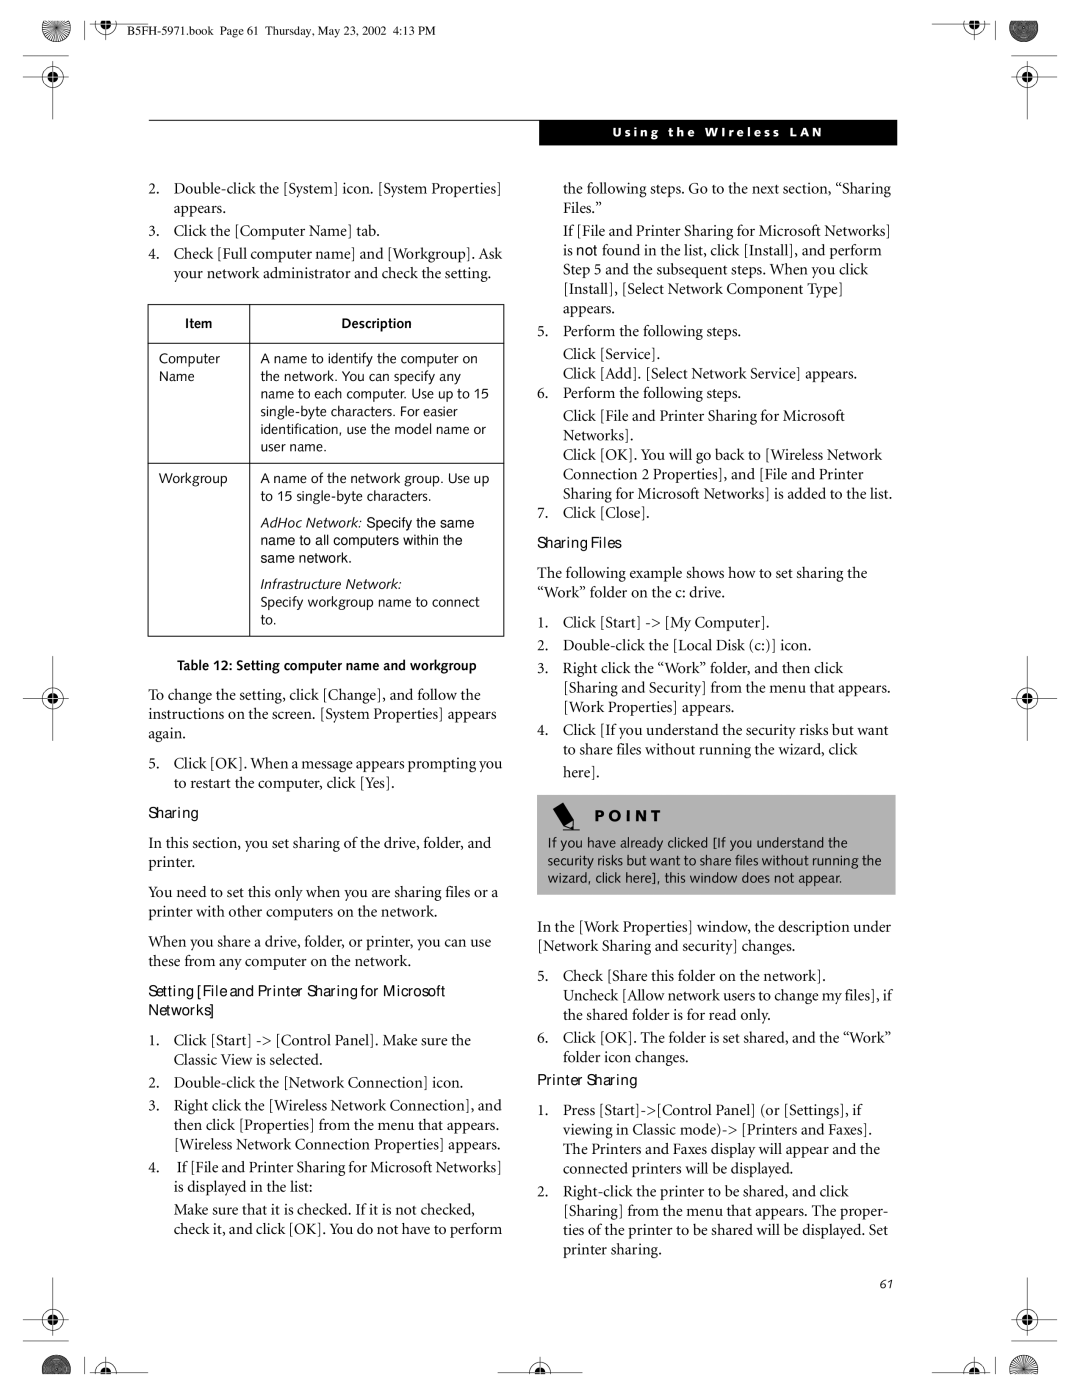
Item | Description |
|
|
Computer | A name to identify the computer on |
Name | the network. You can specify any |
| name to each computer. Use up to 15 |
| |
| identification, use the model name or |
| user name. |
|
|
Workgroup | A name of the network group. Use up |
| to 15 |
| AdHoc Network: Specify the same |
| name to all computers within the |
| same network. |
| Infrastructure Network: |
| Specify workgroup name to connect |
| to. |
|
|
Table 12: Setting computer name and workgroup
To change the setting, click [Change], and follow the instructions on the screen. [System Properties] appears again.
5.Click [OK]. When a message appears prompting you to restart the computer, click [Yes].
Sharing
In this section, you set sharing of the drive, folder, and printer.
You need to set this only when you are sharing files or a printer with other computers on the network.
When you share a drive, folder, or printer, you can use these from any computer on the network.
Setting [File and Printer Sharing for Microsoft Networks]
1.Click [Start]
2.
3.Right click the [Wireless Network Connection], and then click [Properties] from the menu that appears. [Wireless Network Connection Properties] appears.
4.If [File and Printer Sharing for Microsoft Networks] is displayed in the list:
Make sure that it is checked. If it is not checked, check it, and click [OK]. You do not have to perform
U s i n g t h e W I r e l e s s L A N
the following steps. Go to the next section, “Sharing Files.”
If [File and Printer Sharing for Microsoft Networks] is not found in the list, click [Install], and perform Step 5 and the subsequent steps. When you click [Install], [Select Network Component Type] appears.
5.Perform the following steps.
■Click [Service].
■Click [Add]. [Select Network Service] appears.
6.Perform the following steps.
■Click [File and Printer Sharing for Microsoft Networks].
■Click [OK]. You will go back to [Wireless Network Connection 2 Properties], and [File and Printer Sharing for Microsoft Networks] is added to the list.
7.Click [Close].
Sharing Files
The following example shows how to set sharing the “Work” folder on the c: drive.
1.Click [Start]
2.
3.Right click the “Work” folder, and then click [Sharing and Security] from the menu that appears. [Work Properties] appears.
4.Click [If you understand the security risks but want to share files without running the wizard, click here].
P O I N T
If you have already clicked [If you understand the security risks but want to share files without running the wizard, click here], this window does not appear.
In the [Work Properties] window, the description under [Network Sharing and security] changes.
5.Check [Share this folder on the network].
Uncheck [Allow network users to change my files], if the shared folder is for read only.
6.Click [OK]. The folder is set shared, and the “Work” folder icon changes.
Printer Sharing
1.Press
2.
61