Registering a waypoint on the screen
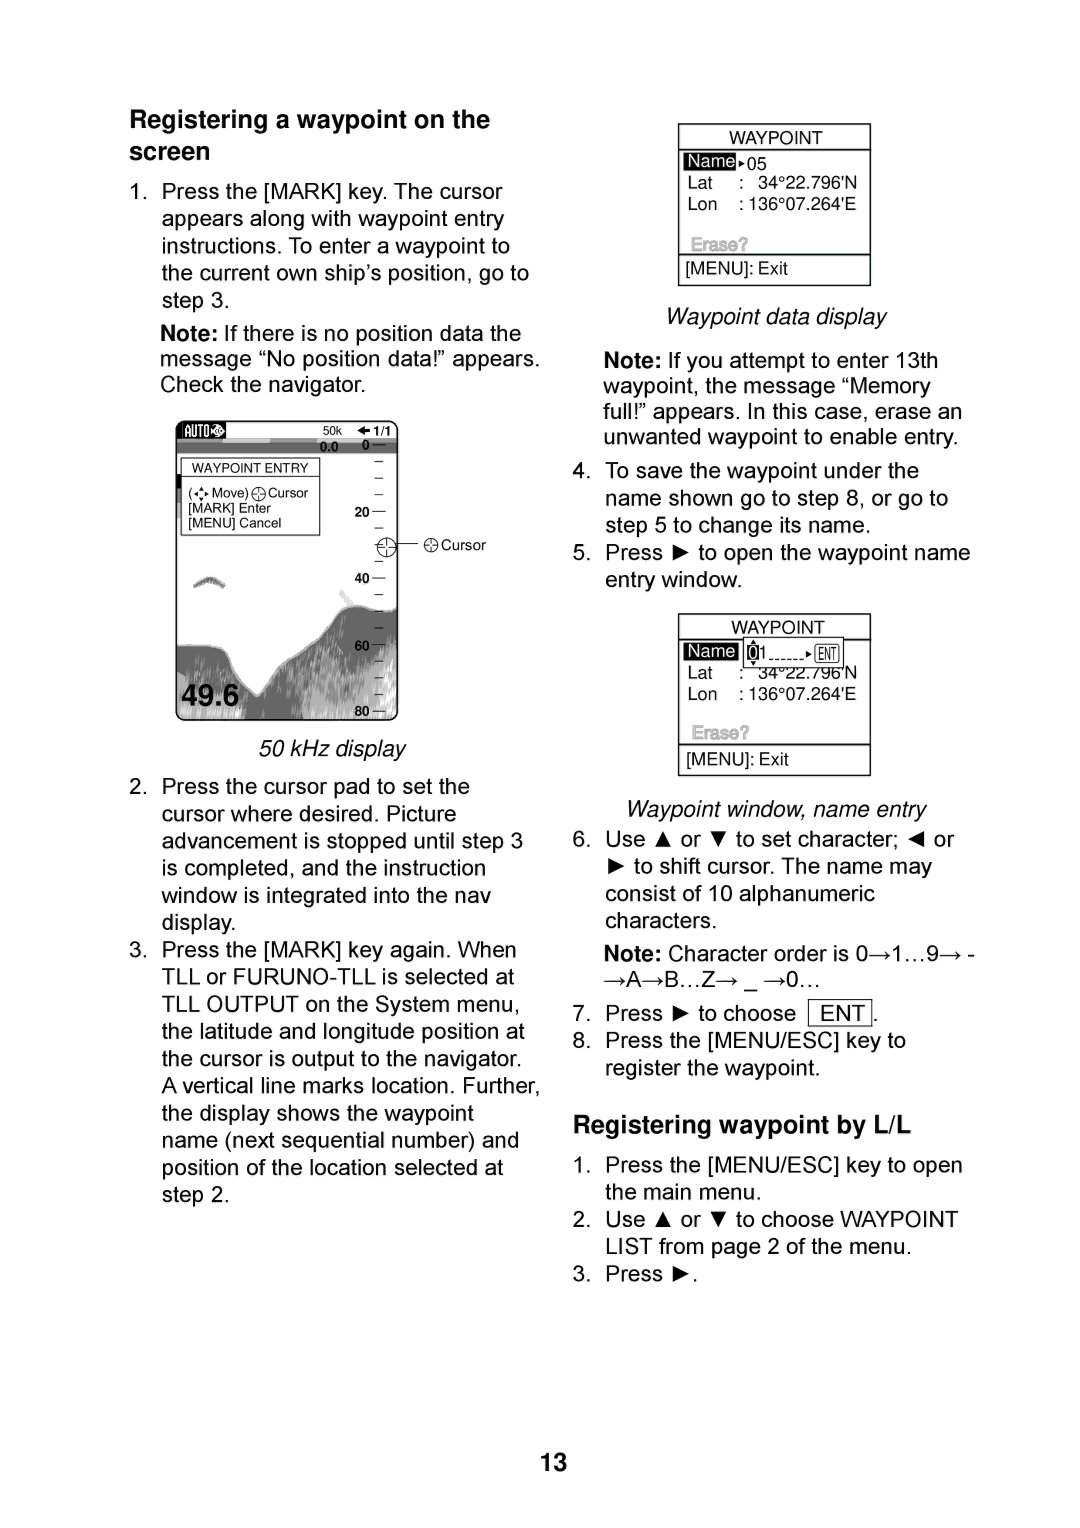
1.Press the [MARK] key. The cursor appears along with waypoint entry instructions. To enter a waypoint to the current own ship’s position, go to step 3.
Note: If there is no position data the message “No position data!” appears. Check the navigator.
50k ![]()
![]() 1/1
1/1
0.00
WAYPOINT ENTRY
( Move) Cursor |
|
[MARK] Enter | 20 |
[MENU] Cancel
![]()
![]()
![]()
![]()
![]() Cursor
Cursor
40
60 ![]()
![]()
![]()
 49.6
49.6

![]()
![]()
![]()
![]()
![]()
![]()
![]() 80
80![]()
![]()
![]()
![]()
![]()
50 kHz display
2.Press the cursor pad to set the cursor where desired. Picture advancement is stopped until step 3 is completed, and the instruction window is integrated into the nav display.
3.Press the [MARK] key again. When TLL or
A vertical line marks location. Further, the display shows the waypoint name (next sequential number) and position of the location selected at step 2.
|
| WAYPOINT | |
|
| FREQ. | |
| Name | ||
|
|
| 05 |
| Lat |
| : 34° 22.796'N |
| Lon |
| : 136° 07.264'E |
Erase?
[MENU]: Exit
Waypoint data display
Note: If you attempt to enter 13th waypoint, the message “Memory full!” appears. In this case, erase an unwanted waypoint to enable entry.
4.To save the waypoint under the name shown go to step 8, or go to step 5 to change its name.
5.Press ► to open the waypoint name entry window.
| WAYPOINT |
Name FREQ. | |
Lat | |
: 34° 22.796'N | |
Lon | : 136° 07.264'E |
Erase? | |
[MENU]: Exit | |
Waypoint window, name entry
6.Use ▲ or ▼ to set character; ◄ or ► to shift cursor. The name may consist of 10 alphanumeric characters.
Note: Character order is 0→1…9→ - →A→B…Z→ _ →0…
7. Press ► to choose ENT .
8.Press the [MENU/ESC] key to register the waypoint.
Registering waypoint by L/L
1.Press the [MENU/ESC] key to open the main menu.
2.Use ▲ or ▼ to choose WAYPOINT LIST from page 2 of the menu.
3.Press ►.
13
