Using the lower oven


timed baking and roasting features. RQVRPHPRGHOV

GEAppliances.com

127()RRGVWKDWVSRLOHDVLO\²VXFKDVPLONHJJVILVKVWXIILQJVSRXOWU\DQGSRUN²VKRXOGQRWEHDOORZHGWRVLWIRUPRUH WKDQKRXUEHIRUHRUDIWHUFRRNLQJ5RRPWHPSHUDWXUHSURPRWHVWKHJURZWKRIKDUPIXOEDFWHULD%HVXUHWKDWWKHRYHQ

OLJKWLVRIIEHFDXVHKHDWIURPWKHEXOEZLOOVSHHGKDUPIXOEDFWHULDJURZWK

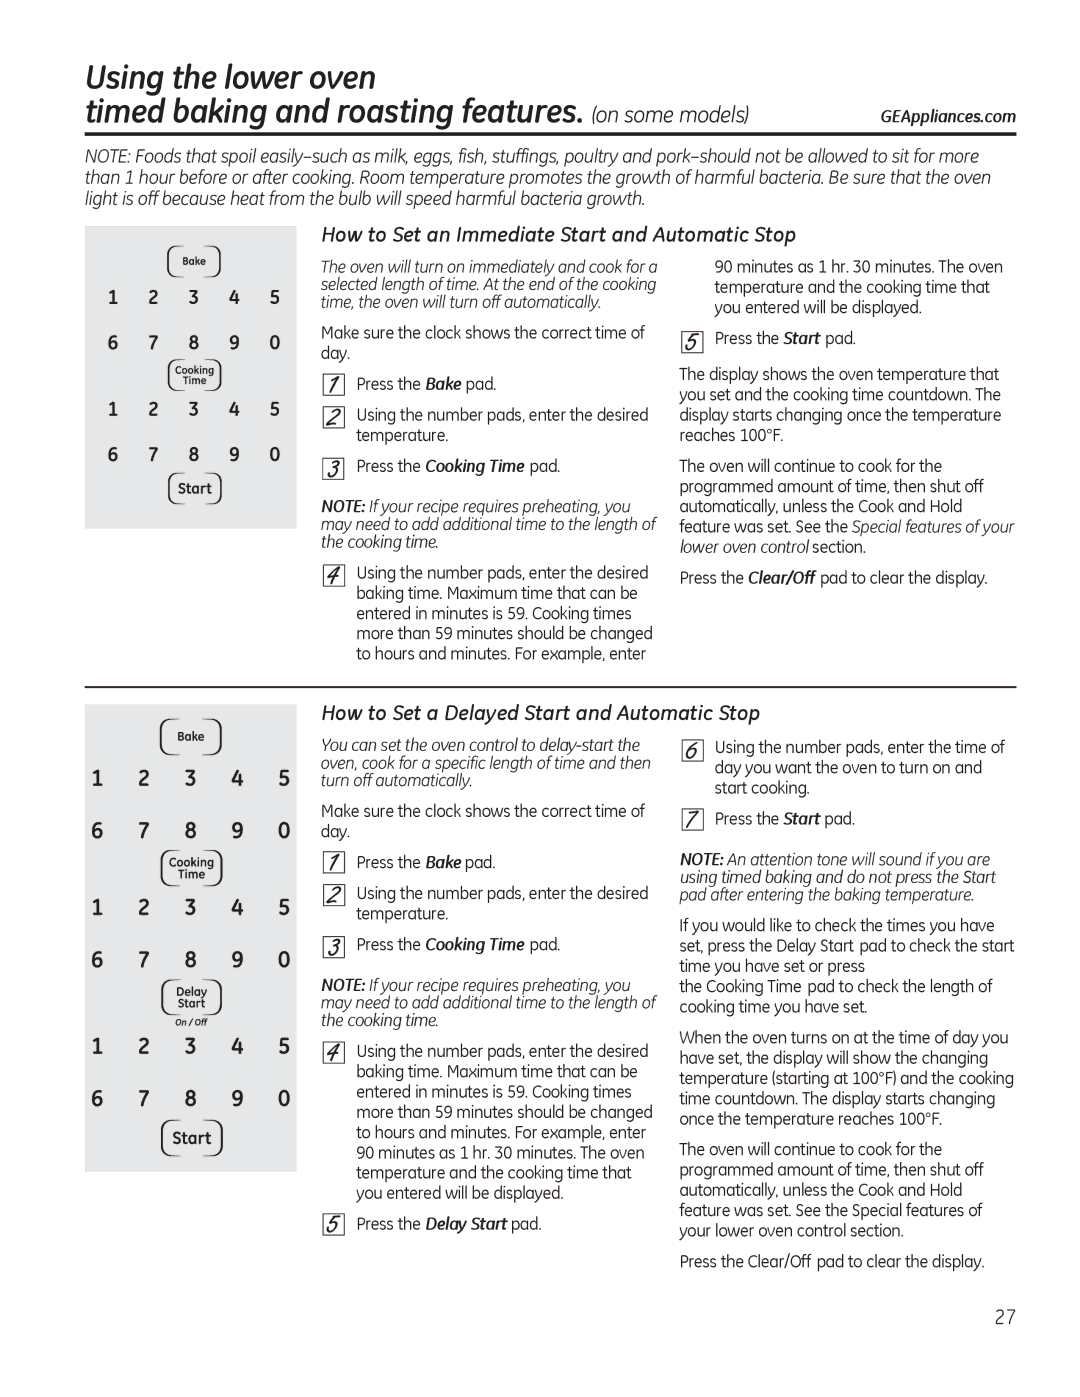
How to Set an Immediate Start and Automatic Stop

7KHRYHQZLOOWXUQRQLPPHGLDWHO\DQGFRRNIRUD VHOHFWHGOHQJWKRIWLPH$WWKHHQGRIWKHFRRNLQJ WLPHWKHRYHQZLOOWXUQRIIDXWRPDWLFDOO\

Make sure the clock shows the correct time of day.

Press the Bake pad.

Using the number pads, enter the desired temperature.

Press the Cooking Time pad.

NOTE: ,I\RXUUHFLSHUHTXLUHVSUHKHDWLQJ\RX PD\QHHGWRDGGDGGLWLRQDOWLPHWRWKHOHQJWKRI the cooking time.

Using the number pads, enter the desired baking time. Maximum time that can be entered in minutes is 59. Cooking times more than 59 minutes should be changed to hours and minutes. For example, enter

90 minutes as 1 hr. 30 minutes. The oven temperature and the cooking time that you entered will be displayed.

Press the Start pad.

The display shows the oven temperature that you set and the cooking time countdown. The display starts changing once the temperature reaches 100°F.

The oven will continue to cook for the programmed amount of time, then shut off automatically, unless the Cook and Hold feature was set. See the 6SHFLDOIHDWXUHVRI\RXU lower oven control section.

Press the Clear/Off pad to clear the display.

How to Set a Delayed Start and Automatic Stop

You can set the oven control to delay-start the RYHQFRRNIRUDVSHFLILFOHQJWKRIWLPHDQGWKHQ

WXUQRIIDXWRPDWLFDOO\

Make sure the clock shows the correct time of day.

Press the Bake pad.

Using the number pads, enter the desired temperature.

Press the Cooking Time pad.

NOTE:,I\RXUUHFLSHUHTXLUHVSUHKHDWLQJ\RX PD\QHHGWRDGGDGGLWLRQDOWLPHWRWKHOHQJWKRI the cooking time.

Using the number pads, enter the desired baking time. Maximum time that can be entered in minutes is 59. Cooking times more than 59 minutes should be changed to hours and minutes. For example, enter 90 minutes as 1 hr. 30 minutes. The oven temperature and the cooking time that you entered will be displayed.

Press the Delay Start pad.

Using the number pads, enter the time of day you want the oven to turn on and start cooking.

Press the Start pad.

NOTE: $QDWWHQWLRQWRQHZLOOVRXQGLI\RXDUH using timed baking and do not press the Start

SDGDIWHUHQWHULQJWKHEDNLQJWHPSHUDWXUH

If you would like to check the times you have set, press the Delay Start pad to check the start time you have set or press

the Cooking Time pad to check the length of cooking time you have set.

When the oven turns on at the time of day you have set, the display will show the changing temperature (starting at 100°F) and the cooking time countdown. The display starts changing once the temperature reaches 100°F.

The oven will continue to cook for the programmed amount of time, then shut off automatically, unless the Cook and Hold feature was set. See the Special features of your lower oven control section.

Press the Clear/Off pad to clear the display.

27

Page 27
Image 27
GE JTP90, JKP90 manual How to Set an Immediate Start and Automatic Stop, How to Set a Delayed Start and Automatic Stop

JTP90, JKP90 specifications

General Electric (GE) has long been a leader in the manufacturing of high-quality kitchen appliances, and among their standout products are the GE Profile Series JKP90 and JTP90 wall ovens. Known for their innovative features, cutting-edge technologies, and sleek design, these ovens are perfect for modern households looking to enhance their culinary experience.

The GE JKP90 and JTP90 are both built-in wall ovens, providing a space-saving solution without compromising on performance or capacity. One of the main features of these ovens is their advanced cooking technology, which includes a true European convection system. This technology ensures even heat distribution, allowing for perfectly baked goods and evenly roasted meats. With a third heating element and a fan that circulates hot air throughout the oven, users can expect consistent results, regardless of the dish being prepared.

Additionally, both models come equipped with a self-cleaning option, making oven maintenance a breeze. This feature simplifies the cleaning process by using high temperatures to burn away food residues, allowing users to spend more time enjoying their meals rather than scrubbing the oven.

For those who appreciate precision in cooking, the GE JKP90 and JTP90 offer a variety of cooking modes, including bake, broil, and specialty settings, allowing users to customize their cooking to suit specific dishes. Another notable characteristic is the implementation of a hidden bake element, which not only maximizes oven capacity but also contributes to easier cleaning.

The easy-to-use digital control panel found on these models enhances the user experience, featuring a large display that provides clear information on cooking settings and timers. Moreover, the ovens include programmable features, like delay bake and a kitchen timer, ensuring that meals can be prepared effortlessly.

Both the JKP90 and JTP90 come with a sleek stainless-steel exterior, offering a modern aesthetic that complements any kitchen décor. Their flush design allows for a seamless integration into cabinetry, providing a sophisticated and stylish appearance.

In summary, the GE Profile Series JKP90 and JTP90 wall ovens represent the perfect combination of technology, design, and functionality. With features like true European convection, self-cleaning capabilities, customizable cooking modes, and a user-friendly digital interface, these ovens are ideal for anyone looking to elevate their cooking experience while enjoying the convenience of modern appliance innovations.