Front Panel Controls
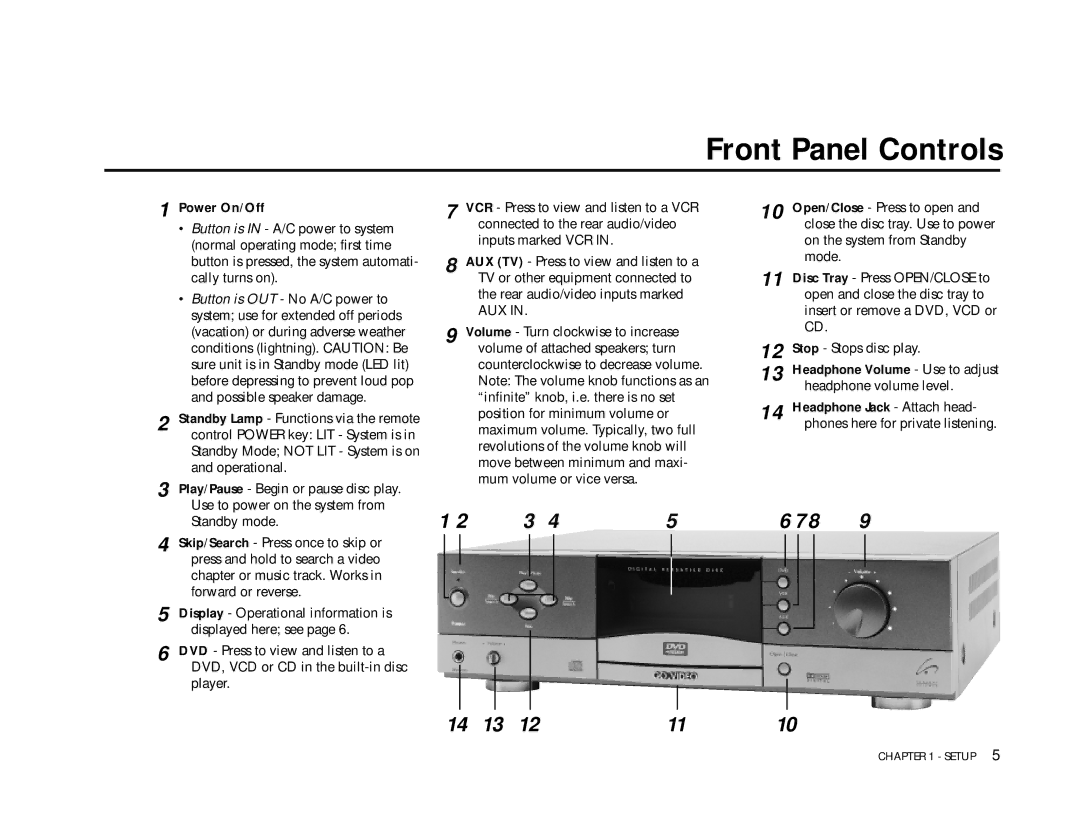
1 Power On/Off
•Button is IN - A/C power to system (normal operating mode; first time button is pressed, the system automati- cally turns on).
•Button is OUT - No A/C power to system; use for extended off periods (vacation) or during adverse weather conditions (lightning). CAUTION: Be sure unit is in Standby mode (LED lit) before depressing to prevent loud pop and possible speaker damage.
2 Standby Lamp - Functions via the remote control POWER key: LIT - System is in Standby Mode; NOT LIT - System is on and operational.
3 Play/Pause - Begin or pause disc play. Use to power on the system from Standby mode.
4 Skip/Search - Press once to skip or press and hold to search a video chapter or music track. Works in forward or reverse.
5 Display - Operational information is displayed here; see page 6.
6 DVD - Press to view and listen to a DVD, VCD or CD in the
7 VCR - Press to view and listen to a VCR connected to the rear audio/video inputs marked VCR IN.
8 AUX (TV) - Press to view and listen to a TV or other equipment connected to the rear audio/video inputs marked
AUX IN.
9 Volume - Turn clockwise to increase volume of attached speakers; turn counterclockwise to decrease volume. Note: The volume knob functions as an “infinite” knob, i.e. there is no set position for minimum volume or maximum volume. Typically, two full revolutions of the volume knob will move between minimum and maxi- mum volume or vice versa.
1 2 | 3 | 4 | 5 | |||||||
|
|
|
|
|
|
|
|
|
|
|
|
|
|
|
|
|
|
|
|
|
|
|
|
|
|
|
|
|
|
|
|
|
|
|
|
|
|
|
|
|
|
|
|
14 | 13 | 12 | 11 |
10 Open/Close - Press to open and close the disc tray. Use to power on the system from Standby mode.
11 Disc Tray - Press OPEN/CLOSE to open and close the disc tray to insert or remove a DVD, VCD or CD.
12 Stop - Stops disc play.
13 Headphone Volume - Use to adjust
headphone volume level.
14 Headphone Jack - Attach head- phones here for private listening.
6 78 9
10
CHAPTER 1 - SETUP 5