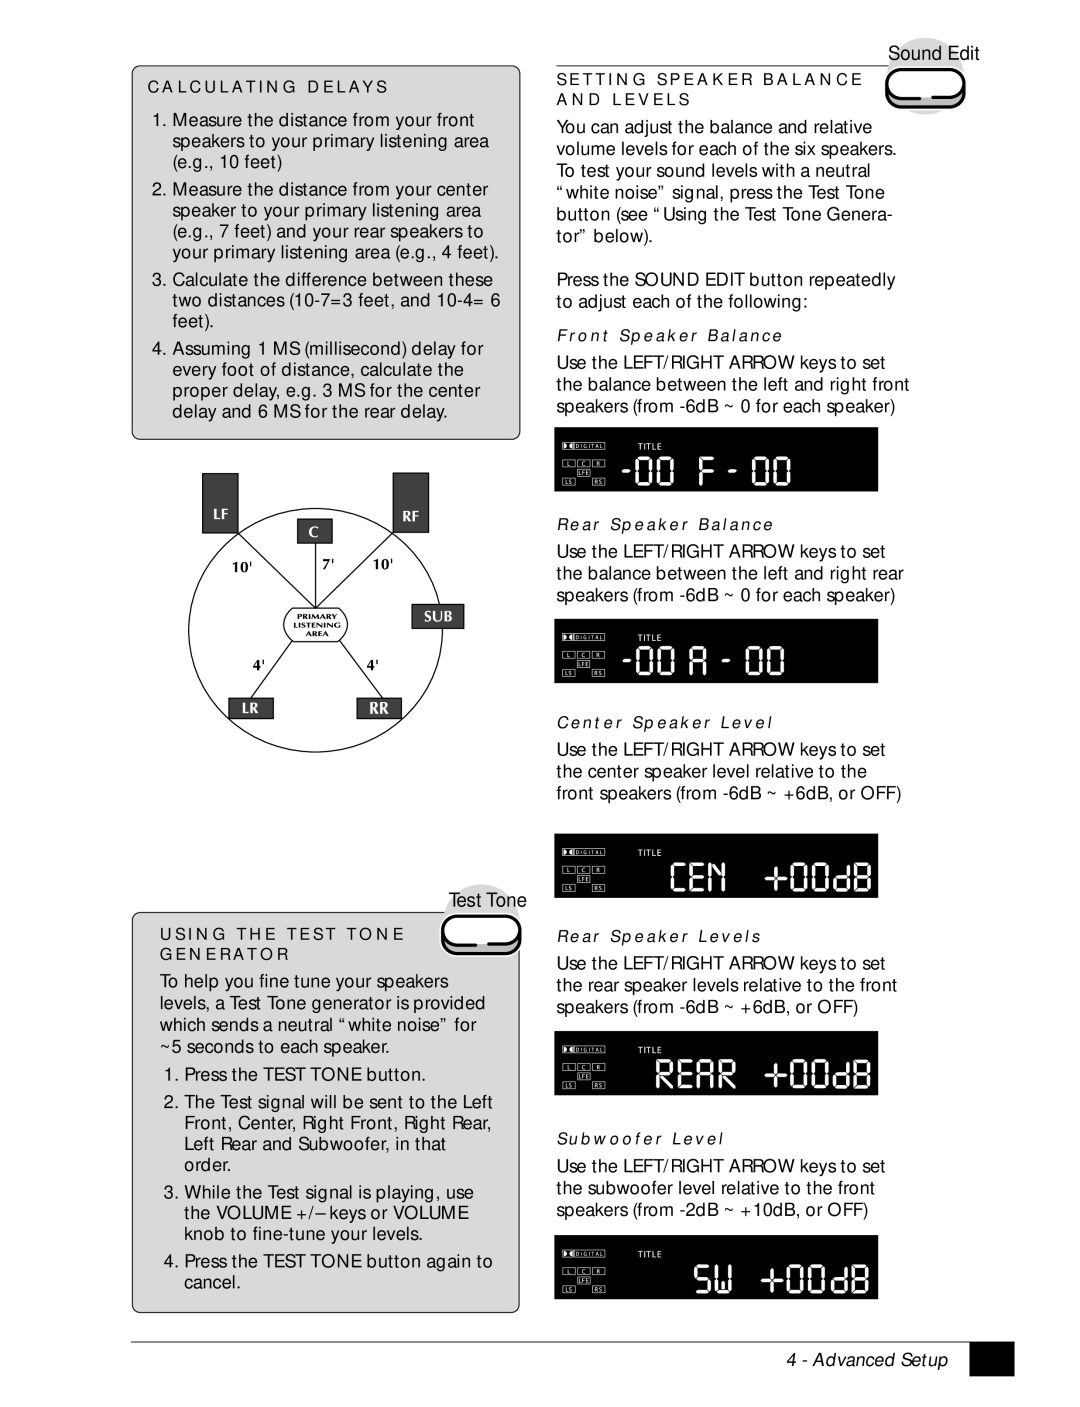
C A L C U L AT I N G D E L AY S
1.Measure the distance from your front speakers to your primary listening area (e.g., 10 feet)
2.Measure the distance from your center speaker to your primary listening area (e.g., 7 feet) and your rear speakers to your primary listening area (e.g., 4 feet).
3.Calculate the difference between these two distances
4.Assuming 1 MS (millisecond) delay for every foot of distance, calculate the proper delay, e.g. 3 MS for the center delay and 6 MS for the rear delay.
Sound Edit
S E T T I N G S P E A K E R B A L A N C E
A N D L E V E L S
You can adjust the balance and relative volume levels for each of the six speakers. To test your sound levels with a neutral “white noise” signal, press the Test Tone button (see “Using the Test Tone Genera- tor” below).
Press the SOUND EDIT button repeatedly to adjust each of the following:
F ro n t S p e a k e r B a l a n c e
Use the LEFT/RIGHT ARROW keys to set the balance between the left and right front speakers (from
R e a r S p e a k e r B a l a n c e
Use the LEFT/RIGHT ARROW keys to set the balance between the left and right rear speakers (from
C e n t e r S p e a k e r L e v e l
Use the LEFT/RIGHT ARROW keys to set the center speaker level relative to the front speakers (from
Test Tone
U S I N G T H E T E S T T O N E
G E N E R AT O R
To help you fine tune your speakers levels, a Test Tone generator is provided which sends a neutral “white noise” for ~5 seconds to each speaker.
1.Press the TEST TONE button.
2.The Test signal will be sent to the Left Front, Center, Right Front, Right Rear, Left Rear and Subwoofer, in that order.
3.While the Test signal is playing, use the VOLUME +/– keys or VOLUME knob to
4.Press the TEST TONE button again to cancel.
R e a r S p e a k e r L e v e l s
Use the LEFT/RIGHT ARROW keys to set the rear speaker levels relative to the front speakers (from
S u b w o o f e r L e v e l
Use the LEFT/RIGHT ARROW keys to set the subwoofer level relative to the front speakers (from
4 - Advanced Setup
21 |
